Installing BI Publisher into Weblogic Server 11g
I was on-site yesterday helping an ISV integrate BI Publisher into their product, and hit a few issues getting the product installed and running on the Weblogic application server. BI Publisher comes integrated out-of-the-box with OC4J and Oracle Application Server, but you'll need to install and configure it manually to work with other application servers such as WebLogic, Websphere and Tomcat. The issues we hit were a bit tricky to work around and I couldn't see much information on the 'net about them, so I thought I'd write them down here in case anyone else hits similar issues.
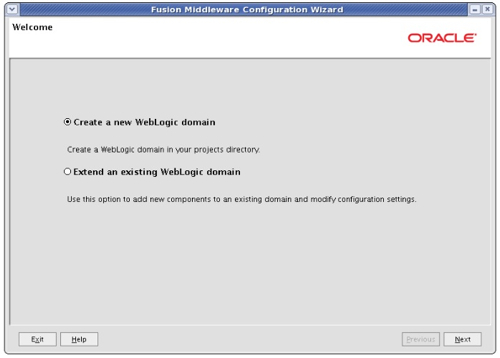
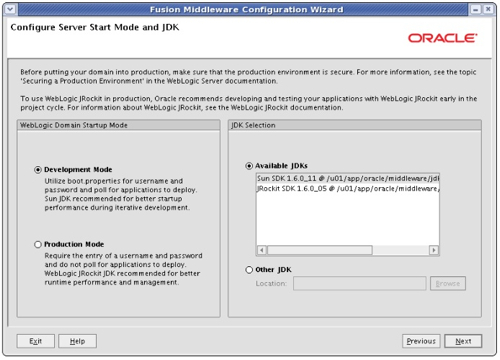
To start off, after installing WebLogic 11g downloaded from OTN, I used the configuration utility to create a new Weblogic domain to hold the BI Publisher application.
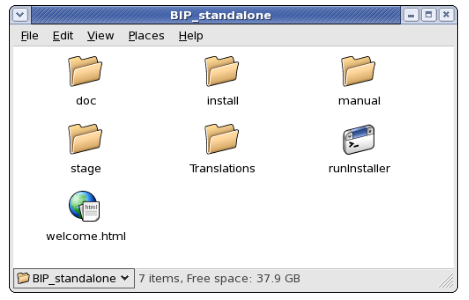
BI Publisher installs automatically, using the Universal Installer, when you are deploying it to OC4J or Oracle Application Server. If you're deploying to WebLogic though you're on your own, and you need to do the install manually. Unzipping the download file shows you the following folder structure, and it's the manual one that we are interested in.
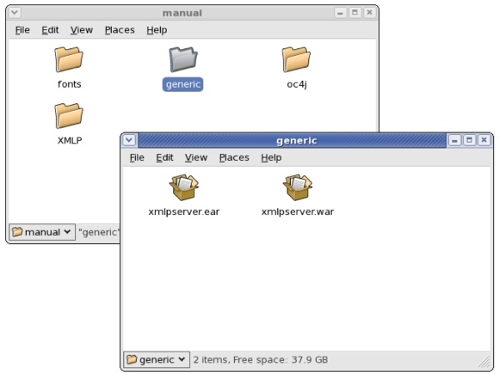
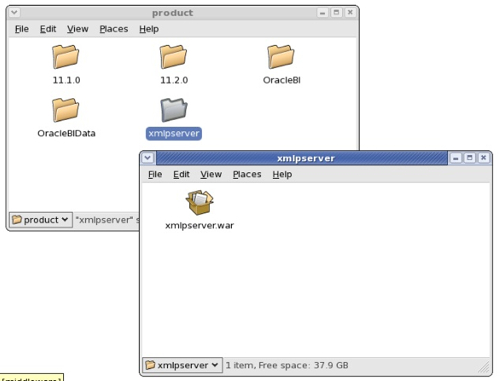
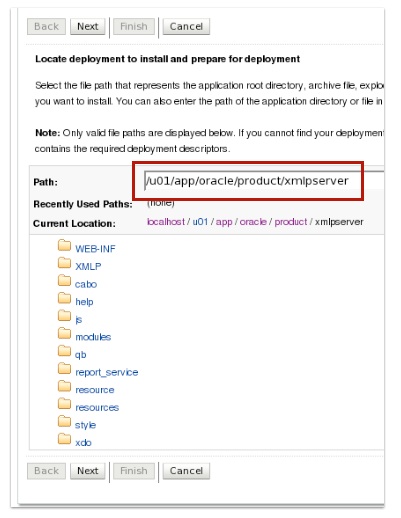
To do this unpacking, I need to create a folder within the server filevstructure that will hold the deployed application. I create this as /u01/app/oracle/product/xmlpserver, and copy the xmlpserver.war file from the manual/generic folder to this new folder, like this:
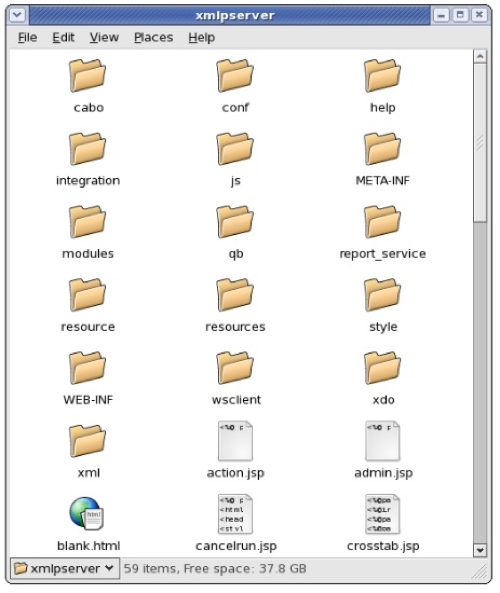
cd /u01/app/oracle/product/xmlpserver
jar xvf xmlpserver.war
rm xmlpserver.war
This then leaves me with an installation directory where the contents of the .war file have been exploded to give me the full application structure, like this:
<?xml version="1.0" encoding="UTF-8"?>
<xmlpConfig xmlns="http://xmlns.oracle.com/oxp/xmlp">
  <resource>
     <file path="${oracle.home}/xdo/repository"/>
   </resource>
</xmlpConfig>
I then edit it so that it reads:
<?xml version="1.0" encoding="UTF-8"?>
<xmlpConfig xmlns="http://xmlns.oracle.com/oxp/xmlp">
  <resource>
     <file path="/u01/app/oracle/product/xmlpserver/XMLP"/>
   </resource>
</xmlpConfig>
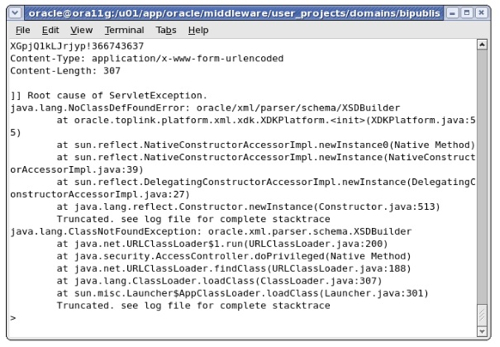
It's vitally important that you get this file path correct, as if you don't the application will still deploy to WebLogic but it won't start, and the error message that you'll get is that it can't find the ${oracle.home}/xdo/repository path which makes you think that the configuration file isn't being read, or hasn't updated, whereas this is a default and the file's value is being ignored because it's invalid.
Once you've made the configuration file change, it's then time to register the application in WebLogic. To do this, first of all start the Admin Server from the unix command line, like this:
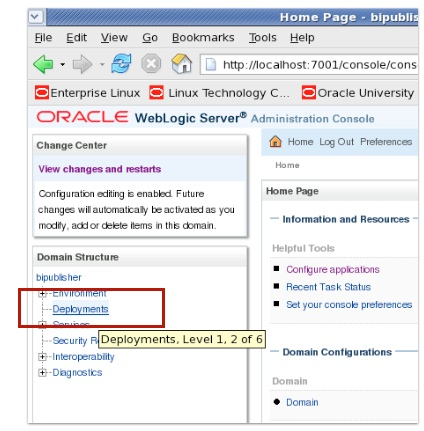
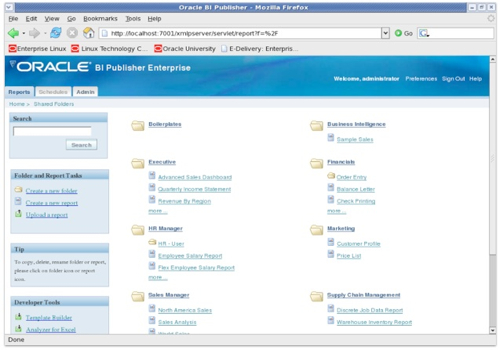
cd /u01/app/oracle/middleware/user_projects/domains/bipublisher
./startWebLogic.sh
Once WebLogic starts up, using your Web browser start the Admin Console, and log in using the username and password you defined when setting up the new domain.When the Administration Console screen comes up, look for the Deployments link on the left-hand side of the screen and click on it (this assumes you are running the console in Development mode, otherwise you'll need to Lock and Edit beforehand.
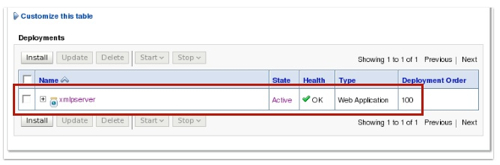
If you click back on the Deployments link on the left-hand side, the xmlpserver application should show a Health of OK. If it doesn't, click on the link to find out what the problem is - for me, it was usually due to the wrong path being put in the xmlp-server-config.xml file.
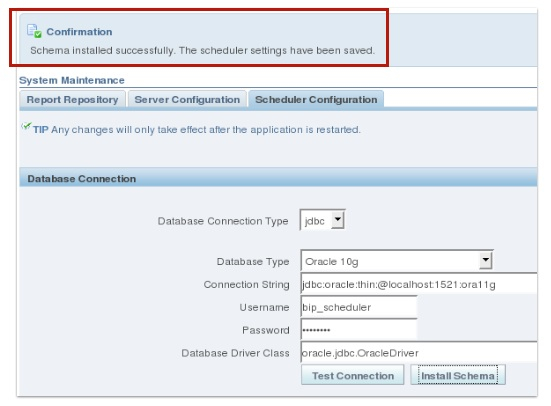
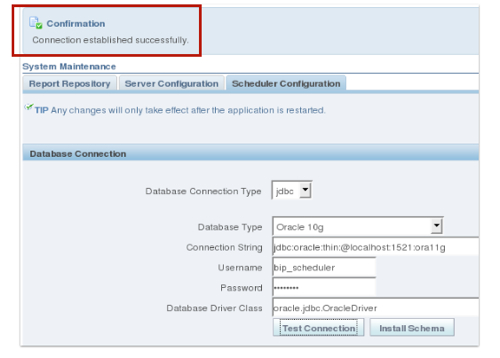
When you press the Test Connection button, if you've entered the credentials properly you should get a Connection Established Successfully message, like this:
if [ "${WLS_REDIRECT_LOG}" = "" ] ; then
	echo "Starting WLS with line:"
	echo "${JAVA_HOME}/bin/java ${JAVA_VM} ${MEM_ARGS} -Dweblogic.Name=${SERVER_NAME} -Djava.security.policy=${WL_HOME}/server/lib/weblogic.policy ${JAVA_OPTIONS}  ${PROXY_SETTINGS} ${SERVER_CLASS}"
	${JAVA_HOME}/bin/java ${JAVA_VM} ${MEM_ARGS} -Dweblogic.Name=${SERVER_NAME} -Djava.security.policy=${WL_HOME}/server/lib/weblogic.policy ${JAVA_OPTIONS}  ${PROXY_SETTINGS} ${SERVER_CLASS}
else
	echo "Redirecting output from WLS window to ${WLS_REDIRECT_LOG}"
	${JAVA_HOME}/bin/java ${JAVA_VM} ${MEM_ARGS} -Dweblogic.Name=${SERVER_NAME} -Djava.security.policy=${WL_HOME}/server/lib/weblogic.policy ${JAVA_OPTIONS}  ${PROXY_SETTINGS} ${SERVER_CLASS}  >"${WLS_REDIRECT_LOG}" 2>&1
fi
to this
if [ "${WLS_REDIRECT_LOG}" = "" ] ; then
	echo "Starting WLS with line:"
	echo "${JAVA_HOME}/bin/java ${JAVA_VM} ${MEM_ARGS} -Dweblogic.Name=${SERVER_NAME} -Djava.security.policy=${WL_HOME}/server/lib/weblogic.policy ${JAVA_OPTIONS} -Dtoplink.xml.platform=oracle.toplink.platform.xml.jaxp.JAXPPlatform ${PROXY_SETTINGS} ${SERVER_CLASS}"
	${JAVA_HOME}/bin/java ${JAVA_VM} ${MEM_ARGS} -Dweblogic.Name=${SERVER_NAME} -Djava.security.policy=${WL_HOME}/server/lib/weblogic.policy ${JAVA_OPTIONS} -Dtoplink.xml.platform=oracle.toplink.platform.xml.jaxp.JAXPPlatform ${PROXY_SETTINGS} ${SERVER_CLASS}
else
	echo "Redirecting output from WLS window to ${WLS_REDIRECT_LOG}"
	${JAVA_HOME}/bin/java ${JAVA_VM} ${MEM_ARGS} -Dweblogic.Name=${SERVER_NAME} -Djava.security.policy=${WL_HOME}/server/lib/weblogic.policy ${JAVA_OPTIONS} -Dtoplink.xml.platform=oracle.toplink.platform.xml.jaxp.JAXPPlatform ${PROXY_SETTINGS} ${SERVER_CLASS}  >"${WLS_REDIRECT_LOG}" 2>&1
fi
Now stop the Weblogic Admin Server and then restart it, using the above script, make sure it's started OK (it's very easy to make typing errors when adding this command), and then go back into the BI Publisher Web interface. If you now try to create the scheduler tables, it should now work correctly.