Oracle Endeca (2.3) Record Level Security
A common task with any BI solution is to implement some type of security whether it be content, or data based. Tools for managing content security in Oracle Endeca Information Discovery are fairly prominent in the Admin pages within Studio, managed through a set of security objects: User Groups, Roles and Communities. Data security, on the other hand, is less obvious and although it is covered it the documentation, a lot of components need to be brought together to proved the complete solution. This blog post therefore will cover the basics of security within Endeca Information Discovery, as these basic security objects are required in order to explain the implementation of record level security.
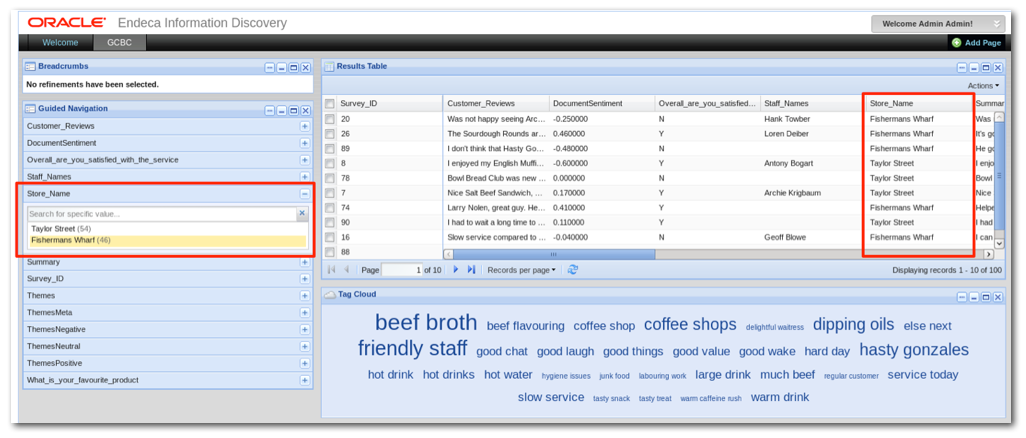
If you are familiar with Oracle EID basic security please skip down to Assigning Record Security. Otherwise, the following scenario uses a simple ‘survey’ data set where one hundred survey have been carried out across two stores; Taylor Street (54) and Fishermans Wharf (46).
There is a also a requirement that only the manager of each store can see that store's data - something we'd call in relational databases "row-level security", and in the world of Endeca, "record-level security". In this example there are two users who manage different stores; "Angela Salesmanager" who manages Fishermans Wharf and "Paul Salesperson" who managers Taylor Street
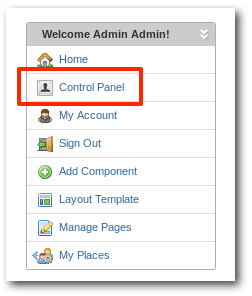
To implement this example of record-level security, firstl start by creating two users within Studio, by clicking on the Welcome menu on the top left of the screen and then selecting Control Panel, like this:
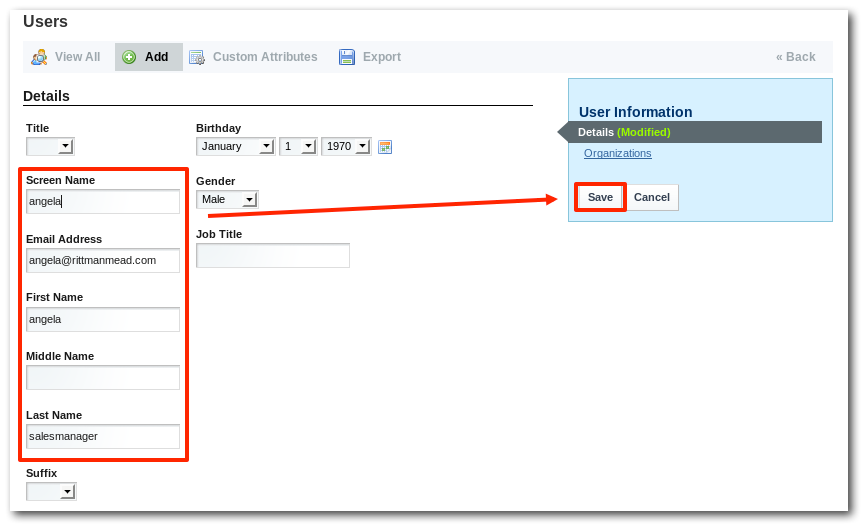
Creating Users
On the left menu pane under the Portal section select Users and click on Add button.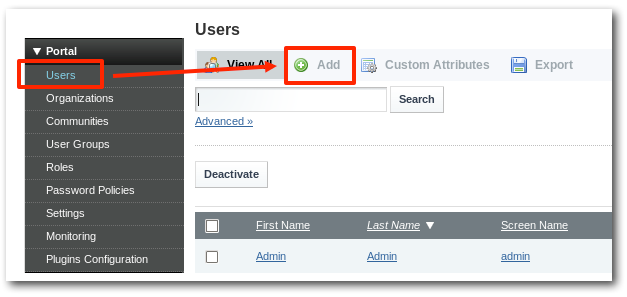
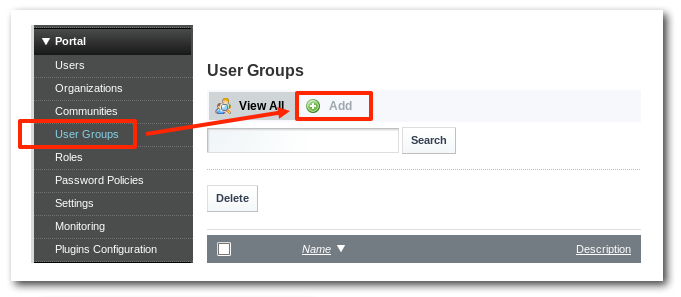
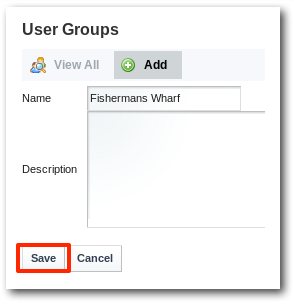
Creating User Groups
The next step is to create two user groups to which we will add these users; this step isn't mandatory, but it's good practice to assign permissions to groups rather than individual users, for the sake of manageability. Click on the User Groups menu item then on the Add button.
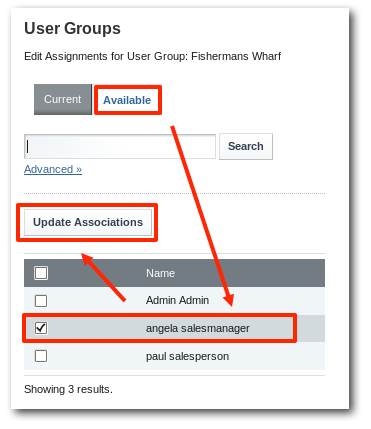
Assigning users into groups
Once the groups are created within Studio, click on the Action menu and select Assign Members.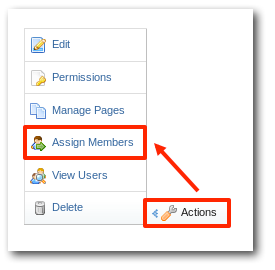
Creating Roles and mapping to User Groups
Next create two roles in the same way as User Groups, prefix them with DF to make them stand out as roles, which will be used for data filters.
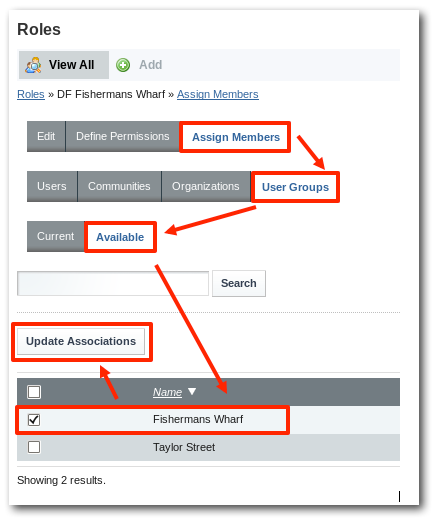
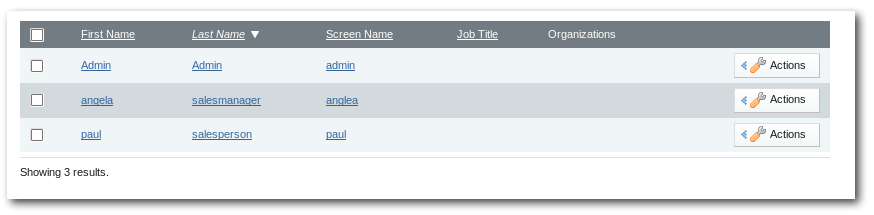
By this stage, there should be two users assigned to two different user groups and those groups assigned to two user roles.
User | User Group | Role
Anglea Salesmanager = Fishermans Wharf = DF Fishermans Wharf
Paul Salesperson = Taylor Street = DF Taylor Street
Assigning Record Security
The basic security is now set up, next the record security needs to be defined.This is done by modifying the Data Source to effectively map a filter to a role, lets breakdown the configuration:The default configuration is still required:
"datastoreName": "GCBC",

"description": "Rittman Mead Training Data",

"name": "GCBC",

"port": "7770",

"server": "localhost"
The property various security properties need to be set to true, the rolePermissionsMultiOr allows multiple values to be assigned to a filter.
"inheritSecurity": "true",

"rolePermissionsMultiOr": "true",

"securityEnabled": "true",
The next section is where the actual filters are defined and assigned. The filder can be give any name and the column that needs to be filter and its value are defined under the recordFilter.
"securityFilters": {

"FISHERMANS_WHARF": {

"class": "com.endeca.portal.data.functions.RecordFilter",

"recordFilter": "OR(Store_Name:Fishermans Wharf)"

},

"TAYLOR_STREET": {

"class": "com.endeca.portal.data.functions.RecordFilter",

"recordFilter": "OR(Store_Name:Taylor Street)"

}

}
Its also worth noting that multipal values can be assigned in record filters and even on different columns. For example:
 OR(COLUMN1:VALUE_A,COLUMN1:VALUE_B,COLUMN2:VALUE_C)

OR(Store_Name:Taylor Street,Month:01-2012)
Finally the securityFilters are assigned to an existing role.
 "rolePermissions": {

"DF Fishermans Wharf": ["FISHERMANS_WHARF"],

"DF Taylor Street": ["TAYLOR_STREET"]

},
Here is the full configuration:
{

"datastoreName": "GCBC",

"description": "Rittman Mead Training Data",

"name": "GCBC",

"port": "7770",

"server": "localhost"

"inheritSecurity": "true",

"rolePermissions": {

"DF Fishermans Wharf": ["FISHERMANS_WHARF"],

"DF Taylor Street": ["TAYLOR_STREET"]

},

"rolePermissionsMultiOr": "true",

"securityEnabled": "true",

"securityFilters": {

"FISHERMANS_WHARF": {

"class": "com.endeca.portal.data.functions.RecordFilter",

"recordFilter": "OR(Store_Name:Fishermans Wharf)"

},

"TAYLOR_STREET": {

"class": "com.endeca.portal.data.functions.RecordFilter",

"recordFilter": "OR(Store_Name:Taylor Street)"

}

},

}
Its really important to note that everything here is case sensitive and will probably be the cause of errors implementing this solution
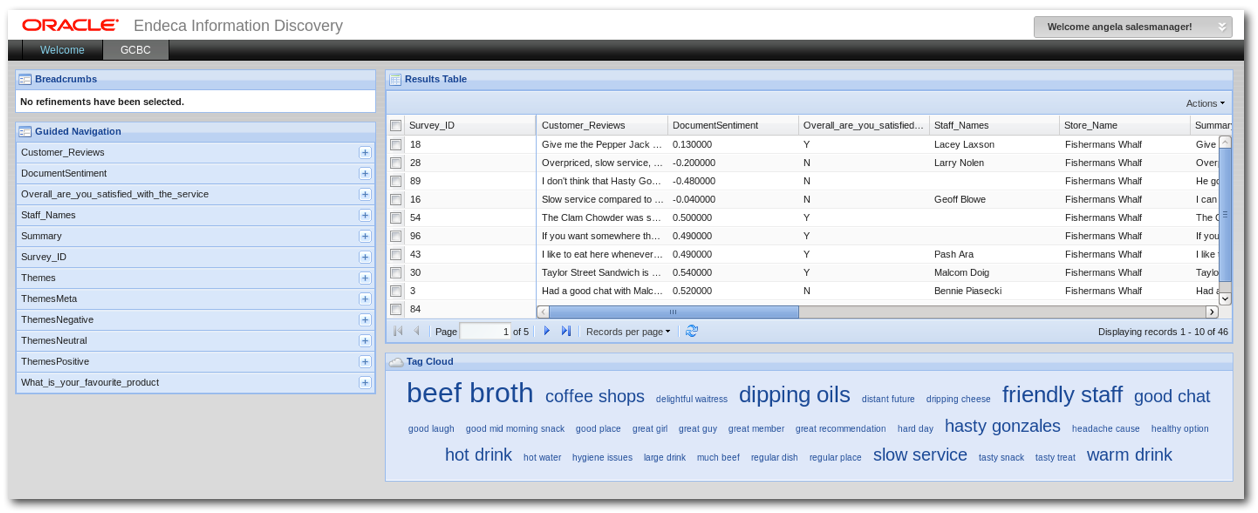
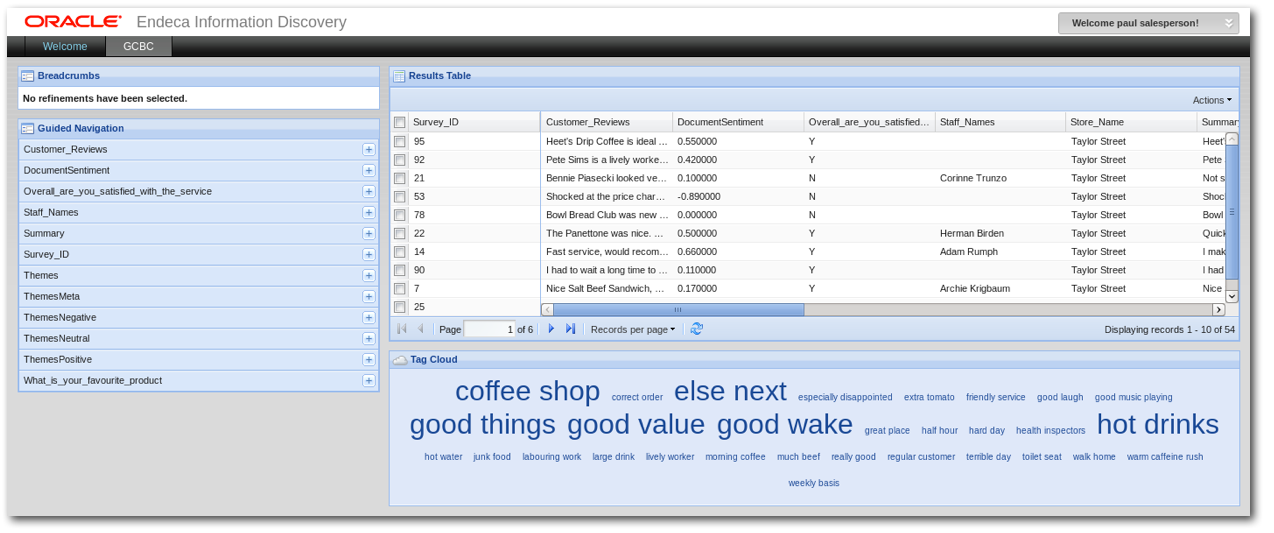
Now we can log into the system using the uses we created earlier, and as you can see Angela can only see Fishermans Wharf and Paul can only see Taylor Street.
Angela: