Running R on Hadoop using Oracle R Advanced Analytics for Hadoop
When most people think about analytics and Hadoop, they tend to think of technologies such as Hive, Pig and Impala as the main tools a data analyst uses. When you talk to data analysts and data scientists though, they’ll usually tell you that their primary tool when working on Hadoop and big data sources is in fact “R”, the open-source statistical and modelling language “inspired” by SAS but now with its own rich ecosystem, and particularly suited to the data preparation, data analysis and data correlation tasks you’ll often do on a big data project.
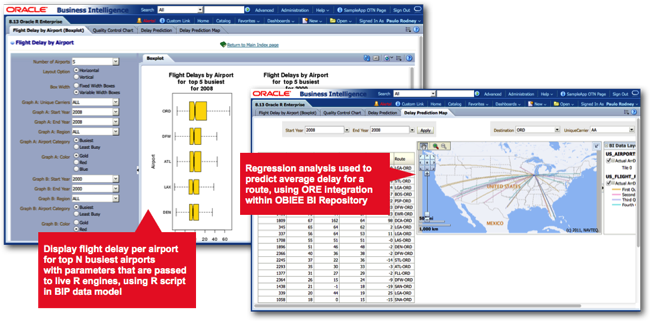
You can see examples where R has been used in recent copies of Oracle’s OBIEE SampleApp, where R is used to predict flight delays, with the results then rendered through Oracle R Enterprise, part of the Oracle Database Enterprise Edition Advanced Analytics Option and which allows you to run R scripts in the database and output the results in the form of database functions.
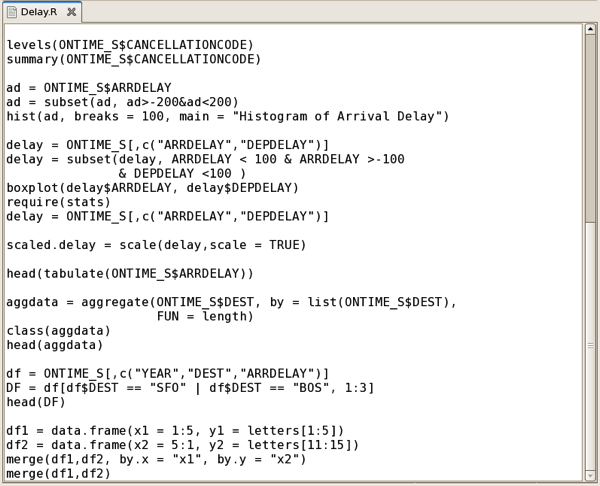
Oracle actually distribute two R packages as part of a wider set of Oracle R technology products - Oracle R, their own distribution of open-source R that you can download via the Oracle Public Yum repository, and Oracle R Enterprise (ORE), an add-in to the database that provides efficient connectivity between R and Oracle and also allows you to run R scripts directly within the database’s JVM. ORE is actually surprisingly pretty good, with its main benefit being that you can perform R analysis directly against data in the database, avoiding the need to dump data to a file and giving you the scalability of the Oracle Database to run your R models, rather than begin constrained by the amount of RAM in your laptop. In the screenshot below, you can see part of an Oracle R Enterprise script we’ve written that analyses data from the flight delays dataset:
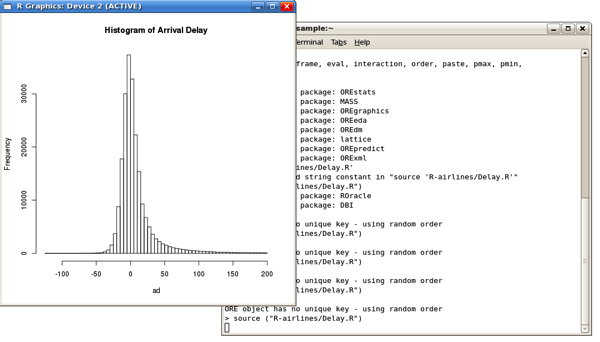
with the results then output in the R console:
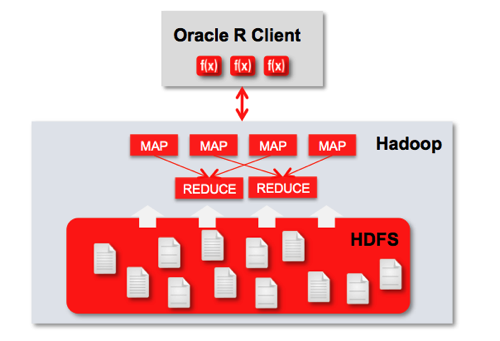
But in many cases though, clients won’t want you to run R analysis on their main databases due to the load it’ll put on them, so what do you do when you need to analyse large datasets? A common option is to run your R queries on Hadoop, giving you the flexibility and power of the R language whilst taking advantage of the horizontal scalability of Hadoop, HDFS and MapReduce. There’s quite a few options for doing this - the open-source RHIPE and the R package “parallel” both provide R-on-Hadoop capabilities - but Oracle also have a product in this area, “Oracle R Advanced Analytics for Hadoop” (ORAAH) previously known as “Oracle R Connector for Hadoop” that according to the docs is particularly well-designed for parallel reads and writes, has resource management and database connectivity features, and comes as part of Oracle Big Data Appliance, Oracle Big Data Connectors and the recently released BigDataLite VM. The payoff here then is that by using ORAAH you can scale-up R to work at Hadoop-scale, giving you an alternative to the more set-based Hive and Pig languages when working with super-large datasets.
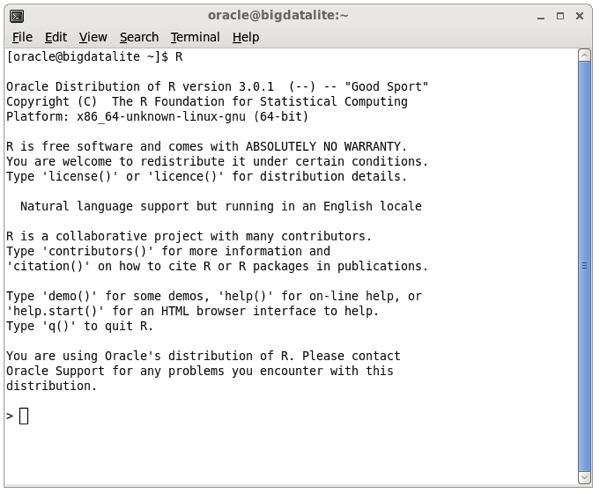
Oracle R Advanced Analytics for Hadoop is already set-up and configured on the BigDataLite VM, and you can try it out by opening a command-line session and running the “R” executable:
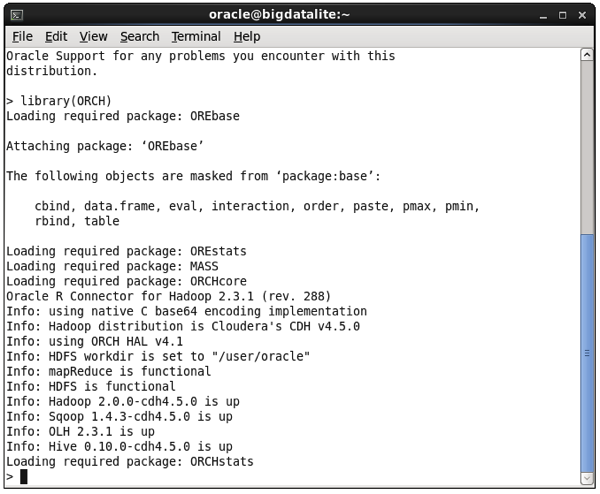
Type in library(ORCH) to load the ORAAH R libraries (ORCH being the old name of the product), and you should see something like this:
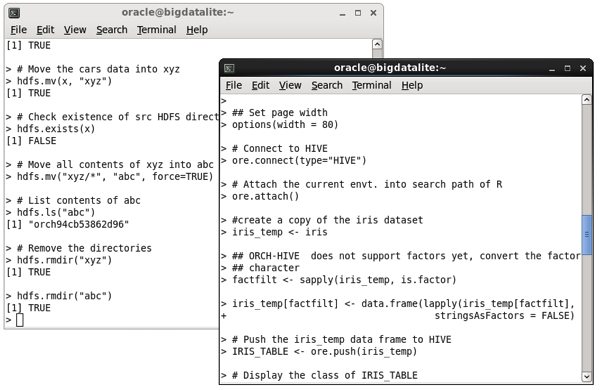
At that point you can now run some demo programs to see examples of what ORAAH can do; for example read and write data to HDFS using the demo(“hdfs_cpmv.basic”), or use Hive as a source for R data frames (“hive_analysis”,”ORCH”), like this:
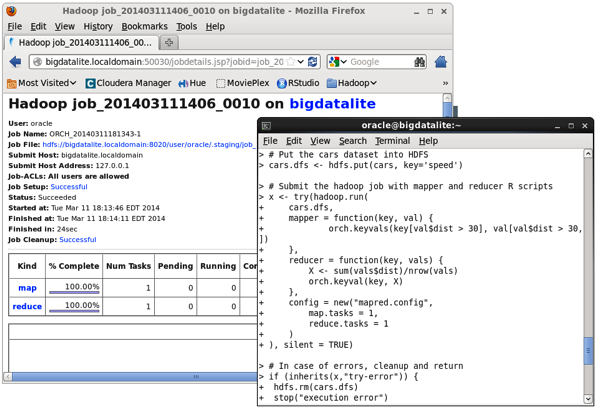
The most important feature is being able to run R jobs on Hadoop though, with ORAAH converting the R scripts you write into Hadoop jobs via the Hadoop Streaming utility, that gives MapReduce the ability to use any executable or script as the mapper or reducer. The “mapred_basic” R demo that ships with ORAAH shows a basic example of this working, and you can see the MapReduce jobs being kicked-off in the R console, and in the Hadoop Jobtracker web UI:
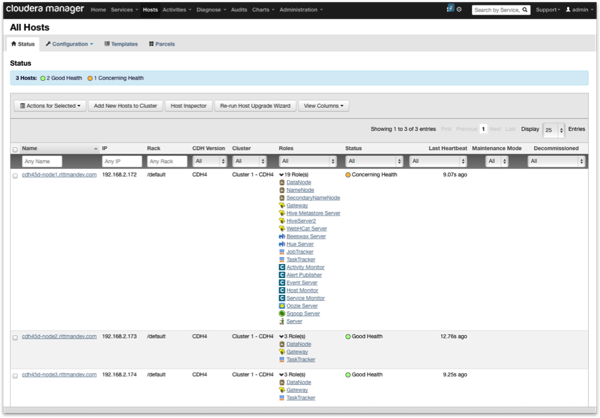
But what if you want to use ORAAH on your own Hadoop cluster? Let’s walk through a typical setup process using a three-node Cloudera CDH 4.5 cluster running on a VMWare ESXi server I’ve got at home, where the three nodes are configured like this:
- cdh45d-node1.rittmandev.com : 8GB RAM VM running OEL6.4 64-bit and with a full desktop available
- cdh45d-node2.rittmandev.com : 2GB RAM VM running Centos 6.2 64-bit, and with a minimal Linux install with no desktop etc.
- cdh45d-node3.rittmandev.com, as per cdh45d-node2
The idea here is that “cdh45d-node1” is where the data analyst can run their R session, or of course they can just SSH into it. I’ve also got Cloudera Manager installed on there using the free “standard” edition of CDH4.5, and with the cluster spanning the other two nodes like this:
If you’re going to use R as a regular OS user (for example, “oracle”) then you’ll also need to use Hue to create a home directory for that user in HDFS, as ORAAH will automatically set that directory as the users’ working directory when they load up the ORAAH libraries.
Step 1: Configuring the Hadoop Node running R Client Software
On the first node where I’m using OEL6.4, Oracle R 2.15.3 is already installed by Oracle, but we want R 3.0.1 for ORAAH 2.3.1, so you can install it using Oracle’s Public Yum repository like this:
sudo yum install R-3.0.1
Once you’ve done that, you need to download and install the R packages in the ORAAH 2.3.1 zip file that you can get hold of from the Big Data Connectors download page on OTN. Assuming you’ve downloaded and unzipped them to /root/ORCH2.3.1, running as root install the R packages within the zip file in the correct order, like this:
cd /root/ORCH2.3.1/
R --vanilla CMD INSTALL OREbase_1.4_R_x86_64-unknown-linux-gnu.tar.gz
R --vanilla CMD INSTALL OREstats_1.4_R_x86_64-unknown-linux-gnu.tar.gz
R --vanilla CMD INSTALL OREmodels_1.4_R_x86_64-unknown-linux-gnu.tar.gz
R --vanilla CMD INSTALL OREserver_1.4_R_x86_64-unknown-linux-gnu.tar.gz
R --vanilla CMD INSTALL ORCHcore_2.3.1_R_x86_64-unknown-linux-gnu.tar.gz
R --vanilla CMD INSTALL ORCHstats_2.3.1_R_x86_64-unknown-linux-gnu.tar.gz
R --vanilla CMD INSTALL ORCH_2.3.1_R_x86_64-unknown-linux-gnu.tar.gz
You’ll also need to download and install the “png” source package from the R CRAN website (http://cran.r-project.org/web/packages/png/index.html), and possibly download and install the libpng-devel libraries from the Oracle Public Yum site before it’ll compile.
sudo yum install libpng-devel
R --vanilla CMD INSTALL png_0.1-7.tar.gz
At that point, you should be good to go. If you’ve installed CDH4.5 using parcels rather than packages though, you’ll need to set a couple of environment variables in your .bash_profile script to tell ORAAH where to find the Hadoop scripts (parcels install Hadoop to /opt/cloudera, whereas packages install to /usr/lib, which is where ORAAH looks for them normally):
# .bash_profile
Get the aliases and functions
if [ -f ~/.bashrc ]; then

. ~/.bashrc

fi
User specific environment and startup programs
PATH=$PATH:$HOME/bin
export PATH

export ORCH_HADOOP_HOME=/opt/cloudera/parcels/CDH-4.5.0-1.cdh4.5.0.p0.30

export HADOOP_STREAMING_JAR=/opt/cloudera/parcels/CDH-4.5.0-1.cdh4.5.0.p0.30/lib/hadoop-0.20-mapreduce/contrib/streaming
You should then be able to log into the R console from this particular machine and load up the ORCH libraries:
[oracle@cdh45d-node1 ~]$ . ./.bash_profile
[oracle@cdh45d-node1 ~]$ R
Oracle Distribution of R version 3.0.1  (--) -- "Good Sport"

Copyright (C)  The R Foundation for Statistical Computing

Platform: x86_64-unknown-linux-gnu (64-bit)
R is free software and comes with ABSOLUTELY NO WARRANTY.

You are welcome to redistribute it under certain conditions.

Type 'license()' or 'licence()' for distribution details.
Natural language support but running in an English locale
R is a collaborative project with many contributors.

Type 'contributors()' for more information and

'citation()' on how to cite R or R packages in publications.
Type 'demo()' for some demos, 'help()' for on-line help, or

'help.start()' for an HTML browser interface to help.

Type 'q()' to quit R.
You are using Oracle's distribution of R. Please contact

Oracle Support for any problems you encounter with this

distribution.
> library(ORCH)

Loading required package: OREbase
Attaching package: ‘OREbase’
The following objects are masked from ‘package:base’:
cbind, data.frame, eval, interaction, order, paste, pmax, pmin,
rbind, table

Loading required package: OREstats

Loading required package: MASS

Loading required package: ORCHcore

Oracle R Connector for Hadoop 2.3.1 (rev. 288)

Info: using native C base64 encoding implementation

Info: Hadoop distribution is Cloudera's CDH v4.5.0

Info: using ORCH HAL v4.1

Info: HDFS workdir is set to "/user/oracle"

Info: mapReduce is functional

Info: HDFS is functional

Info: Hadoop 2.0.0-cdh4.5.0 is up

Info: Sqoop 1.4.3-cdh4.5.0 is up

Warning: OLH is not found

Loading required package: ORCHstats

>
Step 2: Configuring the other Nodes in the Hadoop Cluster
Once you’ve set up your main Hadoop node with the R Client software, you’ll also need to install R 3.0.1 onto all of the other nodes in your Hadoop cluster, along with a subset of the ORCH library files. If your other nodes are also running OEL you can just repeat the “yum install R-3.0.1” step from before, but in my case I’m running a very stripped-down Centos 6.2 install on my other nodes so I need to install wget first, then grab the Oracle Public Yum repo file along with a GPG key file that it’ll require before allowing you download from that server:
[root@cdh45d-node2 yum.repos.d]# wget http://public-yum.oracle.com/public-yum-ol6.repo
--2014-03-10 07:50:25--  http://public-yum.oracle.com/public-yum-ol6.repo

Resolving public-yum.oracle.com... 109.144.113.166, 109.144.113.190

Connecting to public-yum.oracle.com|109.144.113.166|:80... connected.

HTTP request sent, awaiting response... 200 OK

Length: 4233 (4.1K) [text/plain]

Saving to: `public-yum-ol6.repo'
100%[=============================================>] 4,233       --.-K/s   in 0s
2014-03-10 07:50:26 (173 MB/s) - `public-yum-ol6.repo' saved [4233/4233]
[root@cdh45d-node2 yum.repos.d]# wget http://public-yum.oracle.com/RPM-GPG-KEY-oracle-ol6 -O /etc/pki/rpm-gpg/RPM-GPG-KEY-oracle
--2014-03-10 07:50:26--  http://public-yum.oracle.com/RPM-GPG-KEY-oracle-ol6

Resolving public-yum.oracle.com... 109.144.113.190, 109.144.113.166

Connecting to public-yum.oracle.com|109.144.113.190|:80... connected.

HTTP request sent, awaiting response... 200 OK

Length: 1011 [text/plain]

Saving to: `/etc/pki/rpm-gpg/RPM-GPG-KEY-oracle'
100%[=============================================>] 1,011       --.-K/s   in 0s
2014-03-10 07:50:26 (2.15 MB/s) - `/etc/pki/rpm-gpg/RPM-GPG-KEY-oracle' saved [1011/1011]
You’ll then need to edit the public-yum-ol6.repo file to enable the correct repository (RHEL/Centos/OEL 6.4 in my case) for your VMs, and also enable the add-ons repository, with the file contents below being the repo file after I made the required changes.
[ol6_latest]
name=Oracle Linux $releasever Latest ($basearch)
baseurl=http://public-yum.oracle.com/repo/OracleLinux/OL6/latest/$basearch/
gpgkey=file:///etc/pki/rpm-gpg/RPM-GPG-KEY-oracle
gpgcheck=1
enableid=0
[ol6_addons]

name=Oracle Linux $releasever Add ons ($basearch)

baseurl=http://public-yum.oracle.com/repo/OracleLinux/OL6/addons/$basearch/

gpgkey=file:///etc/pki/rpm-gpg/RPM-GPG-KEY-oracle

gpgcheck=1

enabled=1
[ol6_ga_base]

name=Oracle Linux $releasever GA installation media copy ($basearch)

baseurl=http://public-yum.oracle.com/repo/OracleLinux/OL6/0/base/$basearch/

gpgkey=file:///etc/pki/rpm-gpg/RPM-GPG-KEY-oracle

gpgcheck=1

enabled=0
[ol6_u1_base]

name=Oracle Linux $releasever Update 1 installation media copy ($basearch)

baseurl=http://public-yum.oracle.com/repo/OracleLinux/OL6/1/base/$basearch/

gpgkey=file:///etc/pki/rpm-gpg/RPM-GPG-KEY-oracle

gpgcheck=1

enabled=0
[ol6_u2_base]

name=Oracle Linux $releasever Update 2 installation media copy ($basearch)

baseurl=http://public-yum.oracle.com/repo/OracleLinux/OL6/2/base/$basearch/

gpgkey=file:///etc/pki/rpm-gpg/RPM-GPG-KEY-oracle

gpgcheck=1

enabled=0
[ol6_u3_base]

name=Oracle Linux $releasever Update 3 installation media copy ($basearch)

baseurl=http://public-yum.oracle.com/repo/OracleLinux/OL6/3/base/$basearch/

gpgkey=file:///etc/pki/rpm-gpg/RPM-GPG-KEY-oracle

gpgcheck=1

enabled=0
[ol6_u4_base]

name=Oracle Linux $releasever Update 4 installation media copy ($basearch)

baseurl=http://public-yum.oracle.com/repo/OracleLinux/OL6/4/base/$basearch/

gpgkey=file:///etc/pki/rpm-gpg/RPM-GPG-KEY-oracle

gpgcheck=1

enabled=1
Once you’ve saved the file, you can the run the install of R-3.0.1 as before, copy the ORCH files across to the server and then install just the OREbase, OREstats, OREmodels and OREserver packages, like this:
[root@cdh45d-node2 yum.repos.d]# yum install R-3.0.1
ol6_UEK_latest | 1.2 kB 00:00
ol6_UEK_latest/primary | 13 MB 00:03
ol6_UEK_latest 281/281
ol6_addons | 1.2 kB 00:00
ol6_addons/primary | 42 kB 00:00
ol6_addons 169/169
ol6_latest | 1.4 kB 00:00
ol6_latest/primary | 36 MB 00:10
ol6_latest 24906/24906
ol6_u4_base | 1.4 kB 00:00
ol6_u4_base/primary | 2.7 MB 00:00
ol6_u4_base 8396/8396
Setting up Install Process
Resolving Dependencies
--> Running transaction check
---> Package R.x86_64 0:3.0.1-2.el6 will be installed
[root@cdh45d-node2 ~]# cd ORCH2.3.1\ 2/
[root@cdh45d-node2 ORCH2.3.1 2]# ls
ORCH_2.3.1_R_x86_64-unknown-linux-gnu.tar.gz
ORCHcore_2.3.1_R_x86_64-unknown-linux-gnu.tar.gz
ORCHstats_2.3.1_R_x86_64-unknown-linux-gnu.tar.gz
OREbase_1.4_R_x86_64-unknown-linux-gnu.tar.gz
OREmodels_1.4_R_x86_64-unknown-linux-gnu.tar.gz
OREserver_1.4_R_x86_64-unknown-linux-gnu.tar.gz
OREstats_1.4_R_x86_64-unknown-linux-gnu.tar.gz
[root@cdh45d-node2 ORCH2.3.1 2]# R --vanilla CMD INSTALL OREbase_1.4_R_x86_64-unknown-linux-gnu.tar.gz
- installing to library ‘/usr/lib64/R/library’
- installing binary package ‘OREbase’ ...
- DONE (OREbase)
Making 'packages.html' ... done
[root@cdh45d-node2 ORCH2.3.1 2]# R --vanilla CMD INSTALL OREstats_1.4_R_x86_64-unknown-linux-gnu.tar.gz
- installing to library ‘/usr/lib64/R/library’
- installing binary package ‘OREstats’ ...
- DONE (OREstats)
Making 'packages.html' ... done
[root@cdh45d-node2 ORCH2.3.1 2]# R --vanilla CMD INSTALL OREmodels_1.4_R_x86_64-unknown-linux-gnu.tar.gz
- installing to library ‘/usr/lib64/R/library’
- installing binary package ‘OREmodels’ ...
- DONE (OREmodels)
Making 'packages.html' ... done
[root@cdh45d-node2 ORCH2.3.1 2]# R --vanilla CMD INSTALL OREserver_1.4_R_x86_64-unknown-linux-gnu.tar.gz
- installing to library ‘/usr/lib64/R/library’
- installing binary package ‘OREserver’ ...
- DONE (OREserver)
Making 'packages.html' ... done
Now, you can open a terminal window on the main node with the R client software, or SSH into the server, and run one of the ORAAH demos where the R job gets run on the Hadoop cluster.
> demo("mapred_basic","ORCH")
demo(mapred_basic)
---- ~~~~~~~~~~~~
> #
> # ORACLE R CONNECTOR FOR HADOOP DEMOS
> #
> # Name: mapred_basic
> # Description: Demonstrates running a mapper and a reducer containing
> # R script in ORCH.
> #
> #
> #
>
>
> ##
> # A simple example of how to operate with key-values. Input dataset - cars.
> # Filter cars with with "dist" > 30 in mapper and get mean "dist" for each
> # "speed" in reducer.
> ##
>
> ## Set page width
> options(width = 80)
> # Put the cars dataset into HDFS
> cars.dfs <- hdfs.put(cars, key='speed')
> # Submit the hadoop job with mapper and reducer R scripts
> x <- try(hadoop.run(
-
cars.dfs,
-
mapper = function(key, val) {
-
orch.keyvals(key[val$dist > 30], val[val$dist > 30,])
-
},
-
reducer = function(key, vals) {
-
X <- sum(vals$dist)/nrow(vals)
-
orch.keyval(key, X)
-
},
-
config = new("mapred.config",
-
map.tasks = 1,
-
reduce.tasks = 1
-
)
- ), silent = TRUE)
> # In case of errors, cleanup and return
> if (inherits(x,"try-error")) {
- hdfs.rm(cars.dfs)
- stop("execution error")
- }
> # Print the results of the mapreduce job
> print(hdfs.get(x))
val1 val2
1 10 34.00000
2 13 38.00000
3 14 58.66667
4 15 54.00000
5 16 36.00000
6 17 40.66667
7 18 64.50000
8 19 50.00000
9 20 50.40000
10 22 66.00000
11 23 54.00000
12 24 93.75000
13 25 85.00000
> # Remove the HDFS files created above
> hdfs.rm(cars.dfs)
[1] TRUE
> hdfs.rm(x)
[1] TRUE
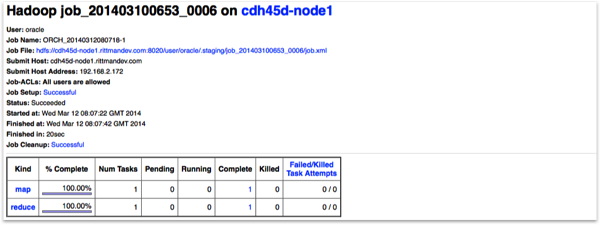
with the job tracker web UI on Hadoop confirming the R script ran on the Hadoop cluster.
So that’s a basic tech intro and tips on the install. Documentation for ORAAH and the rest of the Big Data Connectors is available for reading on OTN (including a list of all the R commands you get as part of the ORAAH/ORCH package). Keep an eye on the blog though for more on R, ORE and ORAAH as I try to share some examples from datasets we’ve worked on.