A question I've been asked fairly regularly over the past few weeks is how you can version control the metadata used by an OBIEE project. As you're probably aware, there is no real version control built in to OBIEE (you can check-in, and check-out, repository objects in the BI Server repository when it's running online, but this is more to make sure that two people don't edit the same repository object at the same time). What we really need is a way to take the various files that make up an OBIEE installation and save them into a version control system, saving copies of each revision and allowing us to access a specific version, or "release" of our OBIEE system so that we can refer back to it, or deploy it into another environment such as production.
Now you can make version control as complicated as you like, but to illustrate the principals what I thought would be useful would be to set up a simple version control system on an all-Windows environment using VisualSVN Server, a free "packaging up" of the open-source Subversion version control system, and the free TortoiseSVN Windows Explorer extension that provides Windows integration with Subversion. Once you've got them both installed (VisualSVN usually on a server, TortoiseSVN on your developer PC) you can make a start.
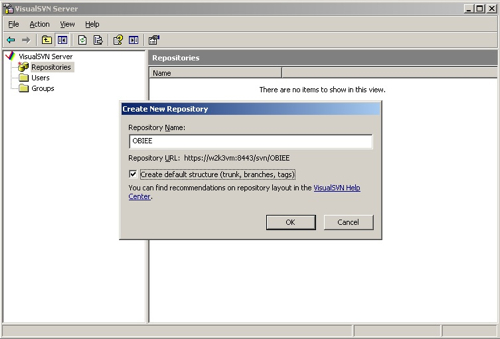
The first step is to start the VisualSVN Server management tool and create a new repository. I've called my repository "OBIEE", and I selected the option to create the default Subversion directory structure. "Trunc" is where your project files will go; "Branch" is for when you create branches of your code (independent code streams that had a common root); "Tags" is where you can copy complete copies of your "Trunc" directory when you want to specifically save a release of your code.
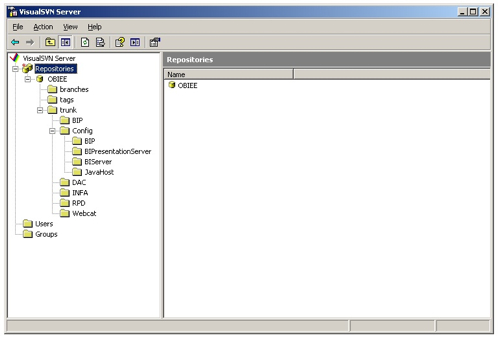
Once you've created the base repository and the top-level trunc, branches and tags directories, you can now create directories and subdirectories under the trunc directory for the project. In my case, I create directories for the main parts of an OBIEE and Oracle BI Apps project, including the reports, metadata and product configuration files.
So now that the project folders are created in Subversion, I can check these out and copy them, as my "working copy", to the filesystem. The idea then is that I use this as the gathering point for all my project files, uploading them again to Subversion when I'm ready to check in a release of the code.
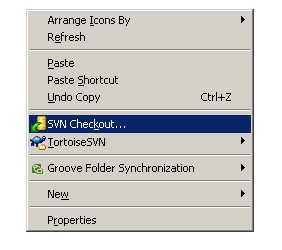
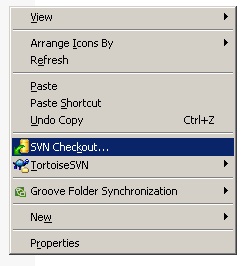
To check out a working copy of the code, I right-click anywhere on the Windows desktop and select SVN Checkout... from the context menu.
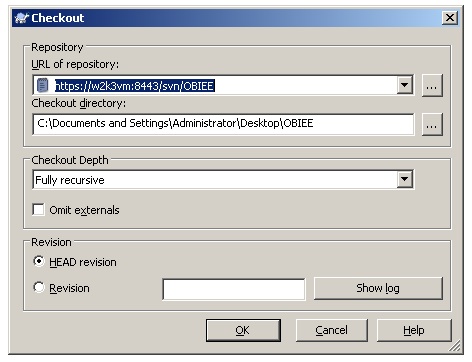
Selecting this option then brings up a Checkout dialog, where I can choose to check out the latest version of the project (the "HEAD" revision), or a specific revision of the project. For now I just select the HEAD revision as there's nothing else other than the folders in the repository anyway.
Once I select my revision, TortoiseSVN then shows me the various project files downloading to my desktop from the Subversion server.

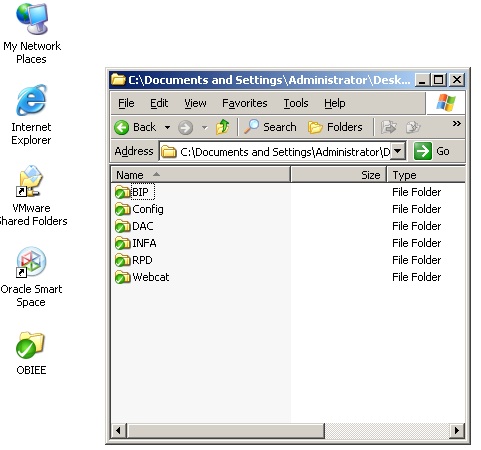
So if I now want to package up a specific release of my OBIEE and Oracle BI Apps project, it's a case of copying the various project files to the new set of folders that have been copied to my desktop. Taking a look at the folders, there are directories for the RPD repository file, the Web Catalog, the various BI Server, BI Presentation Server, BI Publisher and JavaHost services, plus directories for DAC exports and backups of the Oracle_BI_DW_Base Informatica repository.
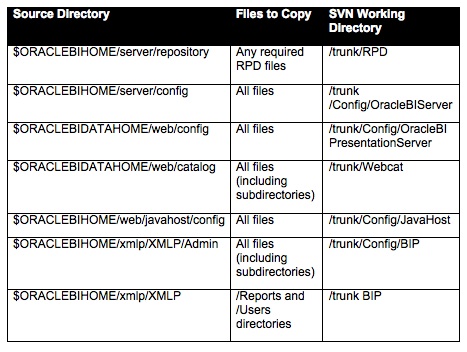
Now that there's a local filesystem to copy the various files to, the next job then is to go and get all the relevant files and place them in the correct directories prior to upload. This table sets our where the files are (this list isn't exhaustive, if you know of any others then let me know) and where they need to get copied to in the working directory.
Once the files are all in place, you can then use TortoiseSVN to upload, or "commit" them to the Subversion repository. To do this, right-click on the top-level local folder and select SVN Commit... from the context menu.

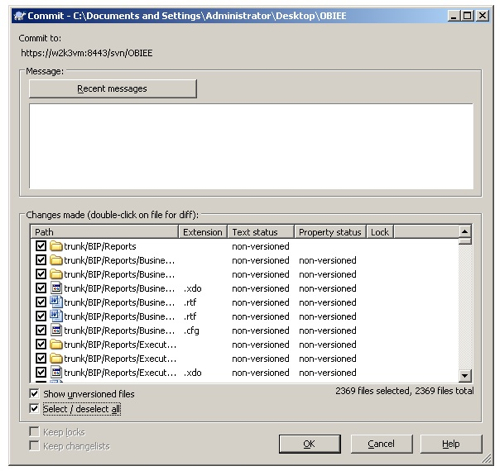
You are then presented with a dialog that lets you determine what is committed. In my case I select all the files so that the entire state of the project is uploaded to the repository.
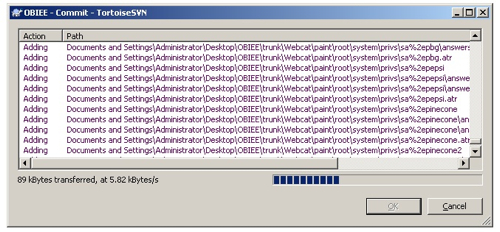
After pressing OK, the project files are then uploaded to Subversion. This can take a few minutes if you're uploading the entire Web Catalog, for example, though subsequent uploads should be quicker as you'll only be uploading the new and changed files.
So now that you've got the project files uploaded to the repository, you can go ahead and upload further revisions later on, with all of the files being versioned and saved within the repository, or you can use the SVN Checkout... feature to download either the latest version, or a specific version, of the project for use in another environment.
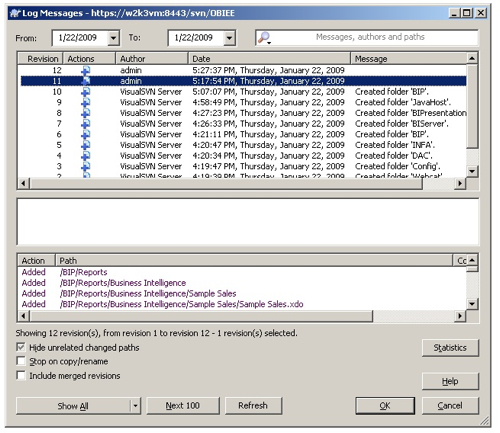
Each upload of project files to the repository generates a new revision number; these can be viewed from the Checkout dialog when you make your checkout selection.
So that's the basics for an OBIEE project. You set the folders up initially in Subversion, then copy the files down to the local filesystem to create your "working copy". You then place all the various OBIEE files into this local filesystem, and upload its contents to Subversion every time you want to record a version. As a process it could be improved; it would be nice if you could upload the project to Subversion from within Oracle BI Administrator, and it'd also be nice if you could avoid having to copy all the files to an upload location and instead leave them in place in the OracleBI and OracleData directories, calling an "upload" function from somewhere that uploaded them in place. It's also a fairly coarse-grained way of versioning the RPD repository file, and you might want to consider exporting the repository to a UDML file instead and uploading that, as a text file, to Subversion so that you can perform diffs on it and perhaps branch the code. But it's a simple, basic way of adding some sort of version control to your OBIEE system and at least being able to refer back to past versions of what you've done.
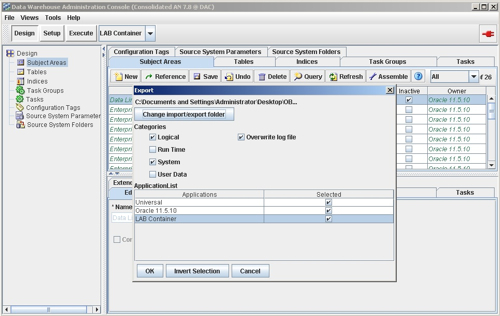
If you're working with the Oracle BI Applications, you can also copy the contents of the DAC repository (via the DAC Export feature) into this filesystem, as well as an export of the Informatica repository. To export the DAC contents, log on to the DAC Console and select Tools > DAC Repository Management, select the folders you want to export and then copy the exported XML files to the /DAC folder in the Subversion working directory.
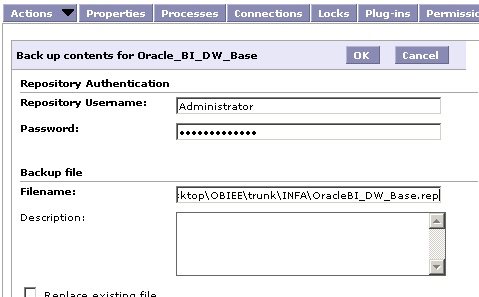
If you want to export your Informatica repository and you're on version 7.9.5, fire up the Informatica PowerCenter Administration Console and locate the entry for your repository server, then select Actions > Back Up Contents from the menu to bring up the Repository Backup menu.
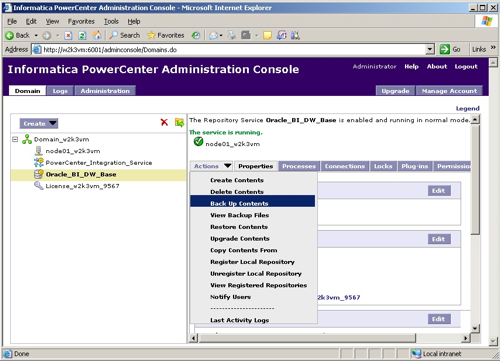
You can then pass in the username and password for the repository, as well as the path to the Subversion working directory and the backup filename, and this should create a copy of the repository that you can subsequently import back into an Informatica environment.
So there you have it. Of course there's a lot more to Subversion than just this; you can create branches of your code, and you can create copies of your project under the "tags" directory to save specific sets of files as a particular release. But it's a good start and not too onerous to set up, and something we use on projects as a low-impact way of adding source control to an OBIEE project.