Configuring SSL on OEID v3.0
Oracle Endeca Information Discovery (OEID) version 3.0 now supports secure connection over HTTP, something useful for when implementing Endeca in a production environment where its expected that all security risks been controlled. Sending requests and data over unsecured HTTP is generally considered one of the more higher-risk vulnerabilities, with the solution generally being to add SSL encryption to standard HTTP communications.
However, enabling SSL connections between different parts of the OEID package seems on the surface to be a bit tricky, since all communications with the Endeca Server are via web service calls; therefore, having the Endeca Server configured for SSL requires all other servers that connect to it to be updated and re-configured. In this blog post therefore I'm going to walk through a step-by-step guide on how to setup this feature, and how to ensure everything subsequently works correctly.
SSL configuration on Oracle WebLogic Server
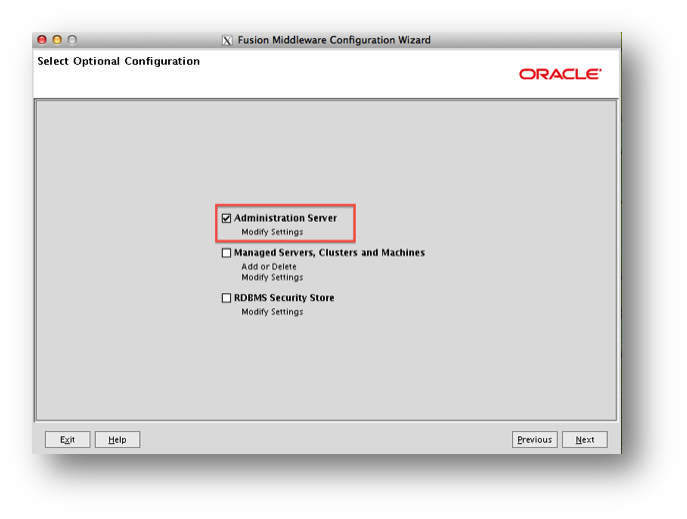
All Weblogic domains will need to be ‘SSL enabled’ and the secure port should be defined. This can be done as one of the steps in the ‘Fusion Middleware configuration Wizard’. To see the setting select the ‘Administrator Server’ from the list, as shown in the screenshot below, when you reach this option point.
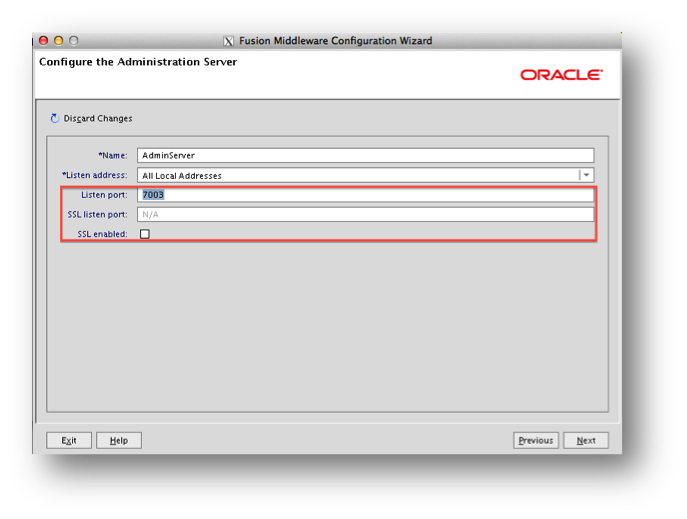
The next step is to check the ‘SSL enabled’ option and choose a ‘SSL Listen Port’.
Generate keys
The first step to configure SSL configuration between different parts of OEID is to generate an SSL key, and then share it between them. A key generator script comes as part of the OEID Weblogic domain installation, and should be accessible on:
WebLogicInstallationpath/user_projects/Endeca_domain/EndecaServer/bin/generate_ssl_keys.sh
When running this script, the Endeca Server WebLogic Server needs to be running, and the script requires both credentials to access the Endeca server, and also an SSL passphrase.
Browser certification
As an OEID developer, you might want to check some web-service requests on your browser; for example, if you want to make sure the Endeca Server is up and running you can try requesting its WSDL document:
https://Endeca_server_host:Endeca_server_port/endeca-server/ws/manage?wsdl
Having the SSL configuration, you need to add SSL certificates to your browser in order to receive reply from the server.
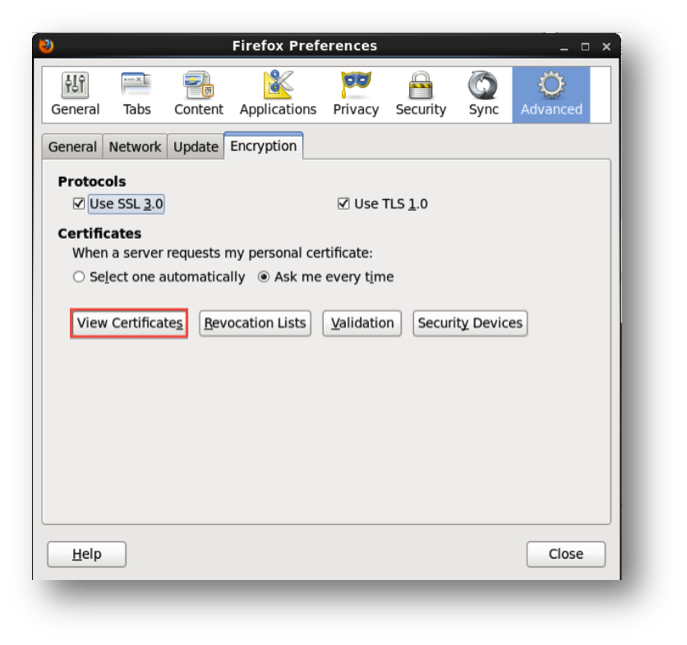
Open your browser and go to its preferences page. Go to Advanced > Encryption tab and click on ‘view certificates’. This is the place that you will need to import the generated esClientCert.p12 file and private passphrase to.
Integrator Configuration
Integration configuration would be done in three areas; Integrator initial file, JRE variables and each graph component’s settings.
- Integrator.ini, This files is by default in the root of the Integrator installation directory. Add following lines under "-vmargs".
-Djavax.net.ssl.keyStore=yourcertkeystorefile.jks
-Djavax.net.ssl.keyStorePassword=keystorepass
-Djavax.net.ssl.trustStore=yourtruststorefile.jks
-Djavax.net.ssl.trustStorePassword=truststorepass
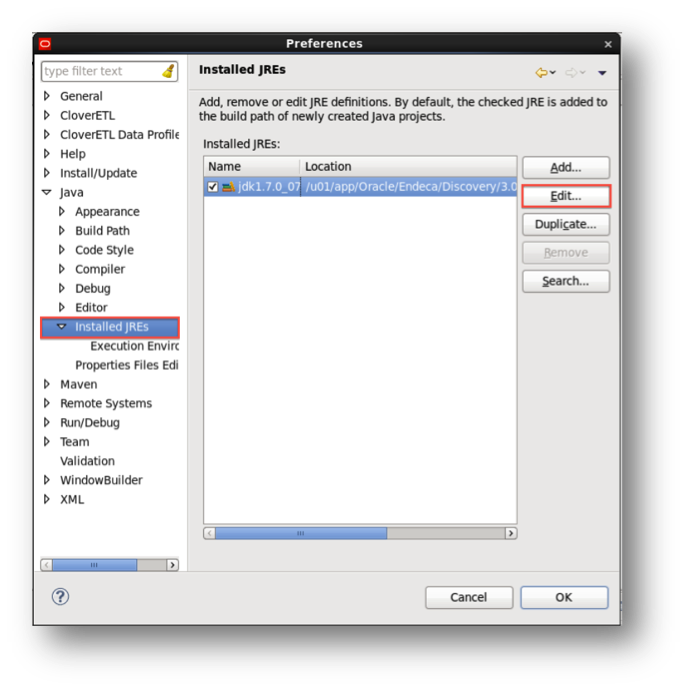
- JRE Configuration, Same variables should be added to the Integrator designer JRE. To do so open clover Preferences on Window menu. Under Java> Installed JREs select the available jdk and click Edit. Add same option to ‘Default VM arguments’ and Finish the edit.
Components
Any graph component requesting a web-service call must be configured for SSL connection. Settings are not all the same and differ for each type. For a WEB_SERVICE_CLIENT component like below it is enough to make sure all calls are to a https address and the correct port has been defined. You’ll also need to Disable SSL Certificate Validation.
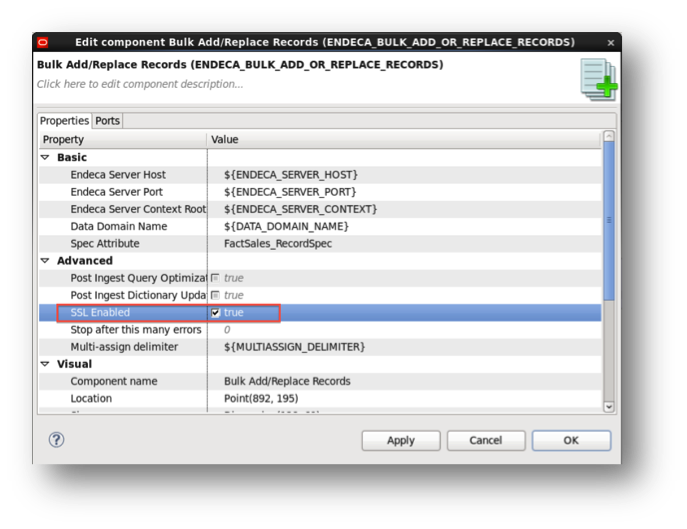
For a BULK ADD/REPLACE component it is enough to check SSL Enabled option.
Endeca Studio Data Sources
Create a folder under default lifreay path/data and call it ‘endeca-data-sources’. All you need to do is to re-copy generated key-stores to the new folder.
As a result if you add the ssl passphrase to the data source definition in the Studio control panel, the definition should be correct and connect successfully.
Provisioning Service
In case of Provisioning Service, firstly copy key-stores to path to Oracle Web-Logic/user-projects/domains/oracle.eid-ps/eidProvisioningConfig/
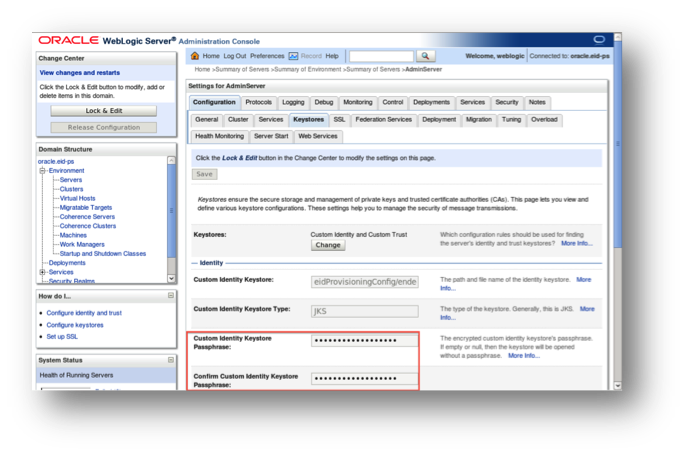
Secondly, go to the WebLogic Administration console. For the current server, enter the SSL passphrase in the key-stores and SSL configuration page, and then restart the server from the control page.

