Why and How to use Oracle Metadata Management 12c. Part 2: Importing and Relating Metadata
In the first post of this series we have seen how to install and configure OEEM to start working with it. In this new post we are going to see how we import the metadata into OEMM from different sources like Oracle Database, OBIEE, ODI and OWB and then relate all of them inside OEMM.
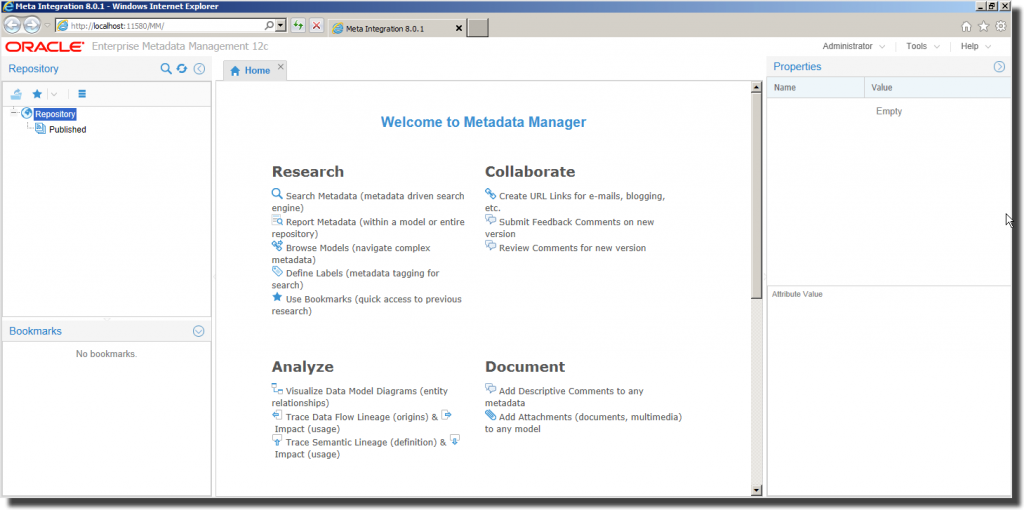
After we have installed and configured OEMM, we need to start adding all the metadata from the different sources and applications that we use. In this example the sources will be some Oracle schemas and our applications will be ODI, OWB and OBIEE. To import the metadata for all of them we need to create one model in OEMM for each. A model in OEMM has all the connection details for a specific source or metadata provider (i.e: database schema, ODI repository, etc), and is also the container for the metadata of that specific source after the import process. So one model can connect to one specific source or application.
First and for organisational purposes we will create a Folder to contain the future models. You can also create your models first, and then create the folder/s that you want and then just move the models under the correspondent folders. In addition, you can create folders within another folder.
To create a folder, right-click on the Repository entry under the Repository panel in the OEMM main page. Select New > Folder in the pop-up menu, enter a name and press the Create button.
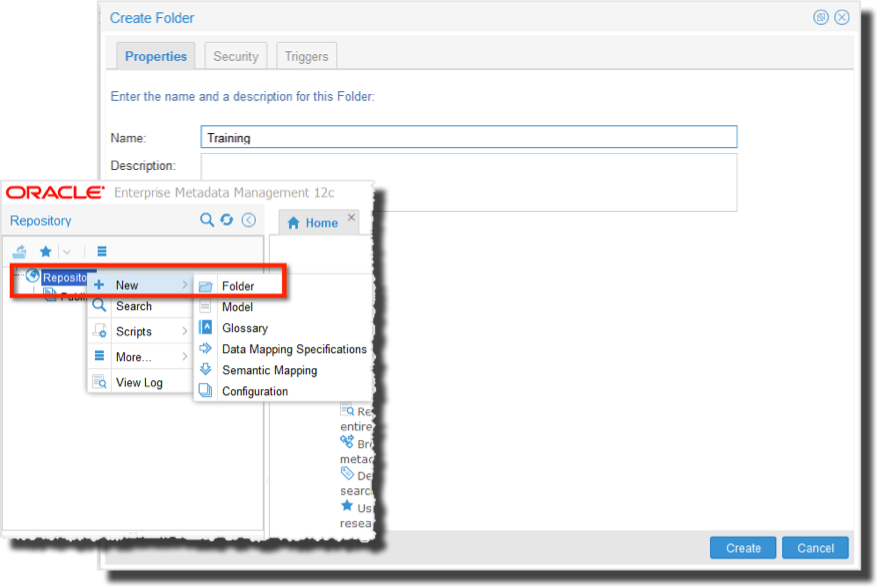
The next step is creating the models and import the metadata of the different sources. The import or reverse engineering process is named harvesting in OEMM. We will start with the model for the Oracle Database. In this particular example I used Oracle 12c.
To create a model right click on the folder or the repository entry, and select New > Model. In the Create Model window that appears, enter a name for the new model and select the type of source that you want to import or to be more precise which will be the Import bridge that this model will use.
The Import Bridge is part of the Meta Integration® Model Bridge (MIMB) software and is the way that OEMM connect to the sources and applications to reverse engineering the metadata. You will find import bridges for a wide range of technologies like different databases, Business Intelligence and Data Integration products from different vendors, Big Data stores, etc.
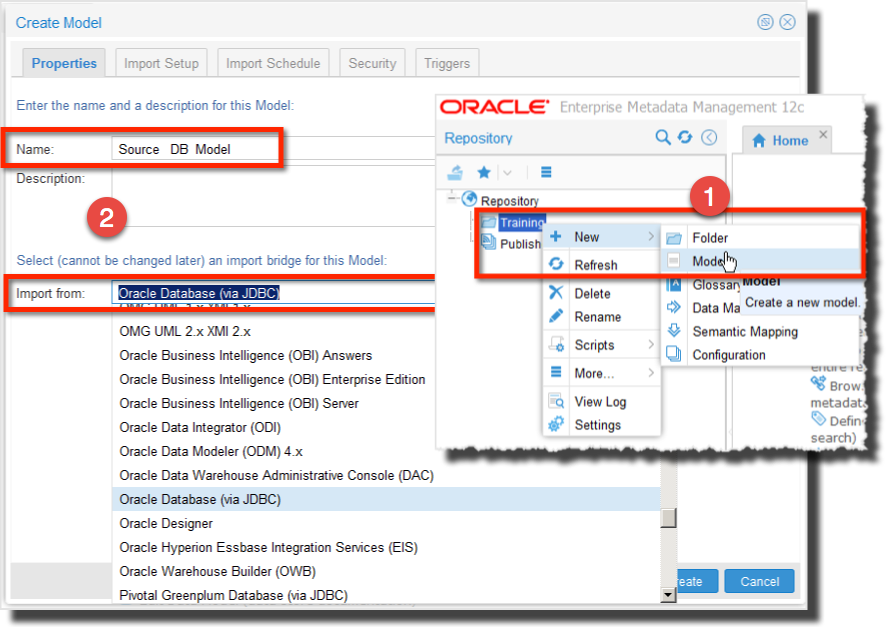
For this first example we will select the Oracle Database (via JDBC) import bridge and in the Import Setup tab we will add all the usual connection details: host, port, service and user and password to connect to the Database. This user should have at least the CONNECT privilege and the SELEC_CATALOG_ROLE role. We can also define this model for specific schemas using the magnifying glass to choose the shown schemas or just write the schemas (in uppercase) separated by “;”. Also we can decide if we want that the stored procedures are going to be included in this imported metadata or not.
After all the connection details have set, we test the connection and wait until we receive the Connection Successful message, and finally press the Create button. A message windows will appear asking if we want to “Import a new version now?” Press yes to start the harvesting process. A log window will show you the progress in the import process that can take several minutes. After the process is finished a new windows message ask if we want to open the model.
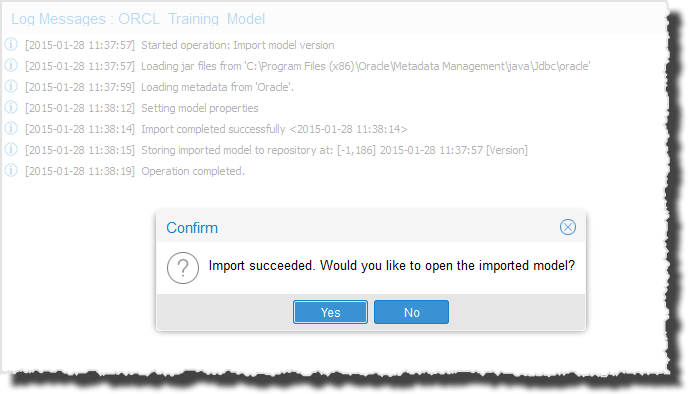
Choose yes to see all the objects that are imported for this model as it is shown in the figure below.
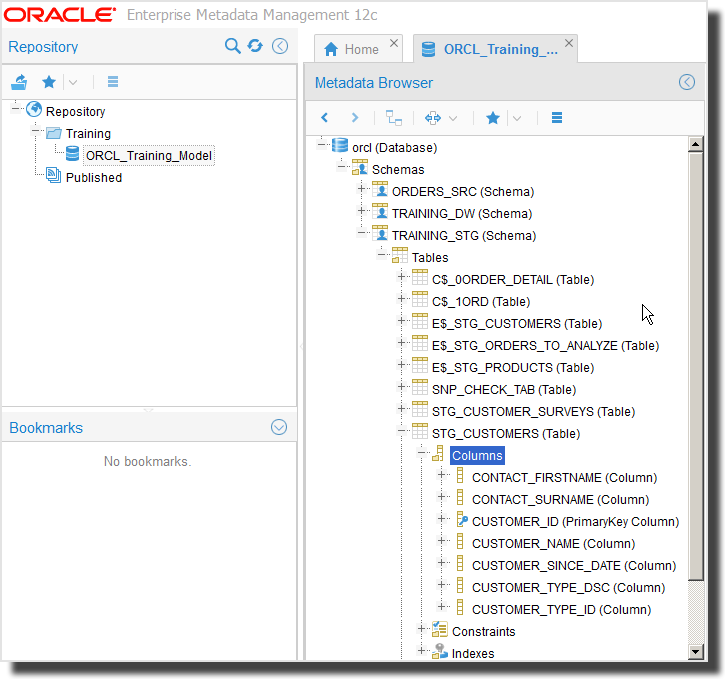
We need to repeat the process explained above to create the models for the rest of sources and applications that we are going to use in this example. The process is the same for all of them but of course there are some differences in the connection details required after we chose the specific Import Bridge for each one.
In the next screenshot you will find the connection details for the ODI model after you choose the Oracle Data Integrator (ODI) Import Bridge. In the Import Setup tab, you need to select the appropriate driver to connect to the database where is the ODI Repository (that could be Oracle, SQLServer, DB2, etc), the ODI Home folder, the URL to connect to database, the schema and the password for the Master Repository, user and password for the ODI User (SUPERVISOR for example), the name of the Work Repository from that we want to select the ODI Objects and the Context.
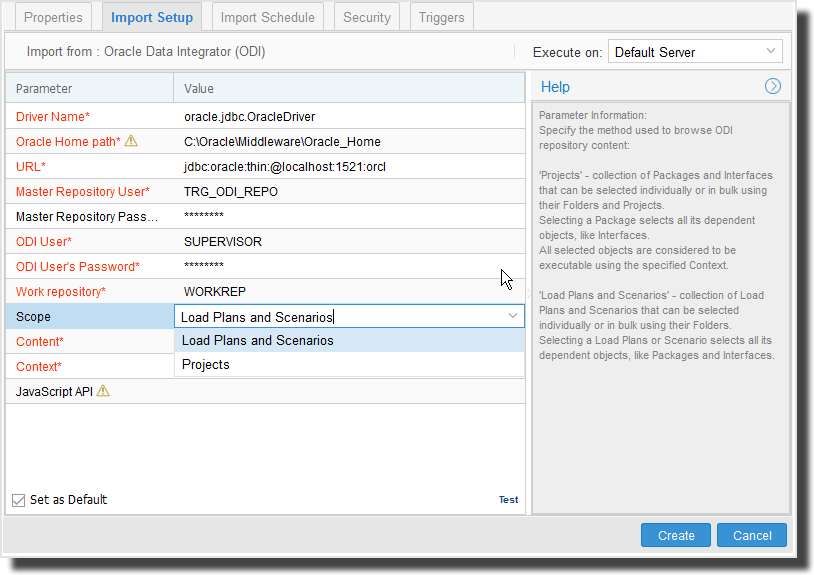
We need to select the Scope for this model between two options: Projects, that will include packages and mappings (or interfaces for versions before 12c) or Load Plans and Scenarios, that includes the Load Plans and Scenarios.
After we chose the Scope we can also filter the Content of the scope pressing the magnifying glass icon and select the specific objects that we want for this model.
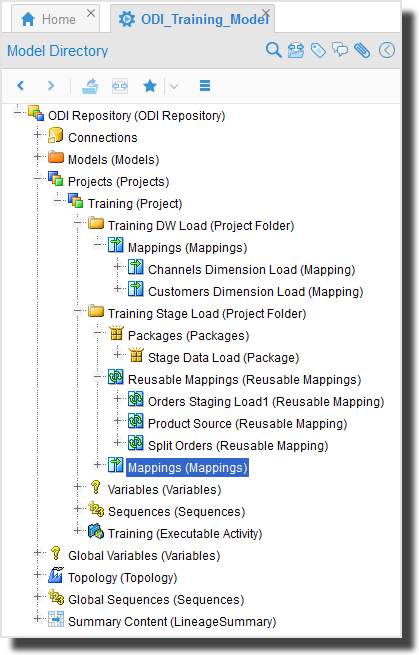
After you press the create button to start the harvesting process, open the model created and it will look similar to this if you choosing Projects as Scope.
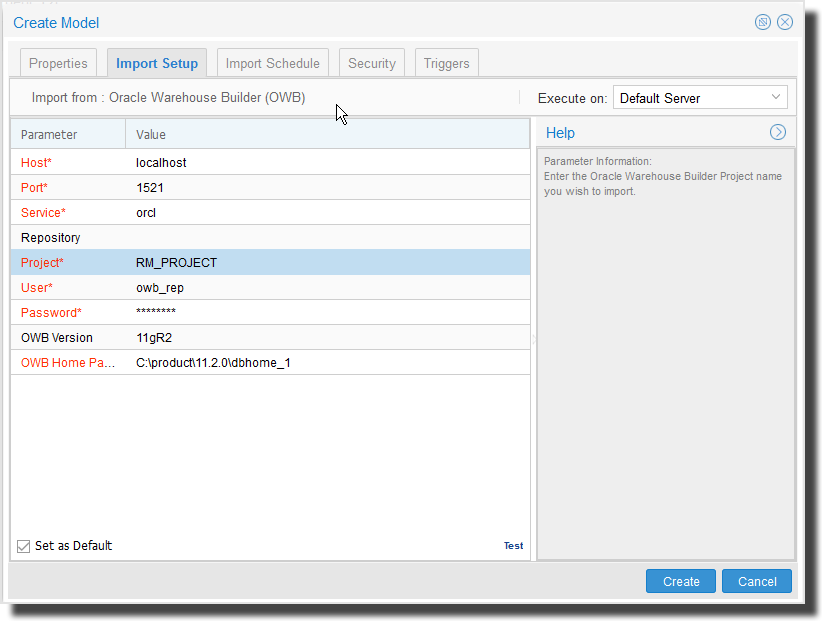
For the connection details to create the OWB model , you need to take a couple of things into account. First, the version of the OWB from which you want to import the metadata. If it is 11.2.0.3 or later you will need to do the these two steps before:
- Copy the following .JAR files from: MetaIntegrationInstallationDir\java\ to %OWB_HOME%\owb\lib\ext\
- jsr173_1.0_api.jar
- MIR.jar
- MIRModelBridge.jar
- MIROracleWarehouseBuilderOmb.jar
- MIRUtil.jar
- stax-1.1.1-dev.jar
- Copy the MetaIntegrationInstallationDir\bin\mimbexec.bat file into the same OWB directory.
As the version that I have is 11.2.0.4, I copy the files detailed above, set the connection parameters like is shown in the following image and test the connection.
When I started the import process the following error message appears in the log windows:
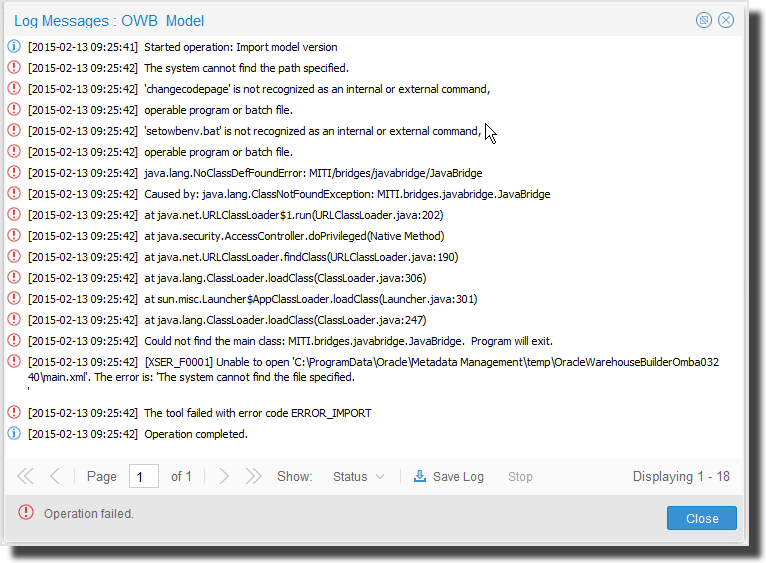
After trying many things unsuccessfully, I asked David Allan for help and he sent me another mimbexec.bat because apparently between 11.2.0.3 and 11.2.0.4 there were directory name changes. This a temporary fix and a proper one is being worked on.
I substituted the bat file and I received another error message as it is shown in the next screenshot.
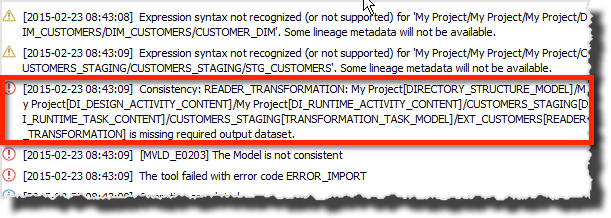
After a while, I realised that the issue that OEMM reported was because I was using an external table in one of the mappings. I changed it for a common table and the import process worked well. This has reported as a bug and a solution is being worked on. I really want to thank David for all his invaluable help on that.
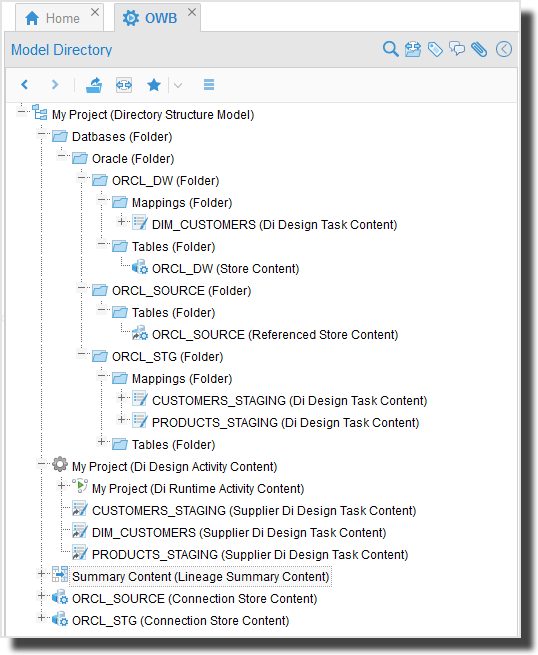
This is how it looks the OWB model after the import of the metadata.
The last model that we need to create is the one based on OBIEE. There are different import bridges depending on the metadata that we need to import from OBIEE. Could be Oracle Business Intelligence (OBI) Server, Oracle Business Intelligence (OBI) Enterprise Edition and Oracle Business Intelligence (OBI) Answers.
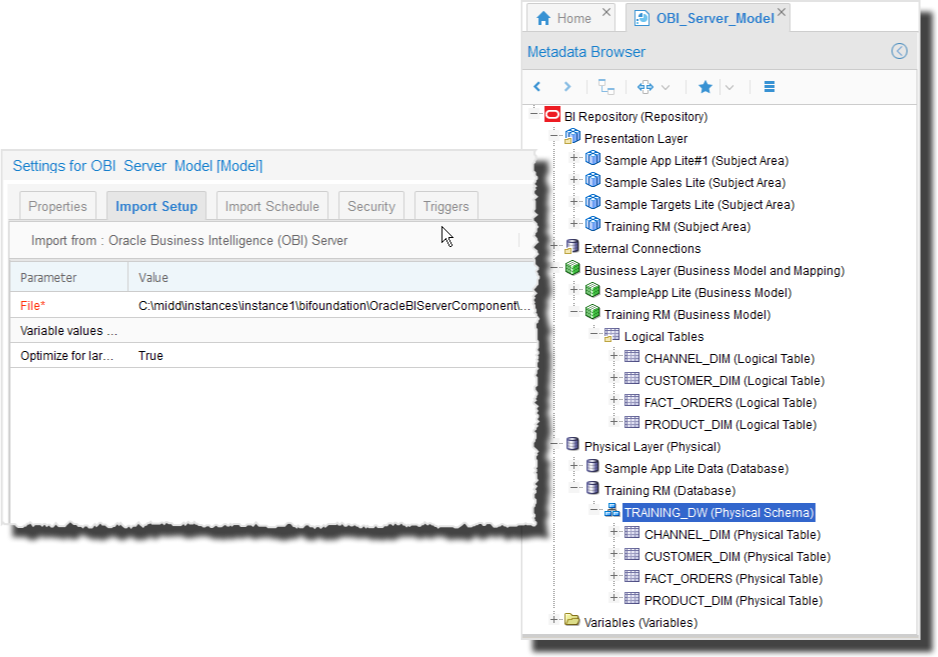
The OBI Server import bridge needs the OBI repository in xml format as a parameter to import it, and the result model will contain all the objects defined in the three layers of the repository (Presentation, Business Model, Physical) as well as the repository connections, the variables and the initialisation blocks defined in the OBI repository.
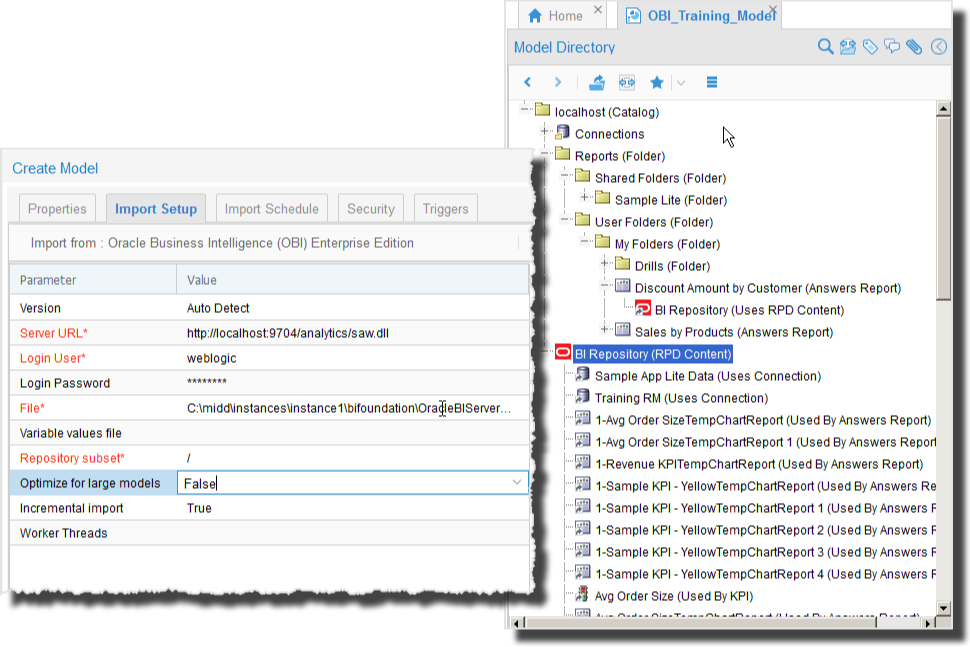
To use the OBI Enterprise Edition import bridge we need to set the login user and password to connect to OBIEE (usually weblogic or a user with admin privileges), the repository file in xml format, and we can also filter the amount of reports retrieved from the OBI Presentation Server.
There are a couple of interesting not mandatory options, one is for optimise the import of large models which if it sets to true doesn’t return some objects like joins, relationships, logical fk, etc., to consume less memory at run time. And another option is to set if we want to do an incremental import to import only the changes of the source or each time we want to import everything.
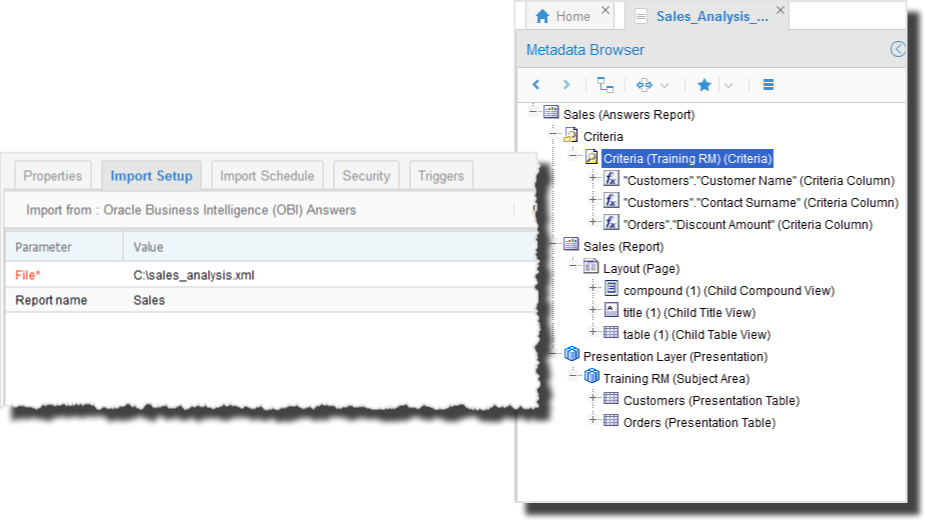
The last import bridge to use with OBI is the OBI Answers, which will be import the content for a particular analysis or KPI report. This bridge needs to have the specific analysis in XML format.
About models, there are a couple of additional things that you need to take note. First if you want to see the configuration details you need to right-click the model and choose the settings option from the pop-up menu. In case that you want to open the model to see the objects that contains, double-click on it.
Another thing is for every parameter that you have in a model, you will find a very detailed help at the right in the import setup tab; and if you click on the name of the Import Bridge in the same tab, you have the documentation of this particular bridge which I find it very useful.
There are two tabs more in the folder and model definition that we won’t use in this example but that we talk in future posts: one for security and another to executing scripts when an event happens to this object. Models also have an additional tab Import Schedule, to create a plan to do the harvest process.
Relate the models
Once we have defined our models we need to relate them and to validate their relationship. The automated process of relate these models through the validation is named stitching. In order to do that we must create a Configuration first. A configuration in OEMM is a collection of models and another objects like mappings, glossaries, etc, that are related in someway.
According to the online documentation we need to consider a configuration as any of these options:
- Repository workspace: a collection of Repository Objects to be analyzed together (search, browse, reports, etc.) as a technical scope, or business area under the same access permission scope.
- Enterprise architecture - a collection of data store Models (ODS, data staging areas, data warehouses, data marts, etc.) and data process Models (ETL/DI, and BI) connected together through data flow stitching.
- Design workflow - a collection of conceptual, logical and physical Models connected (semantically stitched) together through semantic mappings modeling the design process.
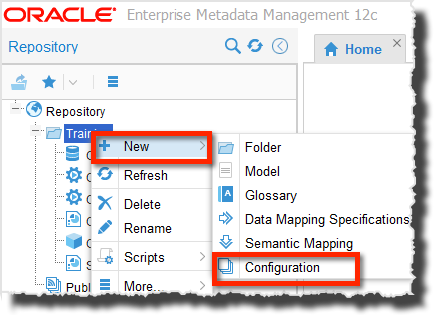
To create a Configuration, just right-click on a selected folder or the repository entry and choose New> Configuration. Enter a name for the configuration and press the Create button.
The configuration is opened and you need to drag the models that you want to be stitched inside this configuration as it is shown in the following screenshot
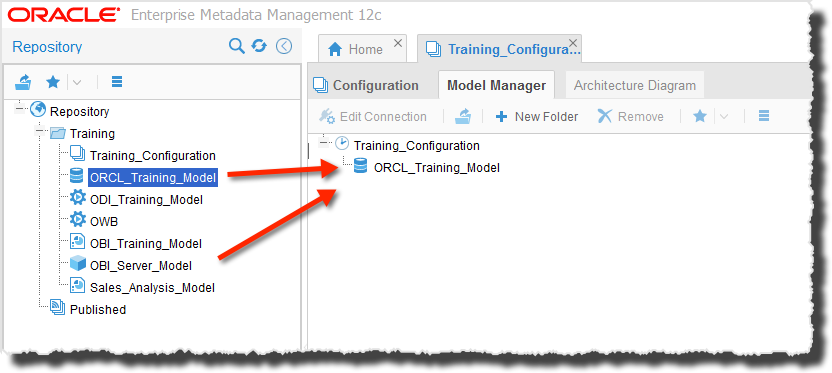
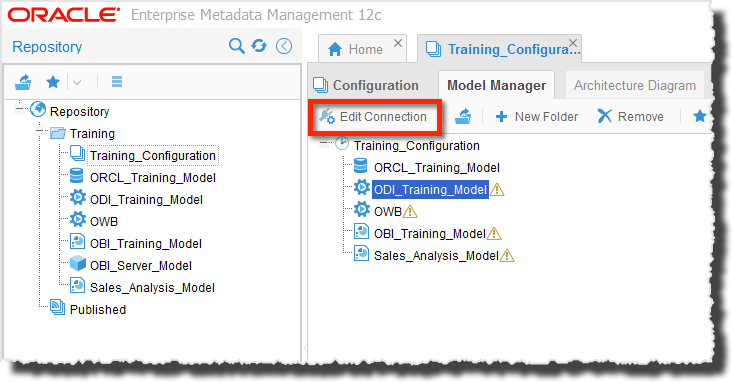
As you drag and drop your models, you can see that some of them have a warning icon after you include them in the configuration, and that is because we need to connect that model with the appropriate source of data.
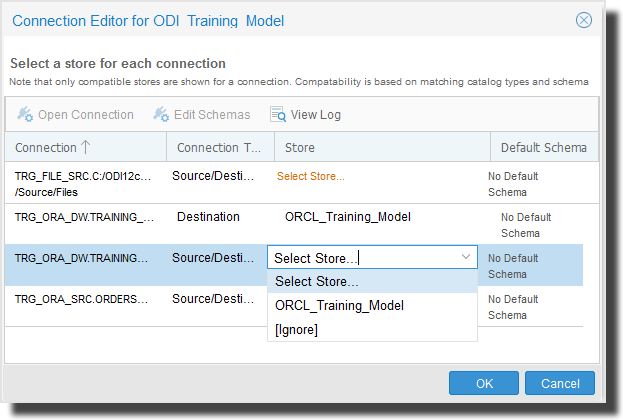
To do that, select the model in the configuration and press Edit Connection. Choose the correspondent store for each connection and press OK.
After you finish with all the models, press the Validate button, to start stitching or relate them.

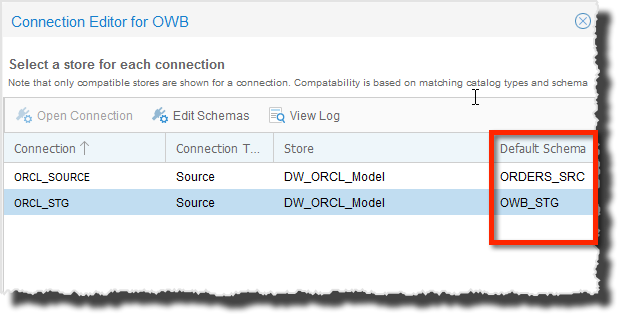
In most of the cases, OEMM can assign the correspondent default schema for each of the connections in the model. If in some cases cannot do it , like in OWB, you need to do it manually.
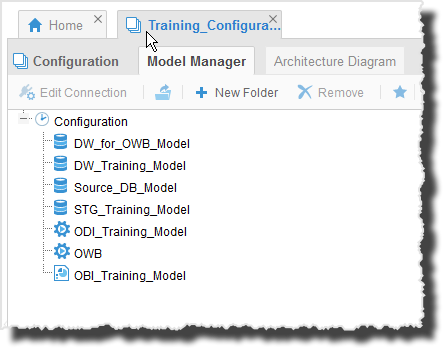
In the following image you will see all the models validated. For this example, I've created four databases models, one that contains the source (transactional system), one for the staging schema, and another two that contains different data warehouses. Also an ODI model, an OWB model and an OBIEE model.
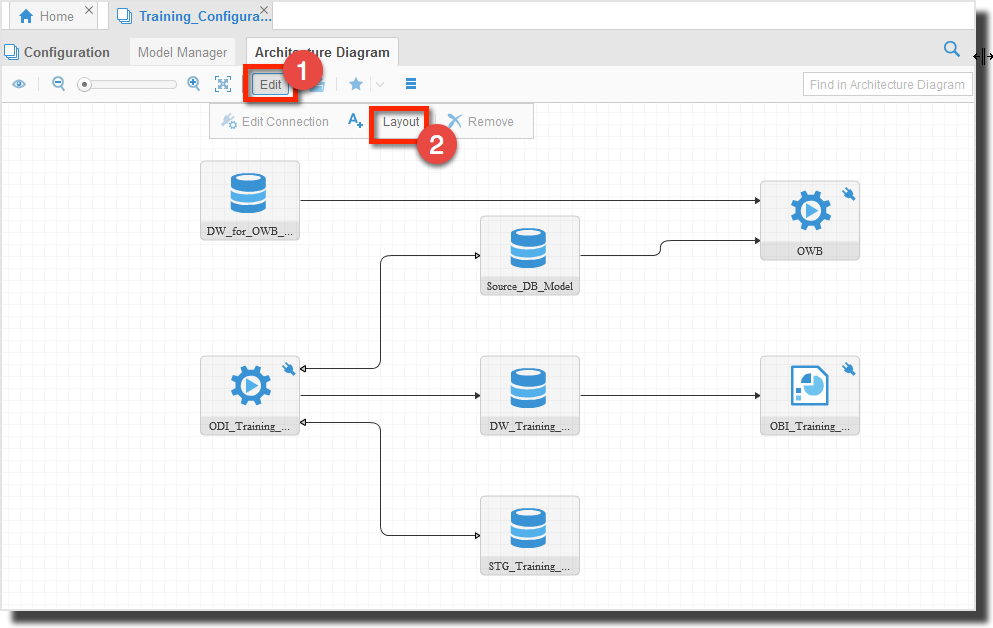
You can see also the relationship between the models that belong to a configuration in a graphical view in the Architecture Diagram tab of the Configuration. If the diagram looks like a little messy, you can press the Edit button and then Layout to order the way the components are shown.
In summary, we create and harvesting (reverse-engineer) the models and then relate or stitching them to can analyse them together. In the next post, we will see some interesting stuff that we can do with configurations and models like trace data lineage and trace data impact.