Spark Streaming and Kafka, Part 2 - Configuring a Kafka Connector

In my previous blog post, I covered the development of a custom Kafka Source Connector, written in Scala. This blog post is about deploying that Connector. We are getting closer to analysing the stream data in Spark - as promised in the title.
If you are installing a Connector from Confluent Hub, instead of installing a custom one, please follow this guide instead.
Setting up Kafka Server
This blog post does not cover setting up a Kafka instance. However, let me give a quick overview of the environment I am using:
- OS: Ubuntu server 18.10.
- Kafka version - at the time of writing, the latest version is 2.1.0. So that is the one I am using. Please note that the Kafka Connector API interface is slightly different for different Kafka versions. (In fact, early in my Connector development I saw Kafka throwing strange missing function errors. It turned out I was using a slightly older API for Kafka 2.0.0 instead of the one for 2.1.0. - the SourceConnector class's function `taskConfigs` had been renamed in the latest version.)
- Java: OpenJDK 11.0.1. It seems the OpenJDK is preferred for Kafka over the Oracle Java JDK.
I got the Kafka install file from:
http://www-eu.apache.org/dist/kafka/2.1.0/kafka_2.12-2.1.0.tgz
Setting up Kafka Topic
Confluent have an excellent user guide on how to set up Connectors. There is also a Quick Start guide in the Apache Kafka website, though it is much less detailed than the guide from Confluent.
The first step for me, once my Kafka instance is up and running, is to create a new topic for my Weather records. Let me call it 'JanisTest'. From Kafka root folder I execute:
$ bin/kafka-topics.sh --create --zookeeper localhost:2181 --replication-factor 1 --partitions 1 --topic JanisTest
$ bin/kafka-topics.sh --list --zookeeper localhost:2181
JanisTest
__consumer_offsets
$
After creating it, I run the --list command to see that it is indeed created and available.
Install Connector
Copy jars from your Scala development environment to your Kafka instance. I chose to have a folder of jars, not one uber-jar with all library dependencies packaged in. But either approach should work fine.
$ cd ~/kafka
$ mkdir connectors
$ cd connectors
$ cp /VMSharedFolder/connectorJars/* .
Do not add the above folder to CLASSPATH! Instead, add it to the
connect-*.properties config files. In the later versions of Kafka, the server itself manages paths to plugins.
$ cd ~/kafka/config
$ vi connect-standalone.properties
We will run our connector in standalone mode, therefore the important file for us to edit is 'connect-standalone.properties'. But we can also edit
the 'connect-distributed.properties' config file if we ever decide to run Kafka on multiple nodes.
Add the following line to the connect-standalone.properties and connect-distributed.properties configuration files:
plugin.path=/home/kafka/kafka/connectors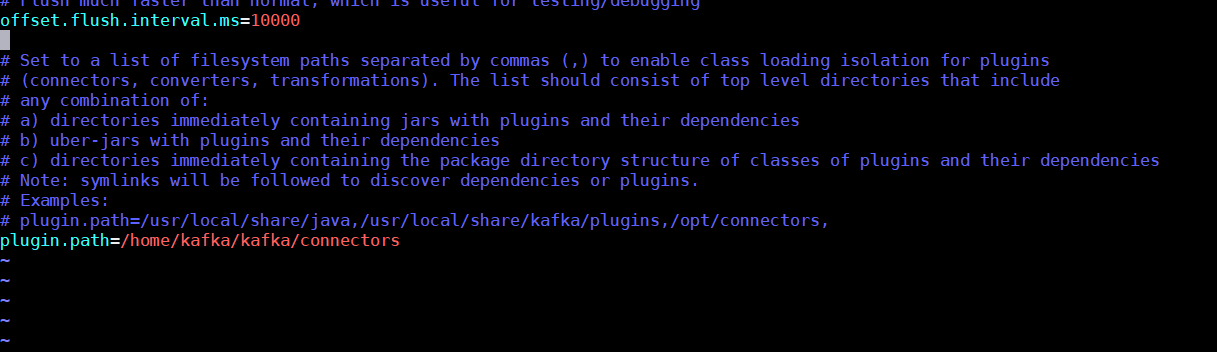
If you need to add several connector folders, the plugin.path value is comma-separated.
Configure Connector
Similar to the connect-standalone.properties file, our newly installed Source Connector also requires a configuration file. Let us create one:
$ cd ~/kafka/config
$ vi connect-http-source.properties
We specify the following configuration attributes in the config file - these attributes were defined in the `HttpSourceConnectorConstants` object we discussed in my previous blog post.
name=http-source

http.url=http://api.openweathermap.org/data/2.5/weather
http.api.key=<YOUR API KEY>
http.api.params=units=metric&q=London,uk

service.name=CurrentWeatherData
topic=JanisTest

poll.interval.ms=60000
tasks.max=1
connector.class=com.rittmanmead.kafka.connector.http.HttpSourceConnector
- name - name of the Connector.
- http.url - the base URL for the HTTP API.
- http.api.key - replace <YOUR API KEY> with the key you got when registering with OpenWeatherMap.
- http.api.params - any additional parameters you would like to specify for your API request - as described in the API documentation. Follow the format
name=value. In case you need to specify several attributes, separate them with a&. - service.name - you can name your service.
- topic - give the topic name that was created previously, as described in this guide.
- poll.interval.ms - the frequency at which the API will be queried. 60000ms = 1 minute. Because the weather does not change that quickly, this polling interval is frequent enough for us. The free API tier limits us to no more than 1 query per second.
- tasks.max - the maximum number of concurrent tasks allowed. In our case it is 1.
- connector.class - the full class path of the SourceConnector class we have implemented, which is described in my previous blog post.
Run Connector
Because we are only running the Connector in standalone mode, there is not much config to be done. We are ready to run it. To start our Source Connector, we run the connect-standalone.sh command:
$ cd ~/kafka
$ ./bin/connect-standalone.sh ./config/connect-standalone.properties ./config/connect-http-source.properties
The first argument passed to the connect-standalone.sh script is the worker properties configuration - only one configuration. It is followed by one or many (on our case - one) connector configuration.
Take a deep breath and hit Enter.
A long log output will follow. If you get any errors, the command will return to shell prompt. Some possible errors are missing classes - if that is the case, please check that you have successfully deployed all the jars and they are registered in the connect-standalone.properties file. Also, if any of the required configuration parameters are missing in the connect-http-source.properties file, you will get an error message.
If successful, the log listing will end with something like this:
[2019-02-19 14:14:55,294] INFO Kafka version : 2.1.0 (org.apache.kafka.common.utils.AppInfoParser:109)
[2019-02-19 14:14:55,297] INFO Kafka commitId : 809be928f1ae004e (org.apache.kafka.common.utils.AppInfoParser:110)
[2019-02-19 14:14:55,334] INFO Created connector http-source (org.apache.kafka.connect.cli.ConnectStandalone:104)
[2019-02-19 14:14:55,406] INFO Setting up an HTTP service for http://api.openweathermap.org/data/2.5/weather... (com.rittmanmead.kafka.connector.http.HttpSourceTask:40)
[2019-02-19 14:14:55,466] INFO Starting to fetch from http://api.openweathermap.org/data/2.5/weather each 60000ms... (com.rittmanmead.kafka.connector.http.HttpSourceTask:47)
[2019-02-19 14:14:55,469] INFO WorkerSourceTask{id=http-source-0} Source task finished initialization and start (org.apache.kafka.connect.runtime.WorkerSourceTask:199)
[2019-02-19 14:14:56,560] INFO Http return code: 200 (com.rittmanmead.kafka.connector.http.HttpSourceTask:31)
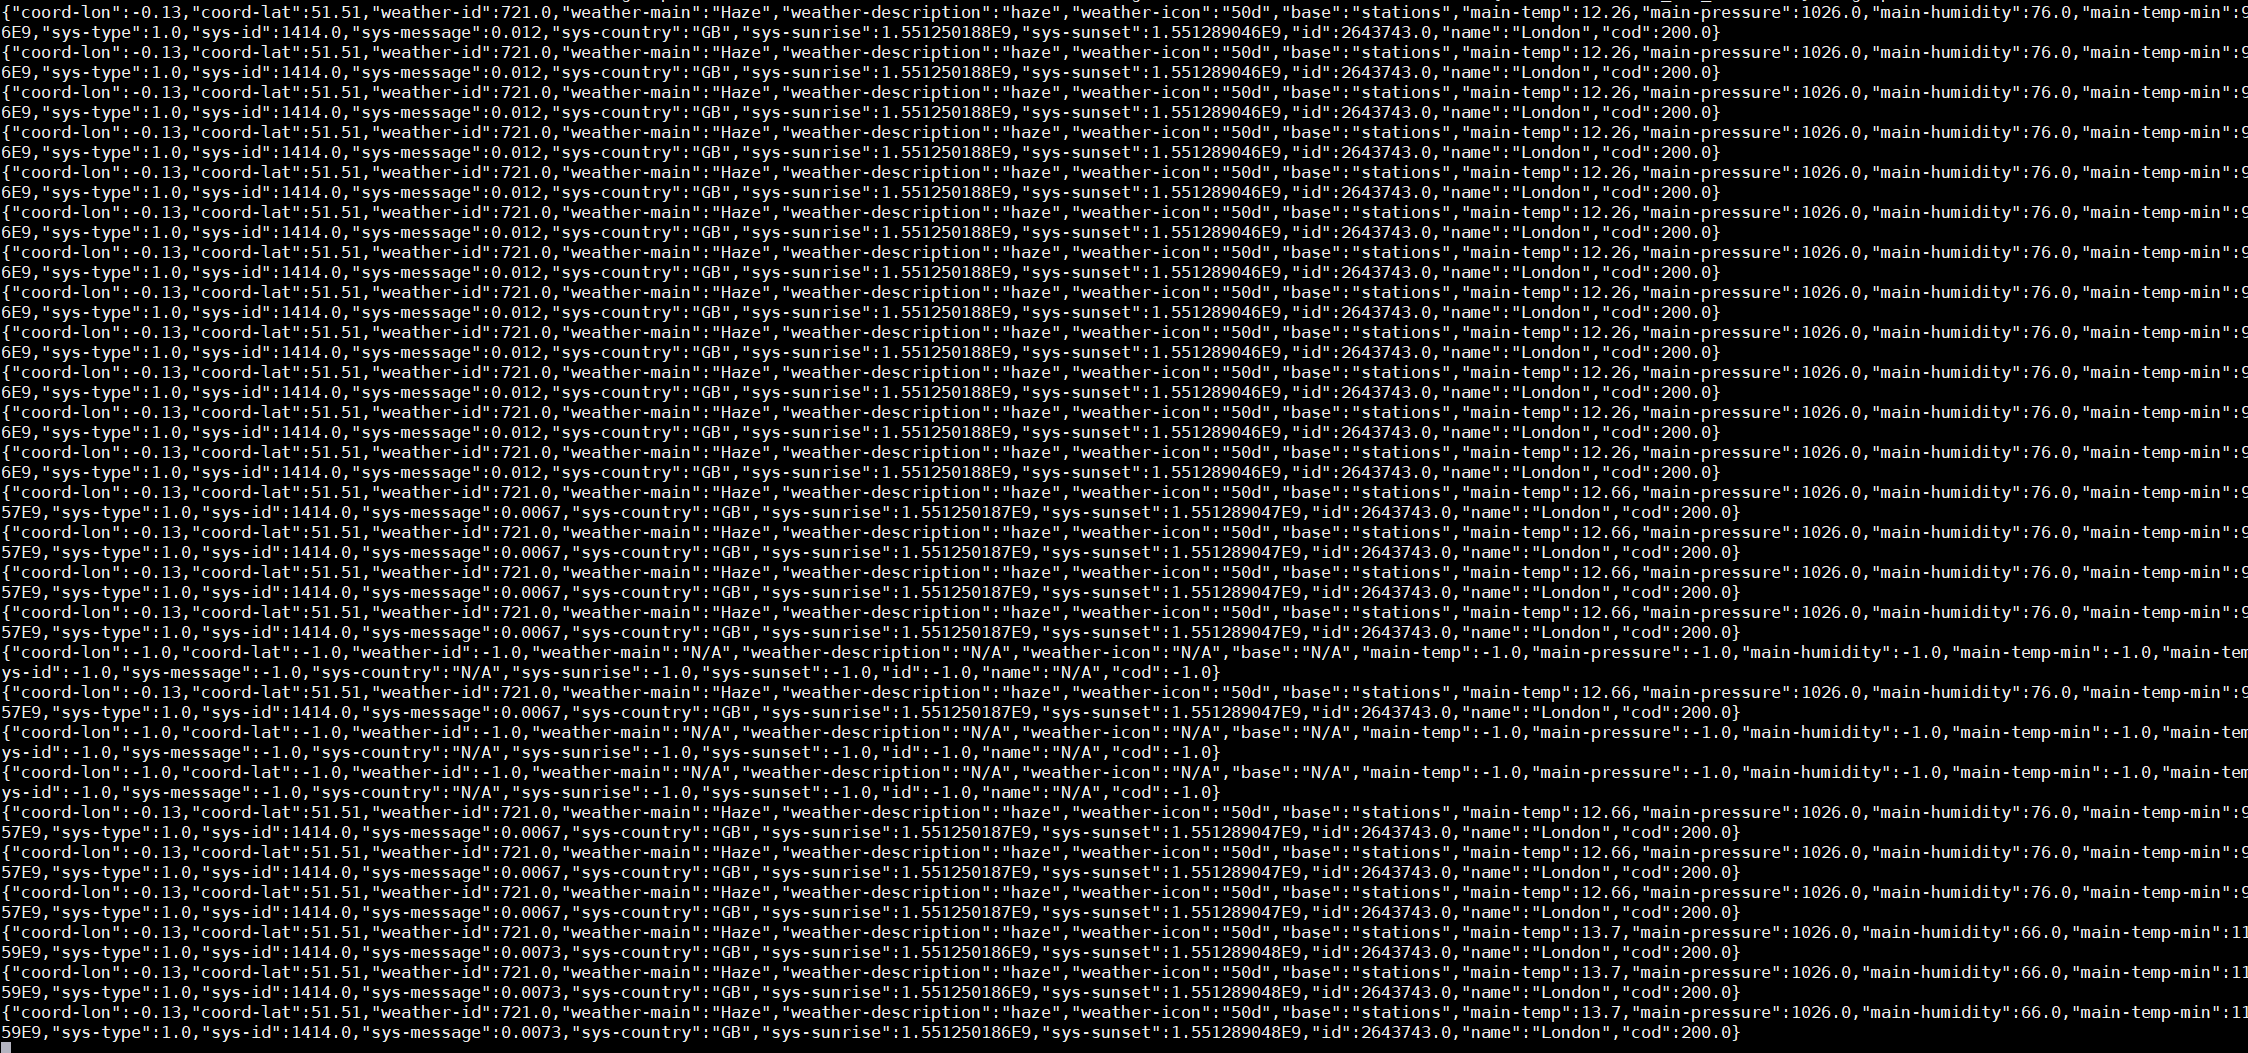
[2019-02-19 14:14:56,569] INFO Weather Schema parser: JSON text to be parsed: {"coord":{"lon":-0.13,"lat":51.51},"weather":[{"id":802,"main":"Clouds","description":"scattered clouds","icon":"03d"}],"base":"stations","main":{"temp":10.09,"pressure":1019,"humidity":61,"temp_min":9,"temp_max":11},"visibility":10000,"wind":{"speed":4.6,"deg":250},"clouds":{"all":44},"dt":1550582400,"sys":{"type":1,"id":1414,"message":0.0038,"country":"GB","sunrise":1550559964,"sunset":1550597002},"id":2643743,"name":"London","cod":200} (com.rittmanmead.kafka.connector.http.HttpSourceTask:273)
[2019-02-19 14:14:57,481] INFO JSON parsed class content: WeatherSchema(Coord(-0.13,51.51),List(WeatherAtom(802.0,Clouds,scattered clouds,03d)),stations,Main(10.09,1019.0,61.0,9.0,11.0),10000.0,Wind(4.6,250.0),Clouds(44.0),1.5505824E9,Sys(1.0,1414.0,0.0038,GB,1.550559964E9,1.550597002E9),2643743.0,London,200.0) (com.rittmanmead.kafka.connector.http.HttpSourceTask:283)
[2019-02-19 14:14:57,499] INFO Got 1 results for CurrentWeatherData (com.rittmanmead.kafka.connector.http.HttpSourceTask:75)Some of the above messages were generated by our Connector directly, like the last line above - 'Got 1 results for CurrentWeatherData'. Others are generated by Kafka itself.
Check Connector Output
Our ultimate goal is to analyse a Kafka Stream with Spark in Scala. However, that will have to wait till my next blog post. For now we can check if the topic is being populated. Please note that our polling interval is 1 minute - the topic will not be flooded with records right away.
$ cd ~/kafka
$ ./bin/kafka-console-consumer.sh --bootstrap-server localhost:9092 --topic JanisTest --from-beginning
If all is going well, you should see Weather records, generated according to our custom-defined schema:
Quite easy, was it not? Certainly setting up a Kafka connector is easier than developing one.
The next step will be analysing this data from Spark. But that will be my next blog post.