Introduction to Oracle Data Science Service Part 1
Creating Data Science Projects and Notebook Sessions, installing and creating kernel environments, and sharing these environments via the OCI Storage Bucket.


Getting started with OCI Data Science Service
The Oracle Cloud Infrastructure (OCI) Data Science service allows you to build, train and deploy Machine Learning (ML) models. Notebook Sessions are created on compute instances of the required shape, and allow you to work with a JupyterLab notebook interface. These Notebook Sessions have access to any open source libraries, Oracle pre-built environments, or you can create and share your own custom environments with other data science users on your OCI tenancy.
To get started you will need the following:
- An OCI tenancy - We assume you already have this;
- A Compartment - To group together data science resources, therefore allowing different groups of users to have different levels of control/access;
- A User group - For the data science team to have the same permissions/ policies on data science resources;
- A Dynamic group - Dynamically defines a group of services and resources, that can then be given permissions via policies to perform required tasks and access resources;
- Policies - A set of rules to allow the user groups and dynamic groups to access the required OCI services, such as Buckets and Vaults;
- Access to an OCI Storage Bucket - For the purpose of saving and sharing environments, data and other artefacts.
In this blog post we will concentrate on creating Data Science Projects and Notebook Sessions, installing and creating kernel environments, and sharing these environments via the OCI Storage Bucket.
Creating Projects and Notebooks
Before creating a data science project, first you need to ensure there is an OCI compartment created to contain your work. In the example below I am using a compartment called DataScience. You can use a pre-existing compartment or create a dedicated compartment for this. Creating a compartment can be done via Identity & Security → Compartments. Depending on your security / policy settings creating a new compartment might be the role of an admin on your OCI tenancy.
A data science project is a collaborative workspace to store your notebook sessions and models.
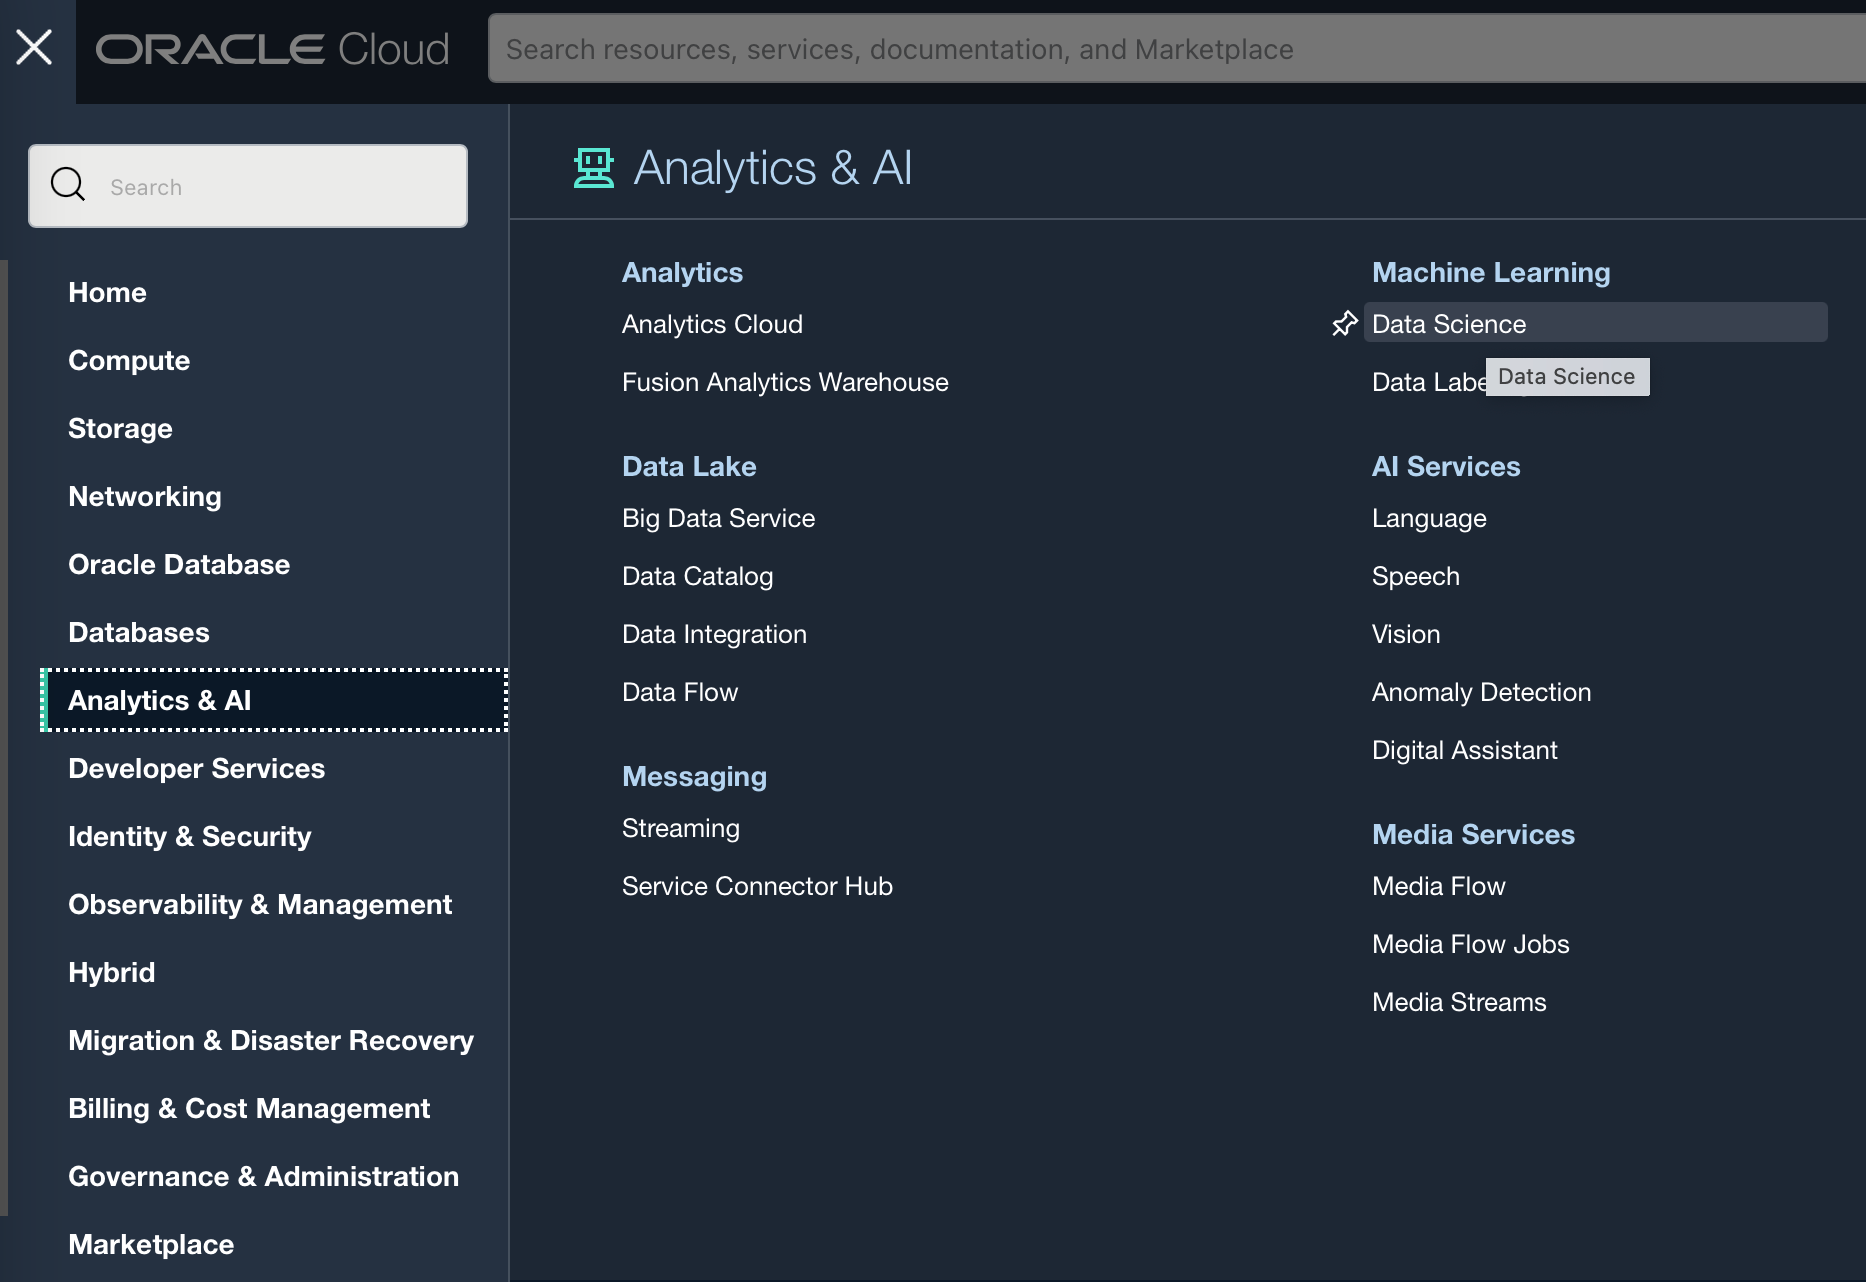
To create a project go to Analytics & AI → Data Science.
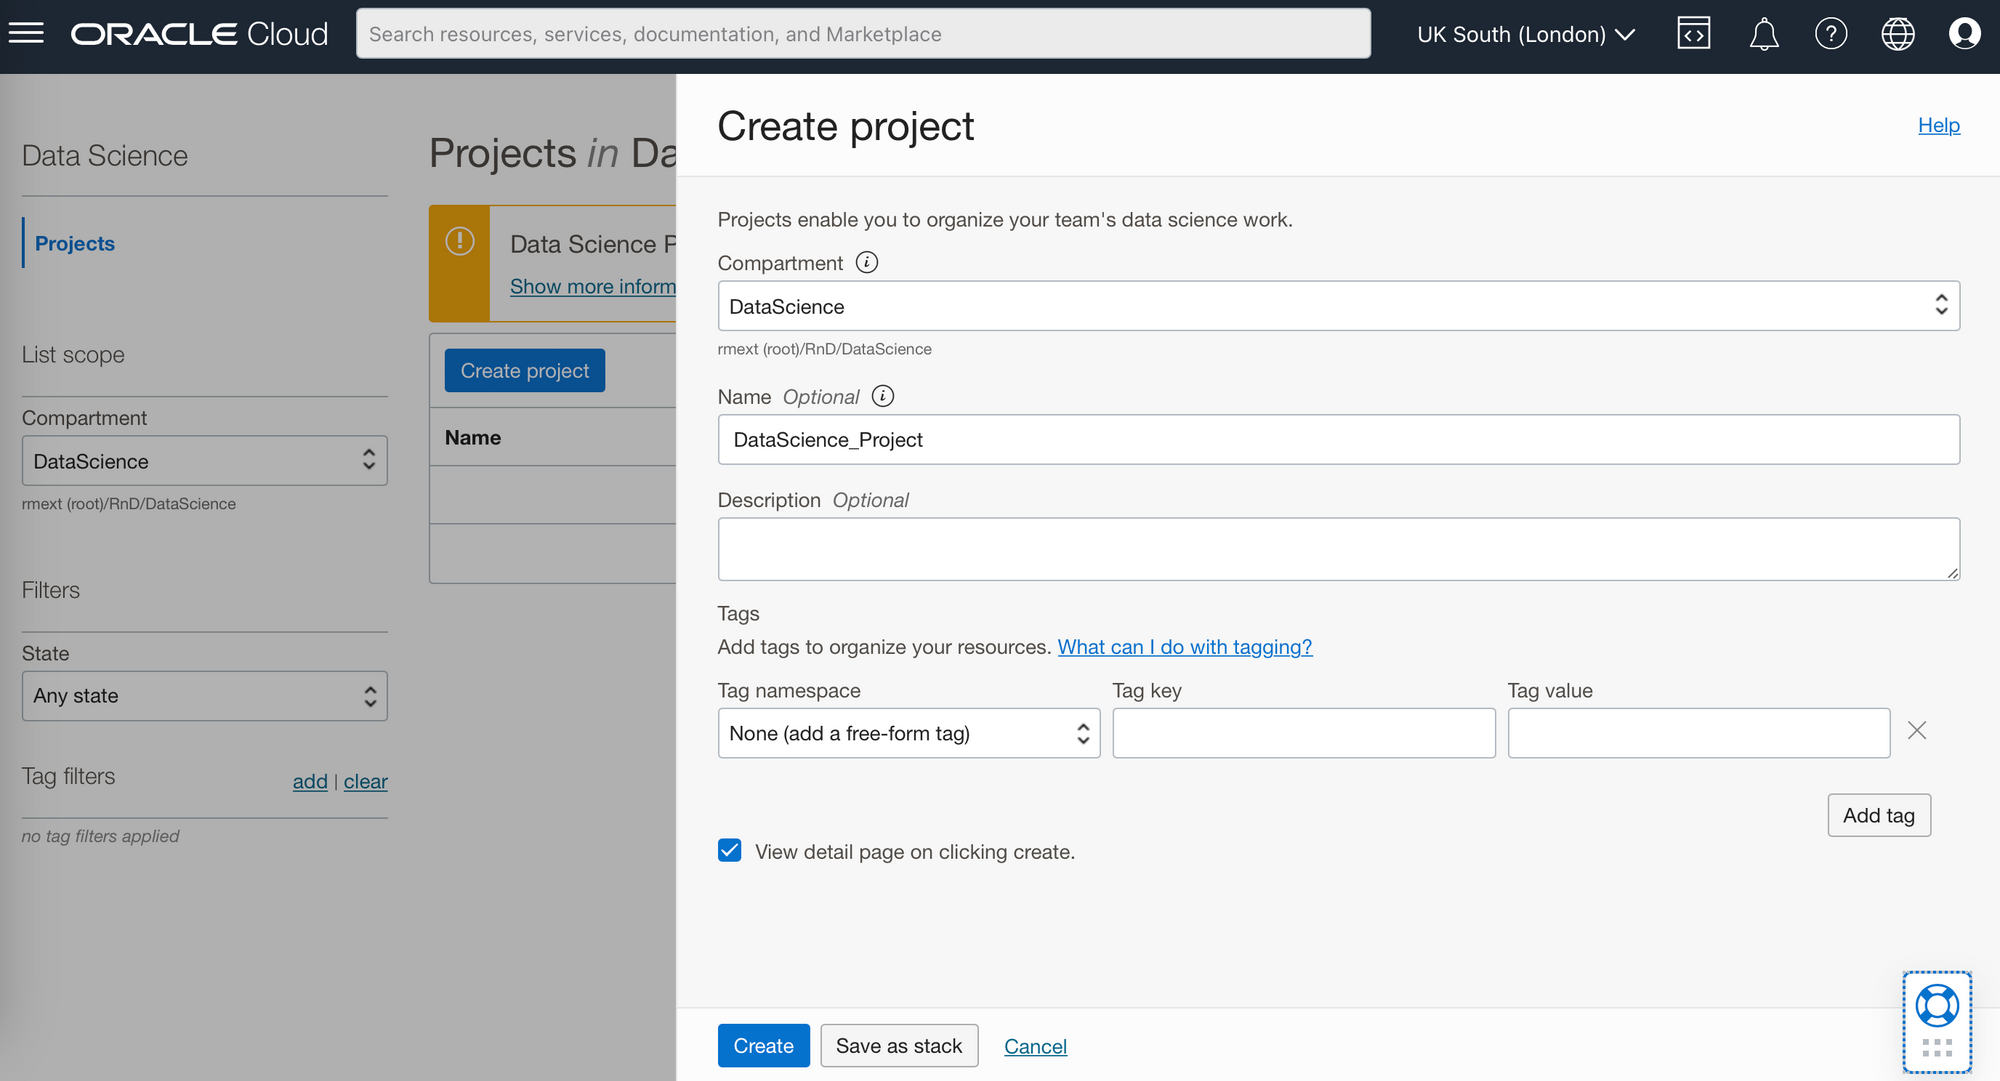
From within your desired compartment you can create a project, here I have created the project: DataScience_Project. You have the option of adding a description, which is useful if you have a range of different projects running concurrently. You can also add tags (e.g. Owner) which will let you keep track of similarly tagged items, for example the cost of items tagged with the same owner or to assign costs to different cost centres or departments.
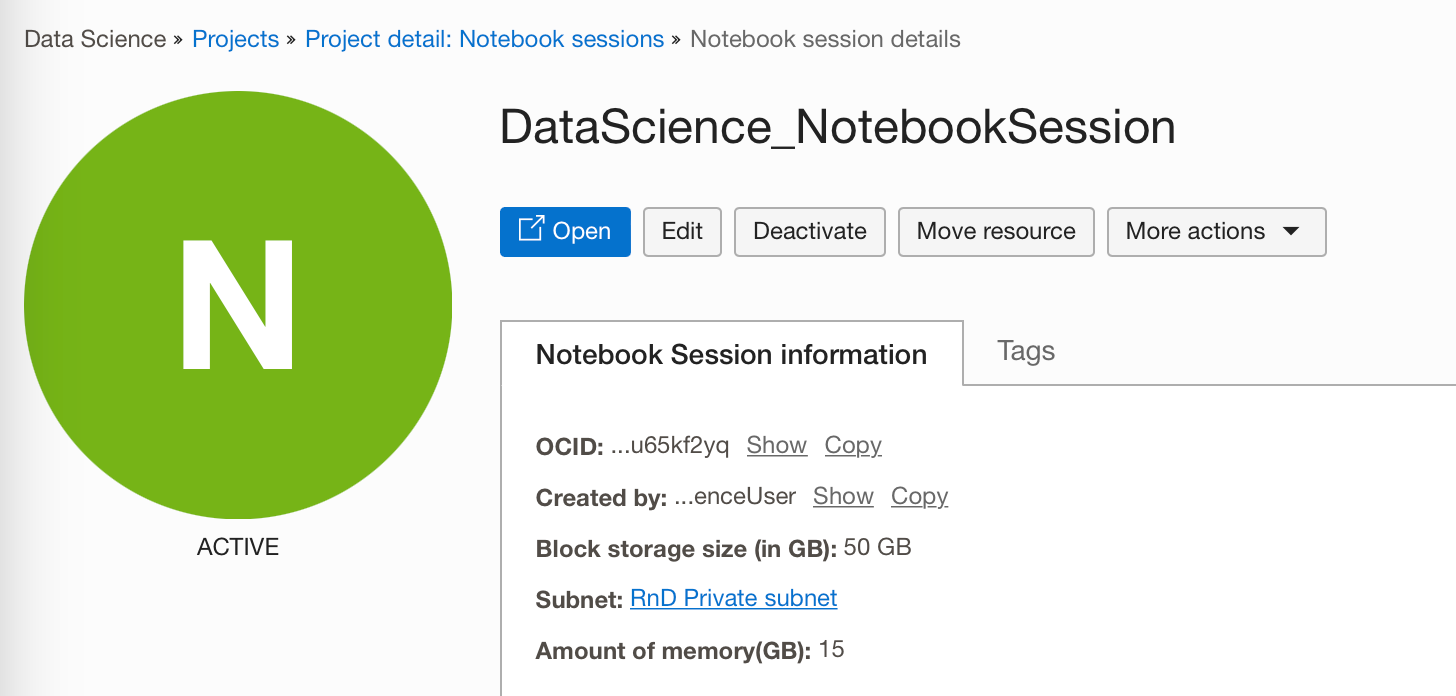
Create a notebook session from within your project. A notebook session creates a JupyterLab interface where you can work in an interactive coding environment to build and train models. Environments come with preinstalled open source libraries and the ability to add others.
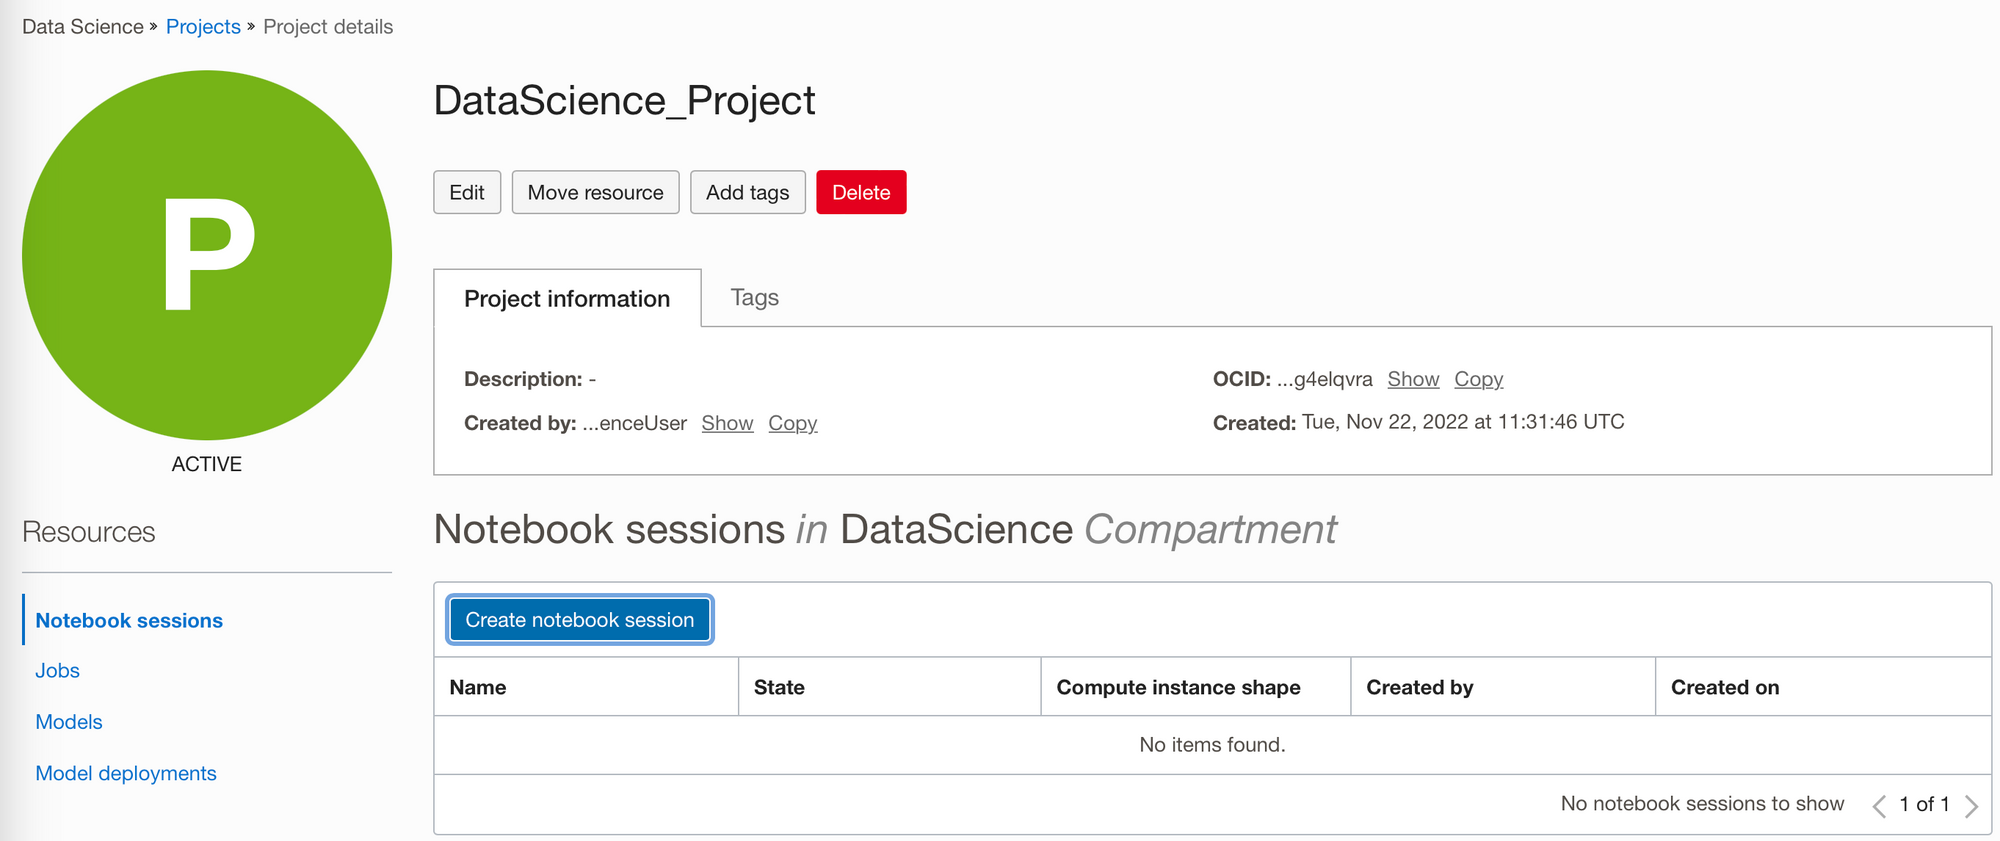
Notebook sessions run in a fully managed infrastructure. When you create a notebook session, you can select CPUs or GPUs, the compute shape, and the amount of storage. In the notebook session I have created I chose the default compute shape, however I chose custom networking, since the Oracle Autonomous Data Warehouse (ADW) I wish to connect to later is on a private subnet. If your ADS (Autonomous Database System), which includes either ADW or ATP (Autonomous Transaction Processing) is publicly accessible you can use the default networking settings.
If you want to change the compute shape of the notebook session after creation, you can do it by deactivating and reactivating it.
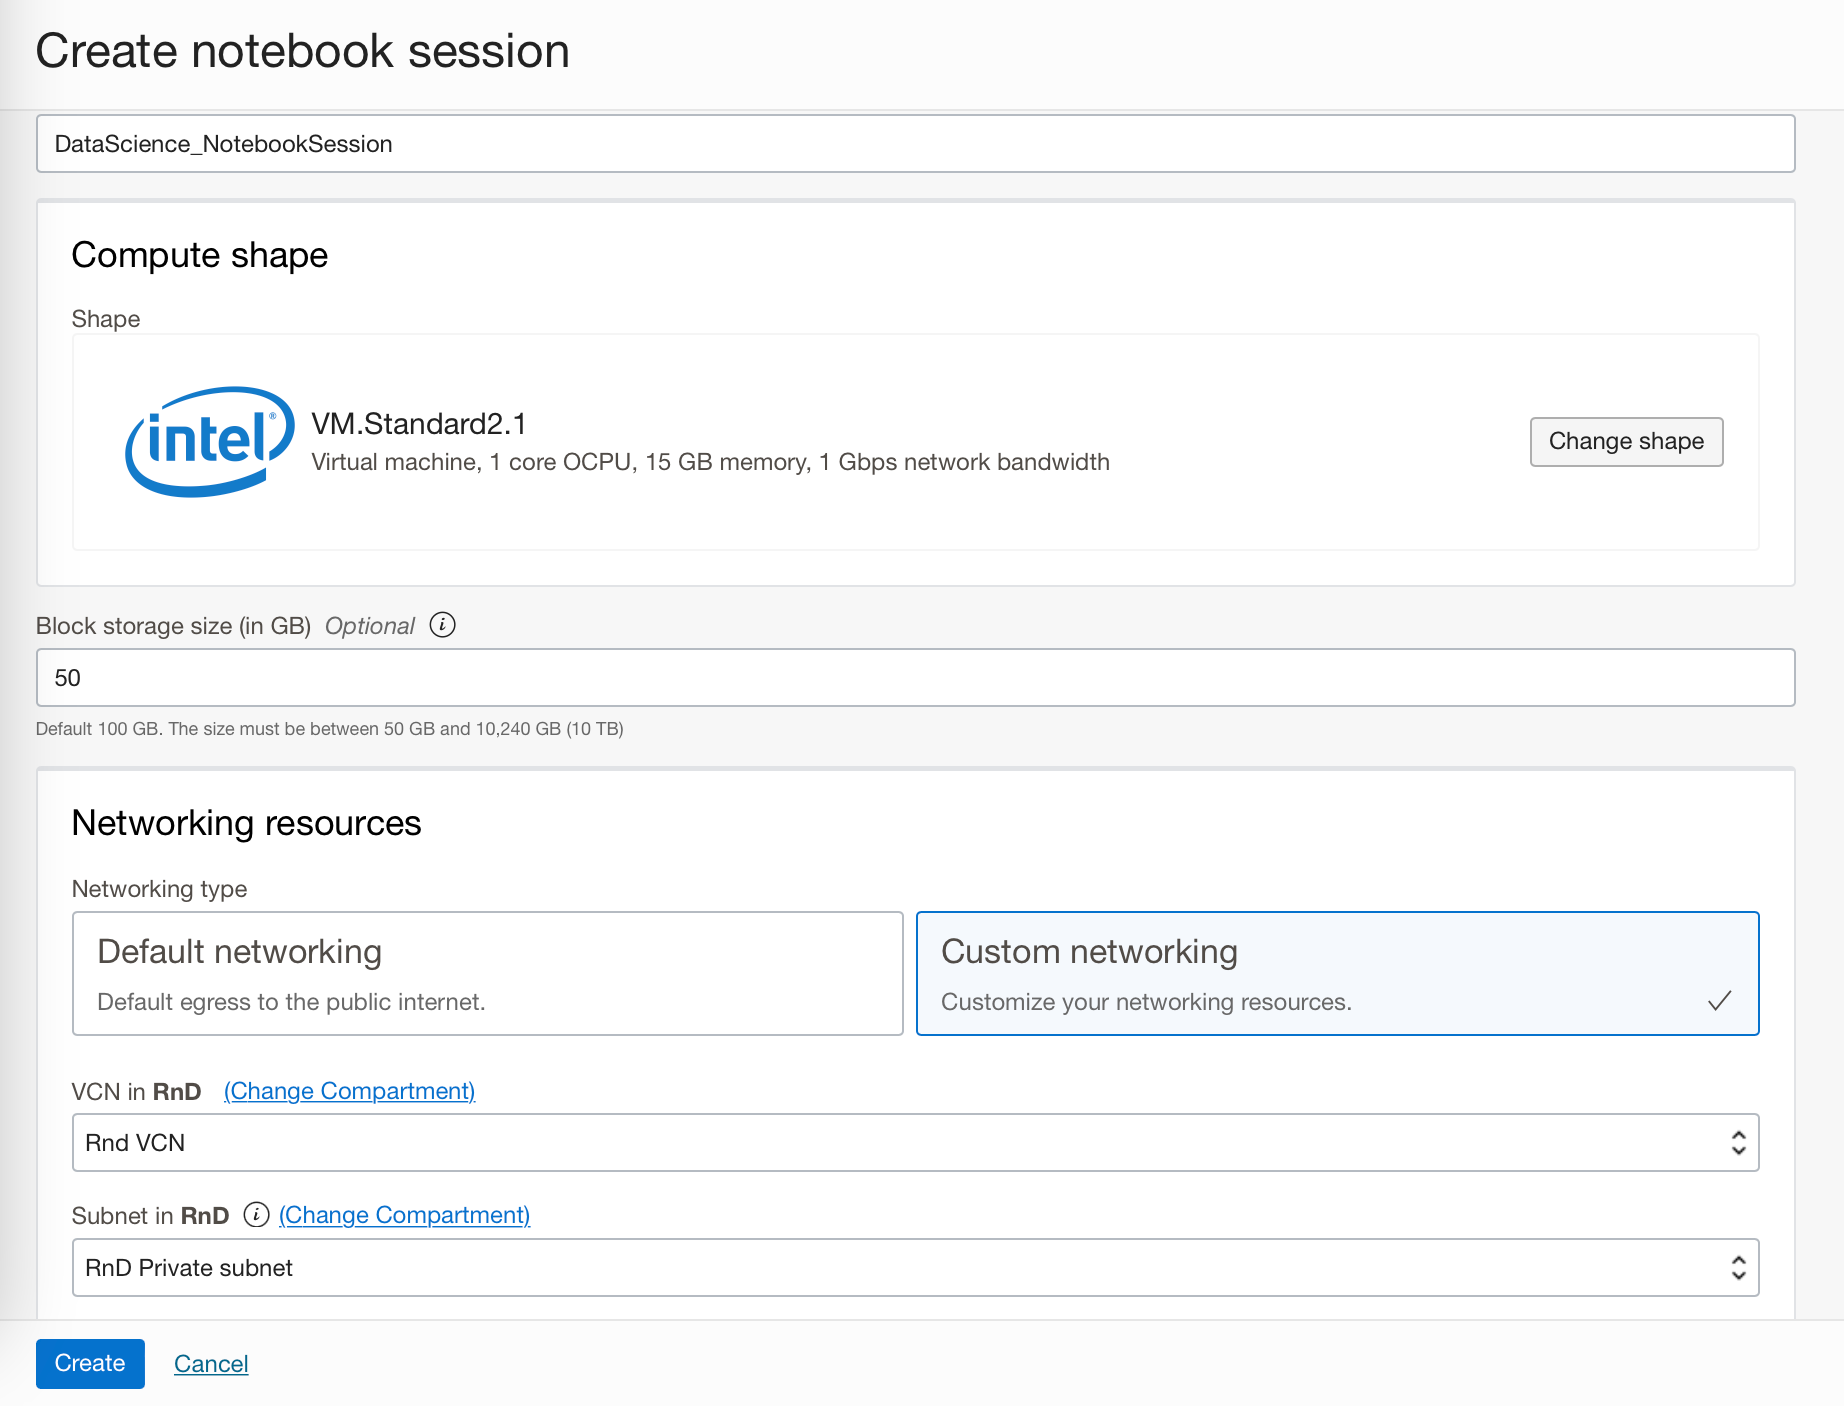
After your notebook session has been created (this will take a few minutes) you can then access the notebook session from within your browser by clicking on the "Open" button.
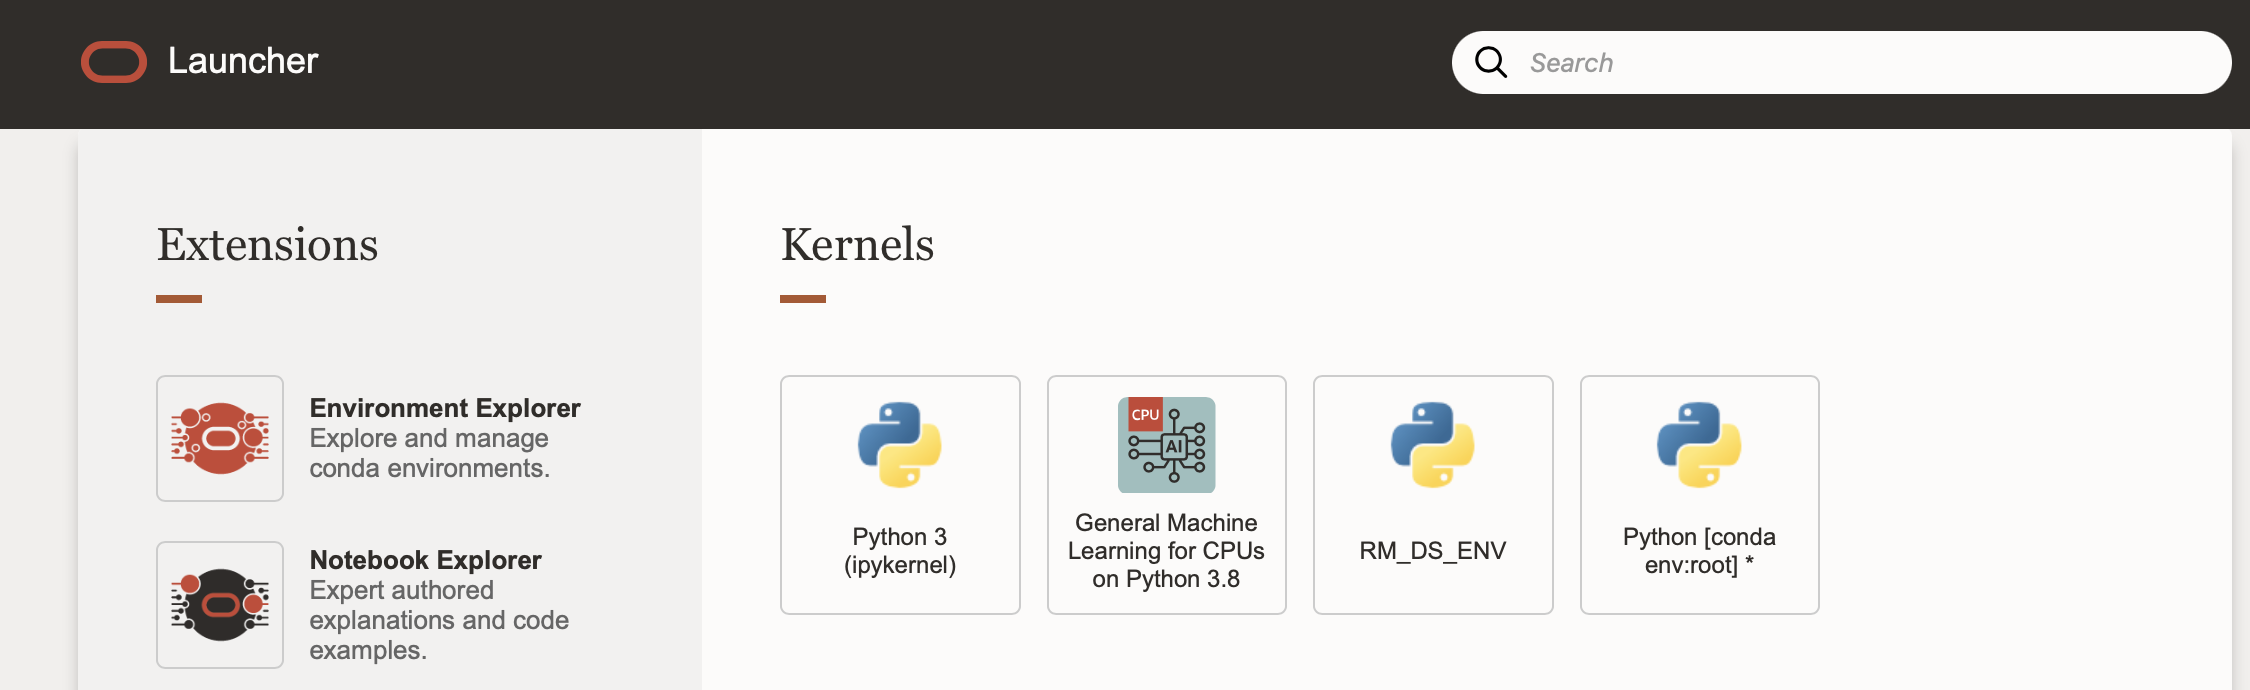
From the launcher tab on the new notebook session you can access a range of functions:
- Create a notebook using the base Conda environment/ kernel;
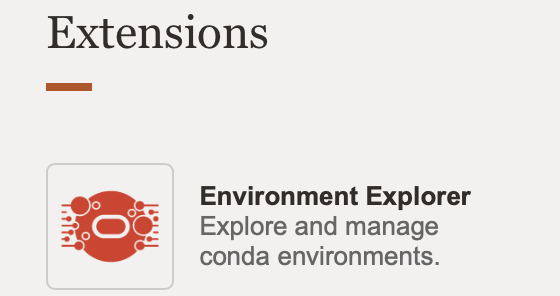
- Browse/install a Conda environment from the Environment Explorer button;
- See example notebooks from the Notebook Explorer button;
- Open a terminal window;
- Create a text file.
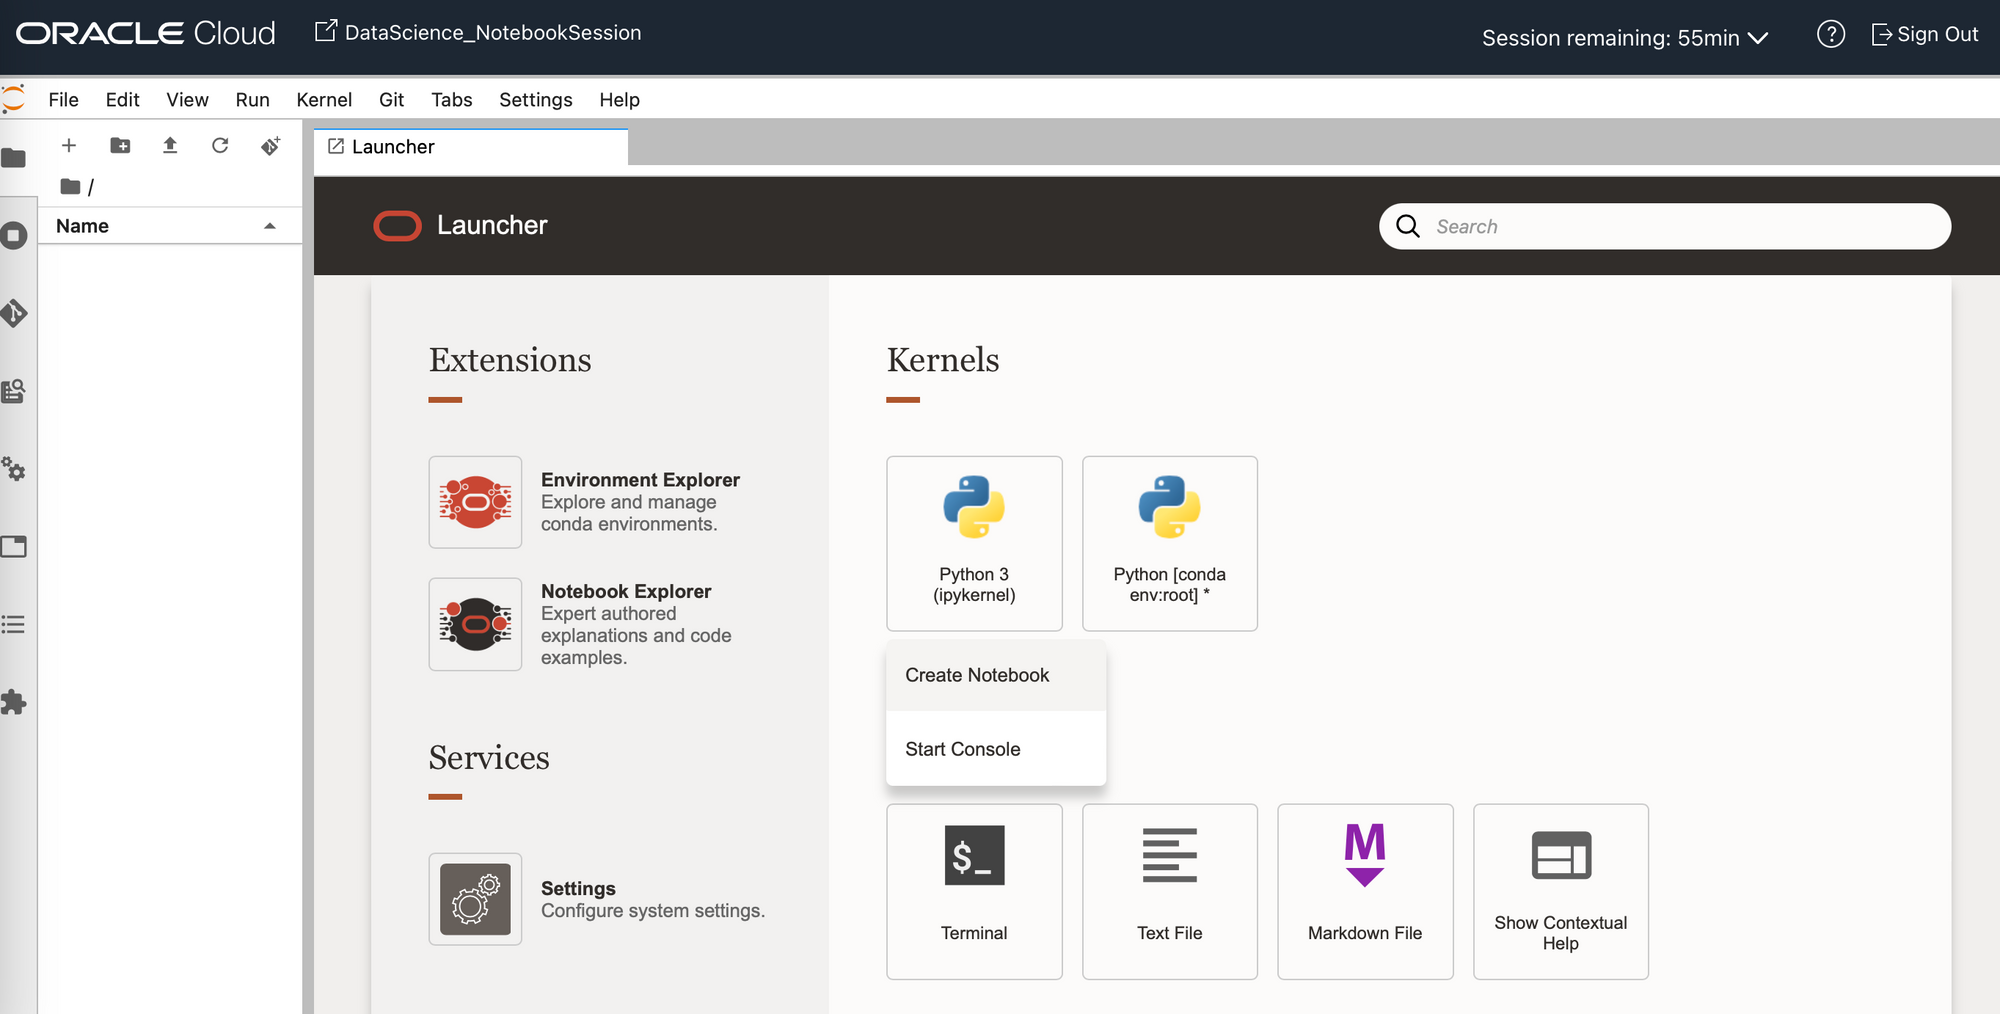
If you create a notebook you will then be able to see a new tab containing a Jupyter notebook. You can identify or change the kernel used in this notebook in the top right hand corner. Notebooks will allow you to execute cells, these cells can include Markdown, Code (Python), or Raw (content that should be included unmodified in nbconvert output for example LaTeX). They will also use the compute instance underneath as a machine, allowing you to read and write to it, create files etc. should you need to. From this first notebook the only python Kernel available will be the base Python 3 kernel, meaning you would only be able to use the libraries included in this base version.

The base Conda environment will only get you so far, and depending on what you would like to use these notebooks for you can either install a pre-made Oracle Conda environment, or create your own Conda environment. Both of these are detailed in the following sections.
Installing a pre-made Conda environment:
To install a pre-made Conda environment go to the Environment Explorer tab:
Here you can see a range of existing Data Science Conda environments which are managed by the OCI Data Science team. (You can identify the environments managed by Oracle as those with a Type "Data Science".)
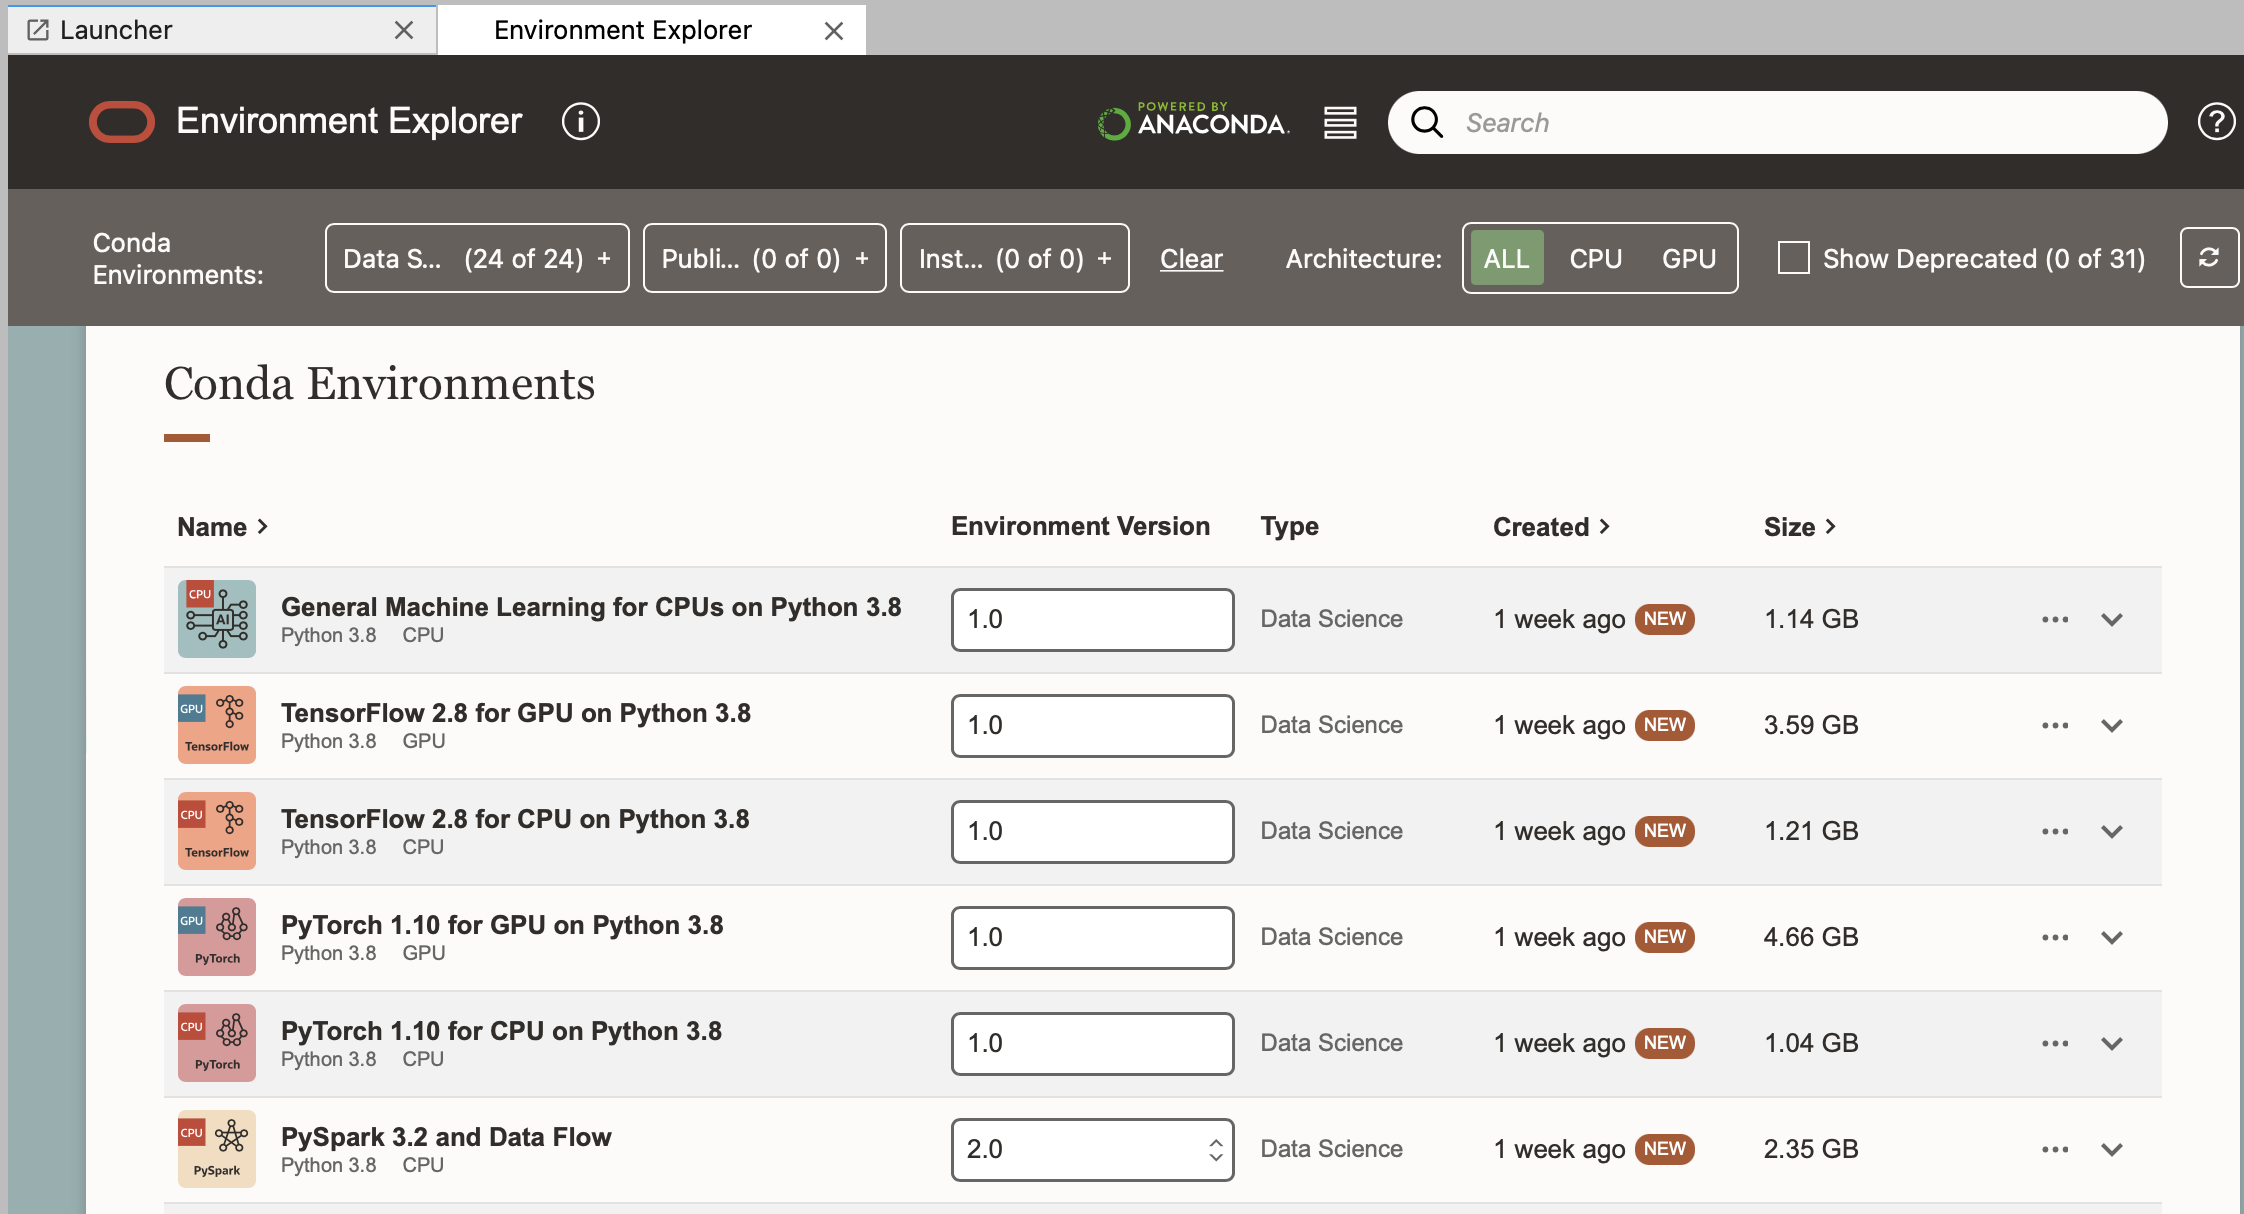
These can be installed using odsc conda install -s <slug_name> from a terminal tab, or from the ellipses on the right.
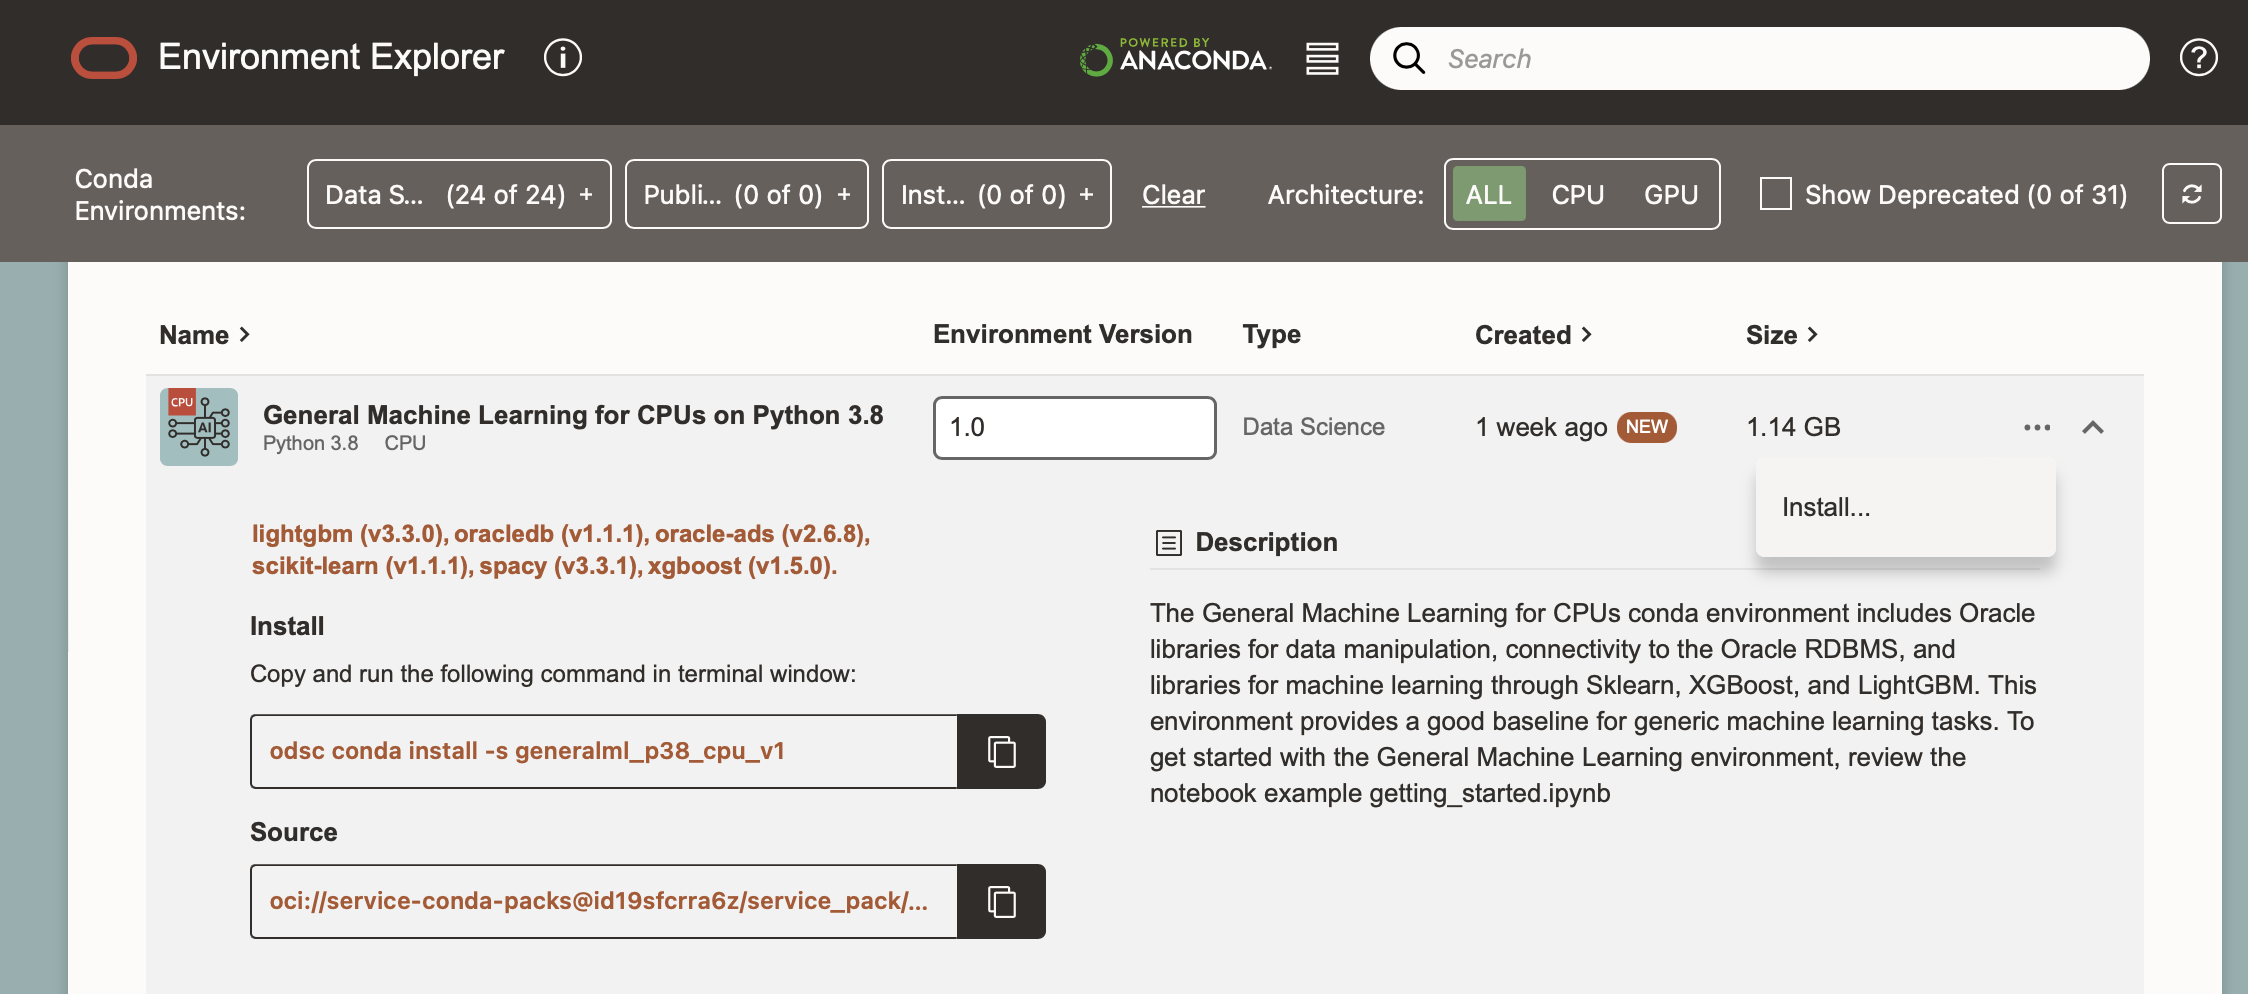
For example, odsc conda install -s generalml_p38_cpu_v1 , where generalml_p38_cpu_v1 is the slug name of the environment.
Once an environment has been installed you will be prompted to run a conda activate command.
conda activate /home/datascience/conda/generalml_p38_cpu_v1
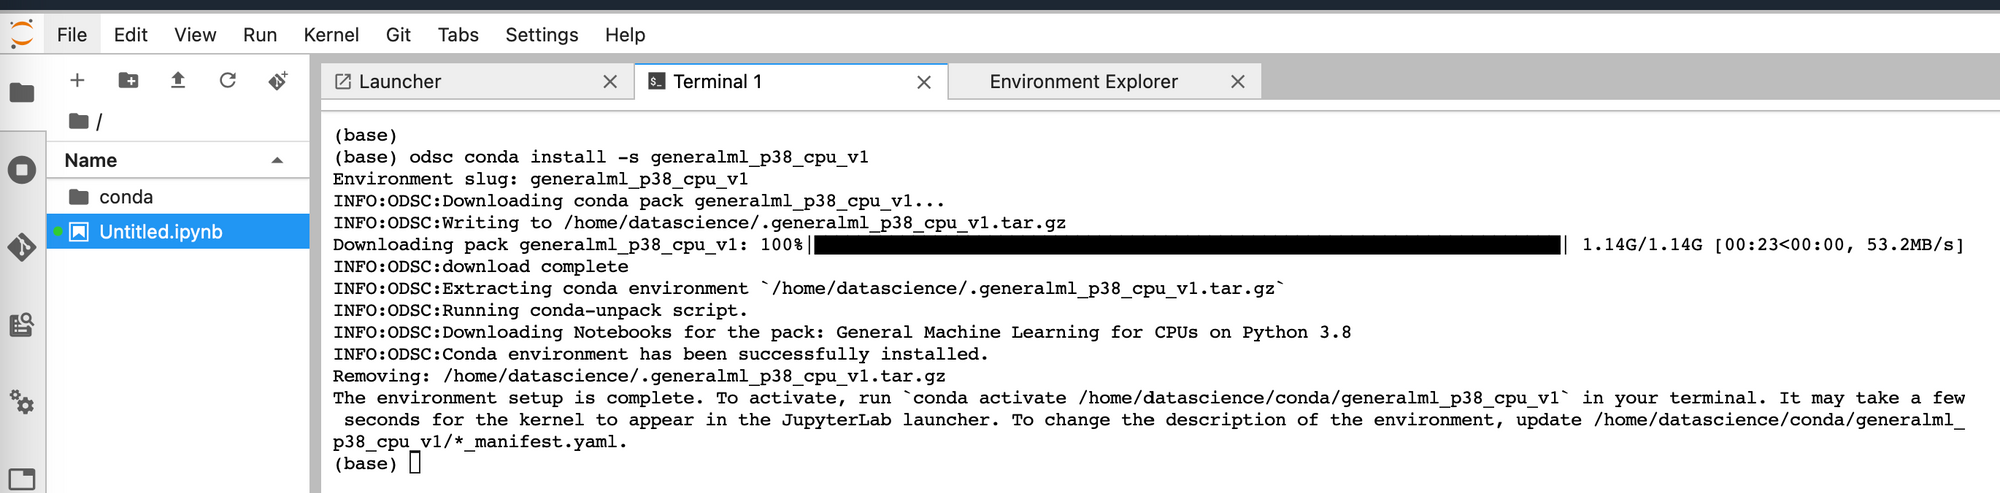
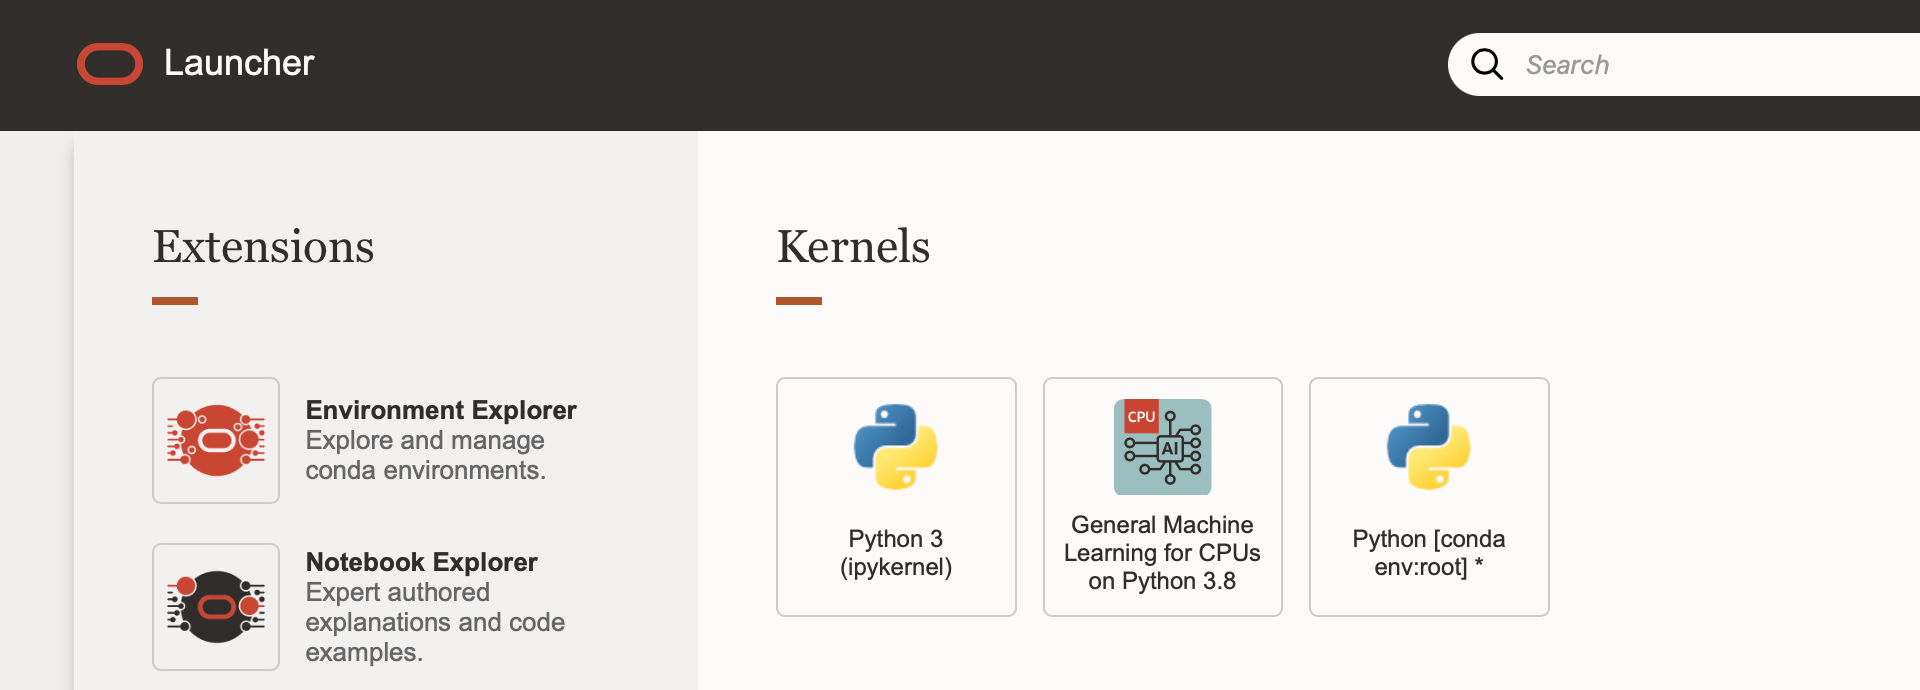
You will be able to see the environment on your instance under the path detailed here. Once the activate command has completed you will also be able to see this environment from the launcher page.
I.e. here we can see the General Machine Learning for CPUs on Python 3.8 environment.
Create or update a Conda environment
To create a custom environment for your needs, you can either start from the base Conda environment, or from an installed Oracle data science environment. Once the environment is activated in the terminal, pip can be used to install any packages required.
To create a custom environment from the base Conda environment run:
odsc conda create -n RM_DS_ENV -v 0.1
Here RM_DS_ENV is the name of the new environment created, and 0.1 is the given version number.
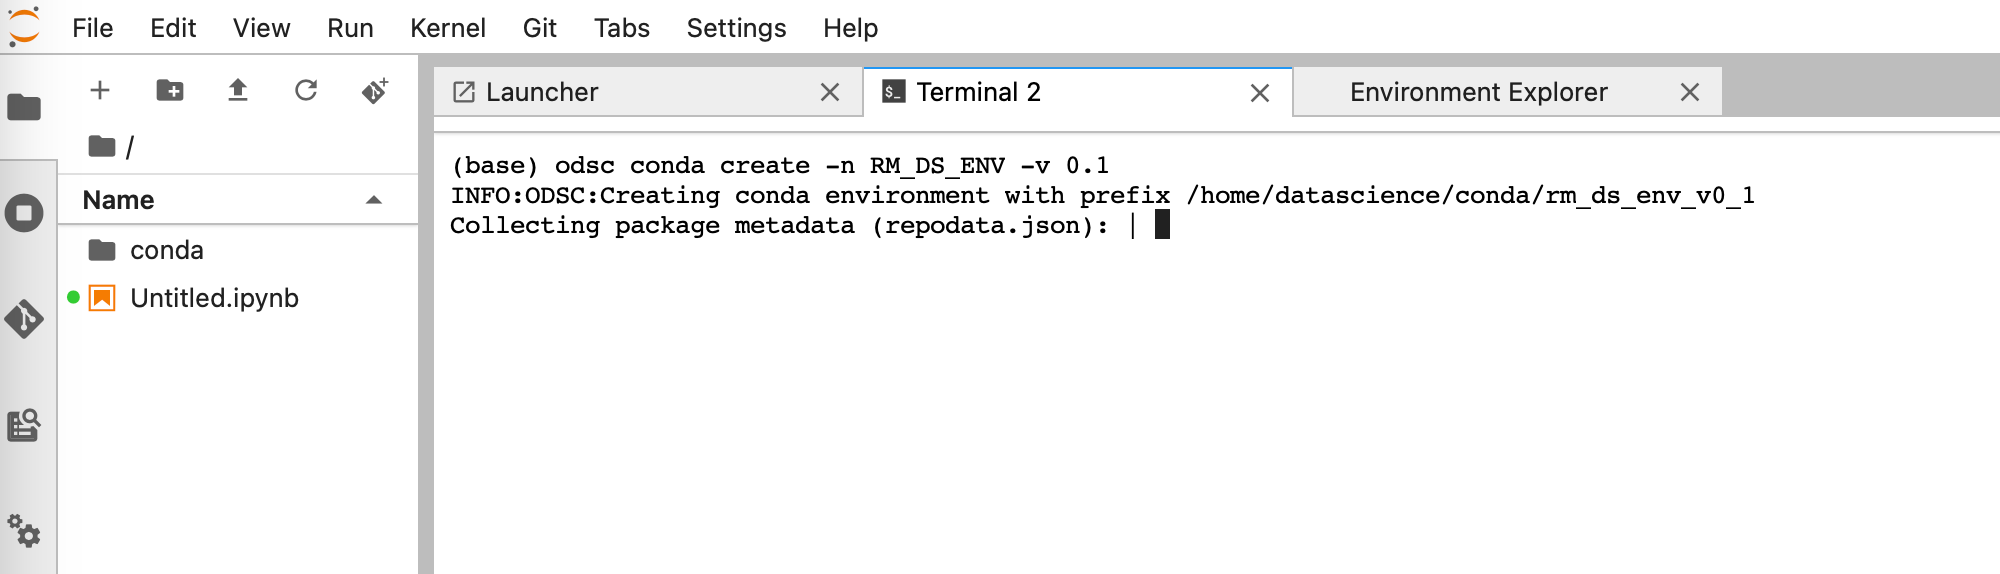
When this has completed, you will be prompted to activate this conda environment with:
conda activate /home/datascience/conda/rm_ds_env_v0_1
The environment can now be seen from the launcher tab and used in notebooks.
From the terminal window, pip can then be used to install any packages required, as you would normally do. For example these Oracle packages:
pip install oracle-ads Oracle Accelerated Data Science.
pip install ocifs Required to connect to OCI file storage.
(Instead of creating a conda environment from scratch you could also use odsc conda clone to create a copy of an installed environment, which you can then modify.)
Saving a Conda environment to an Oracle Storage Bucket
The changes you make to this environment will persist on this notebook session until it is deactivated. However, to save and share these environments with other Data Science users you will need to publish them to an OCI Storage Bucket.
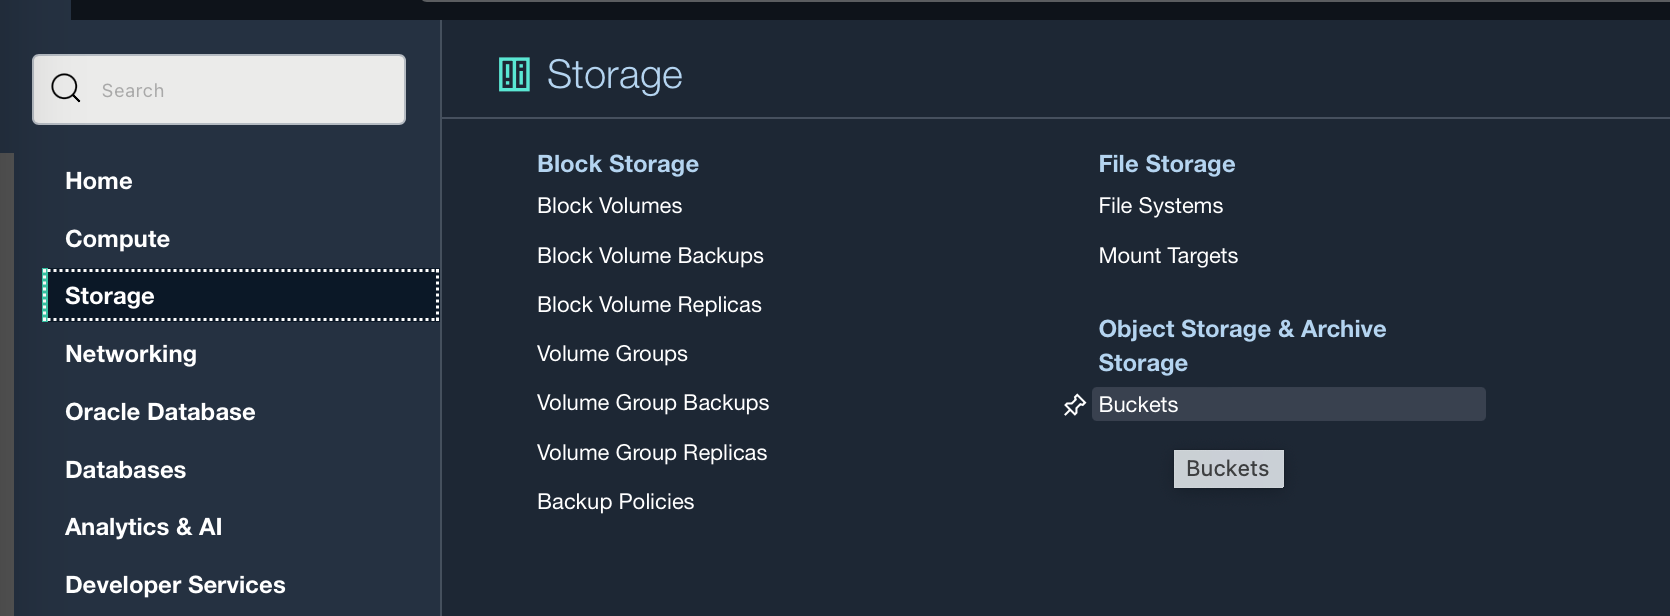
If you do not already have a storage bucket to use, you can create one from Storage → Buckets.
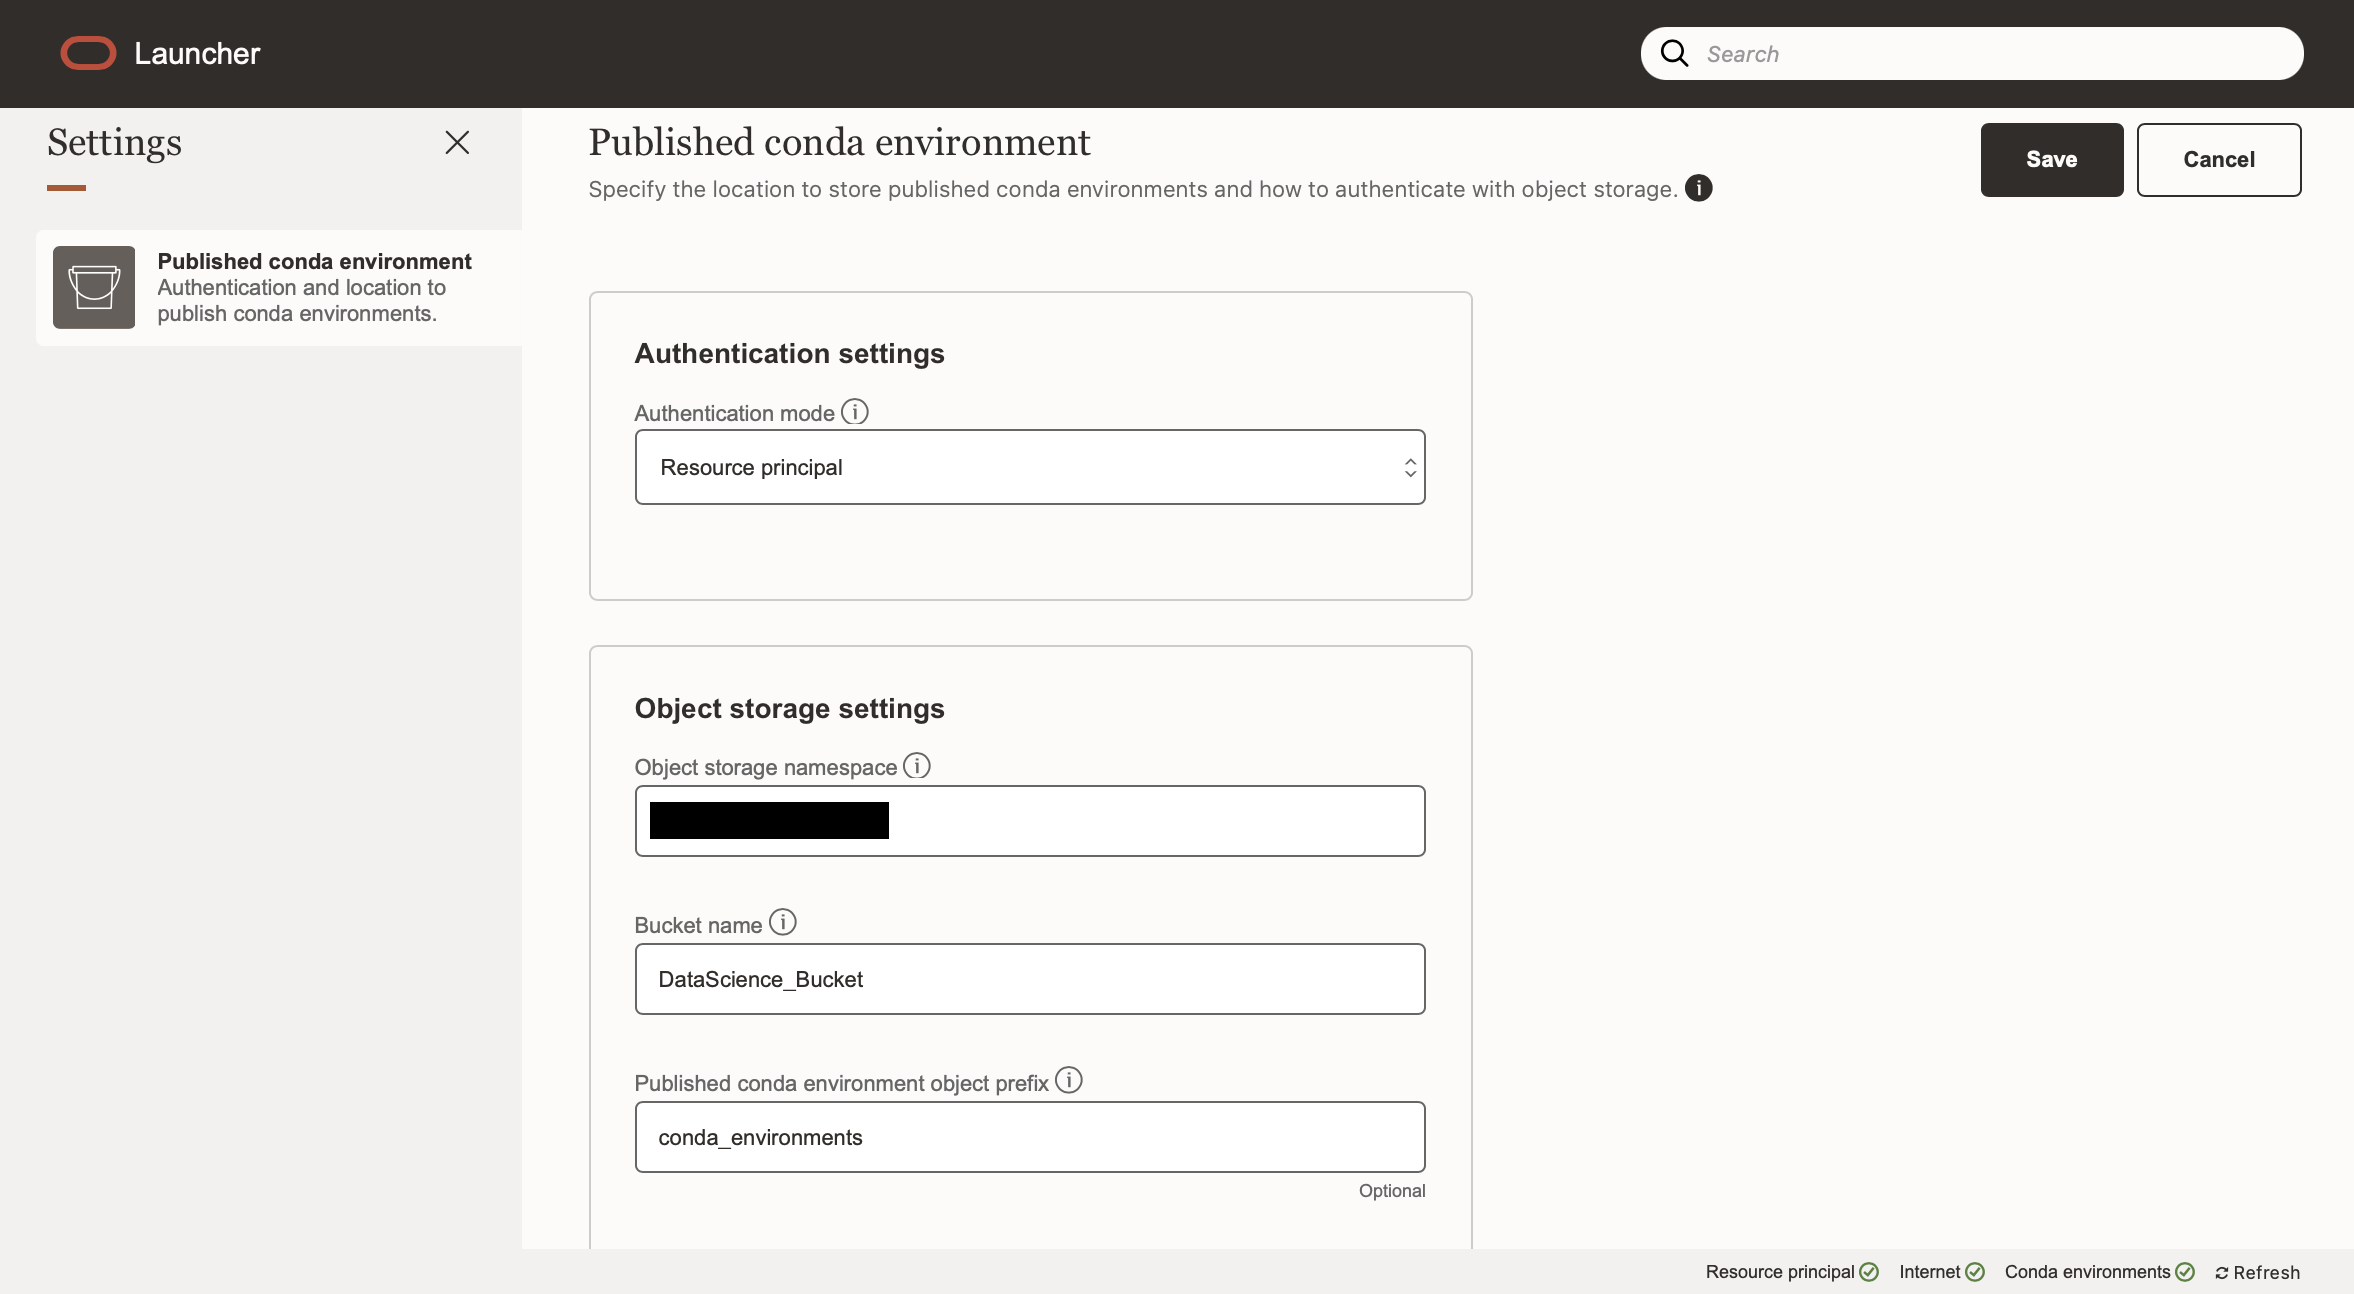
The Bucket I am using here is called DataScience_Bucket, you will need to know the object storage namespace and bucket name of the bucket you intend to use.
Your notebook session can be connected to a storage bucket using “Resource Principal”, as long as your dynamic group has policies to “use” buckets and to “manage” object-family. Otherwise they can be connected using an API key.
Go to Settings under the Launcher tab, then then select “Resource Principal” as your Authentication mode, and fill in the namespace and bucket name.
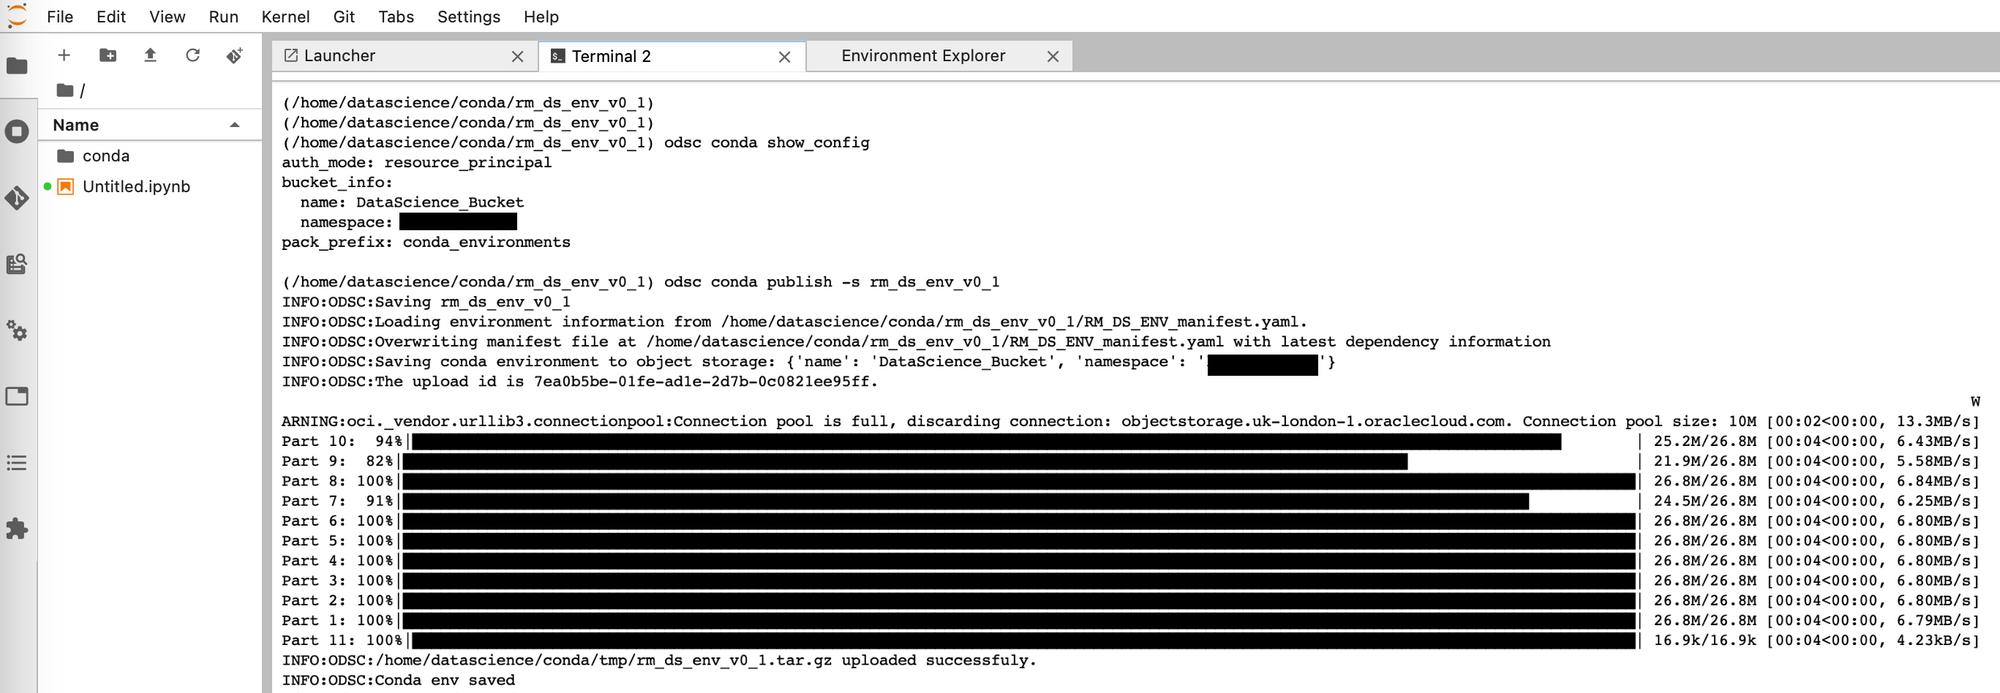
After creating this connection to the storage bucket you can publish your conda environment to the bucket, allowing it to be seen and used by anyone with access to the Bucket.
odsc conda publish -s rm_ds_env_v0_1
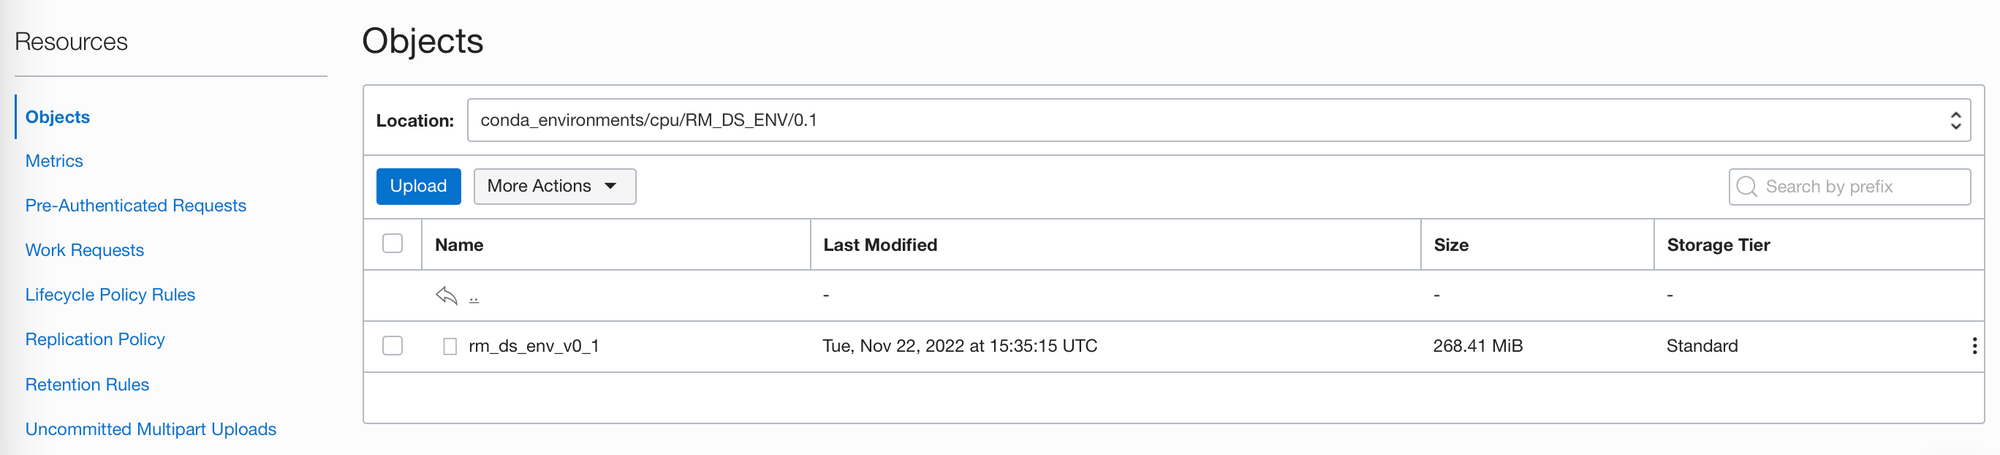
Once publishing is complete, you will be able to see the environment stored in your bucket:
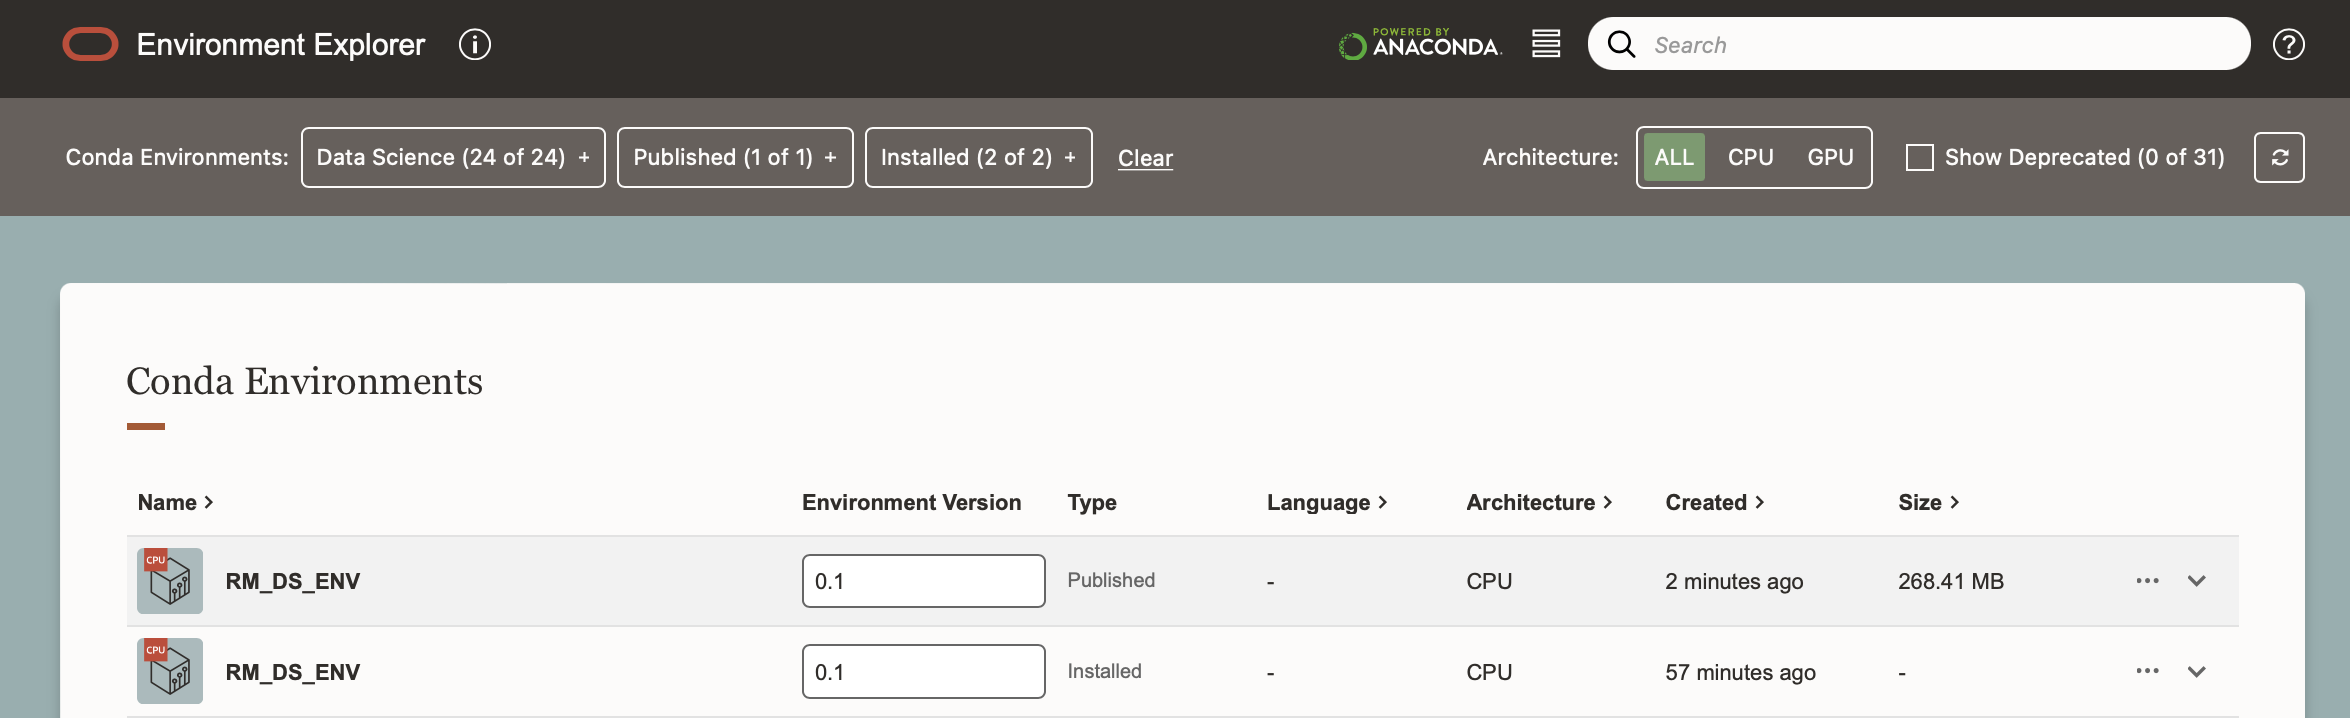
You will also be able to see the environment in the Environment Explorer.
Any other users who can connect to that bucket will be able to install your custom environment.
Editing or updating this environment is as simple as cloning the environment, creating a new version number, adding or updating packages using pip, and then publishing the new version to the storage bucket.
odsc conda clone -f rm_ds_env_v0_1 -e RM_DS_ENV
Version number [0.1]? 0.2
Activate the environment using:
conda activate /home/datascience/conda/rm_ds_env_v0_2Install or update packages from within the terminal then publish the new edited environment back to storage bucket using:
odsc conda publish -s rm_ds_env_v0_2Summary
In this post we've covered requirements for creating and using OCI Data Science Service Notebooks; creating projects and notebook sessions; as well as installing, modifying, and sharing Conda environments via the OCI Storage bucket.
Coming up in Part 2:
In Part 2 we will investigate the oracle-ads package, creating and using secrets to connect to an ADS (Autonomous Database System), as well as reading and writing data from both the ADS and an OCI Storage Bucket.