An Initial Introduction to OCI Queue with OCI Python SDK

In the world of distributed systems and microservices, message queues play a vital role in enabling reliable communication between components. Oracle Cloud Infrastructure (OCI) offers a robust and scalable message queuing service that simplifies the process of building event-driven architectures. The OCI Queue Service introduces a simple concept: publish messages to a persistent store and enable consumers to retrieve them from the store in the order they were received, following the First-In-First-Out (FIFO) principle.
OCI Queue is a fully managed, highly available and durable messaging service provided by Oracle Cloud. It allows developers to decouple the sending and receiving of messages, facilitating asynchronous communication between various system components. By leveraging OCI Queue we can build scalable, fault-tolerant and most importantly event-driven architectures
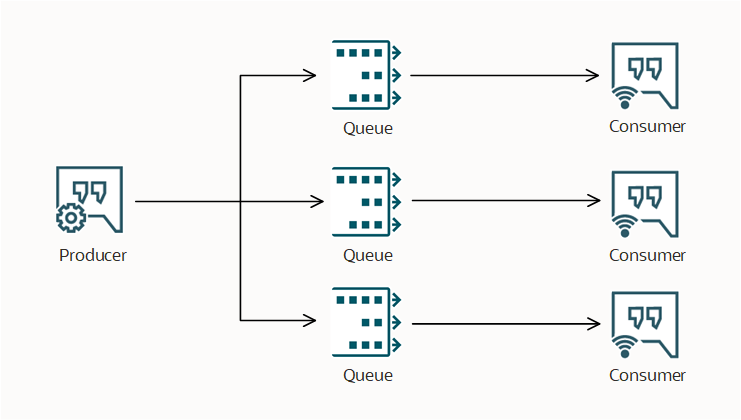
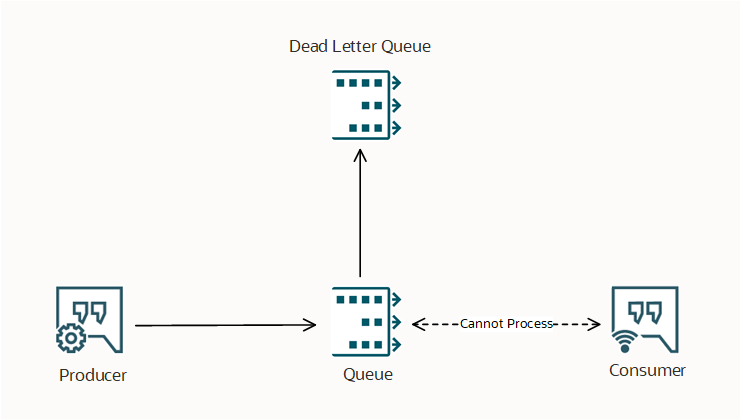
The OCI Queue allows multiple producers to send messages to a shared queue. Several consumers can inquire the queue to fetch messages and contend for their processing, yet only one consumer will ultimately receive each message (without any dissemination). Once a message is successfully consumed by a consumer, it is considered processed and will not be delivered to other consumers. However, if a consumer fails to report success, the message will become available again for another consumer to process. It is important to note that OCI Queue does not include the concept of subscriptions for message delivery.

OCI Queue can be accessed through REST API calls or the STOMP protocol (Simple Text Oriented Messaging Protocol), allowing seamless interaction with the service. STOMP clients can directly connect to OCI Queue for native communication. Additionally, the OCI SDKs for popular languages like Java, Python, and Go, as well as the OCI CLI. In this blog, we will focus on the Python SDK.
Create a new Queue
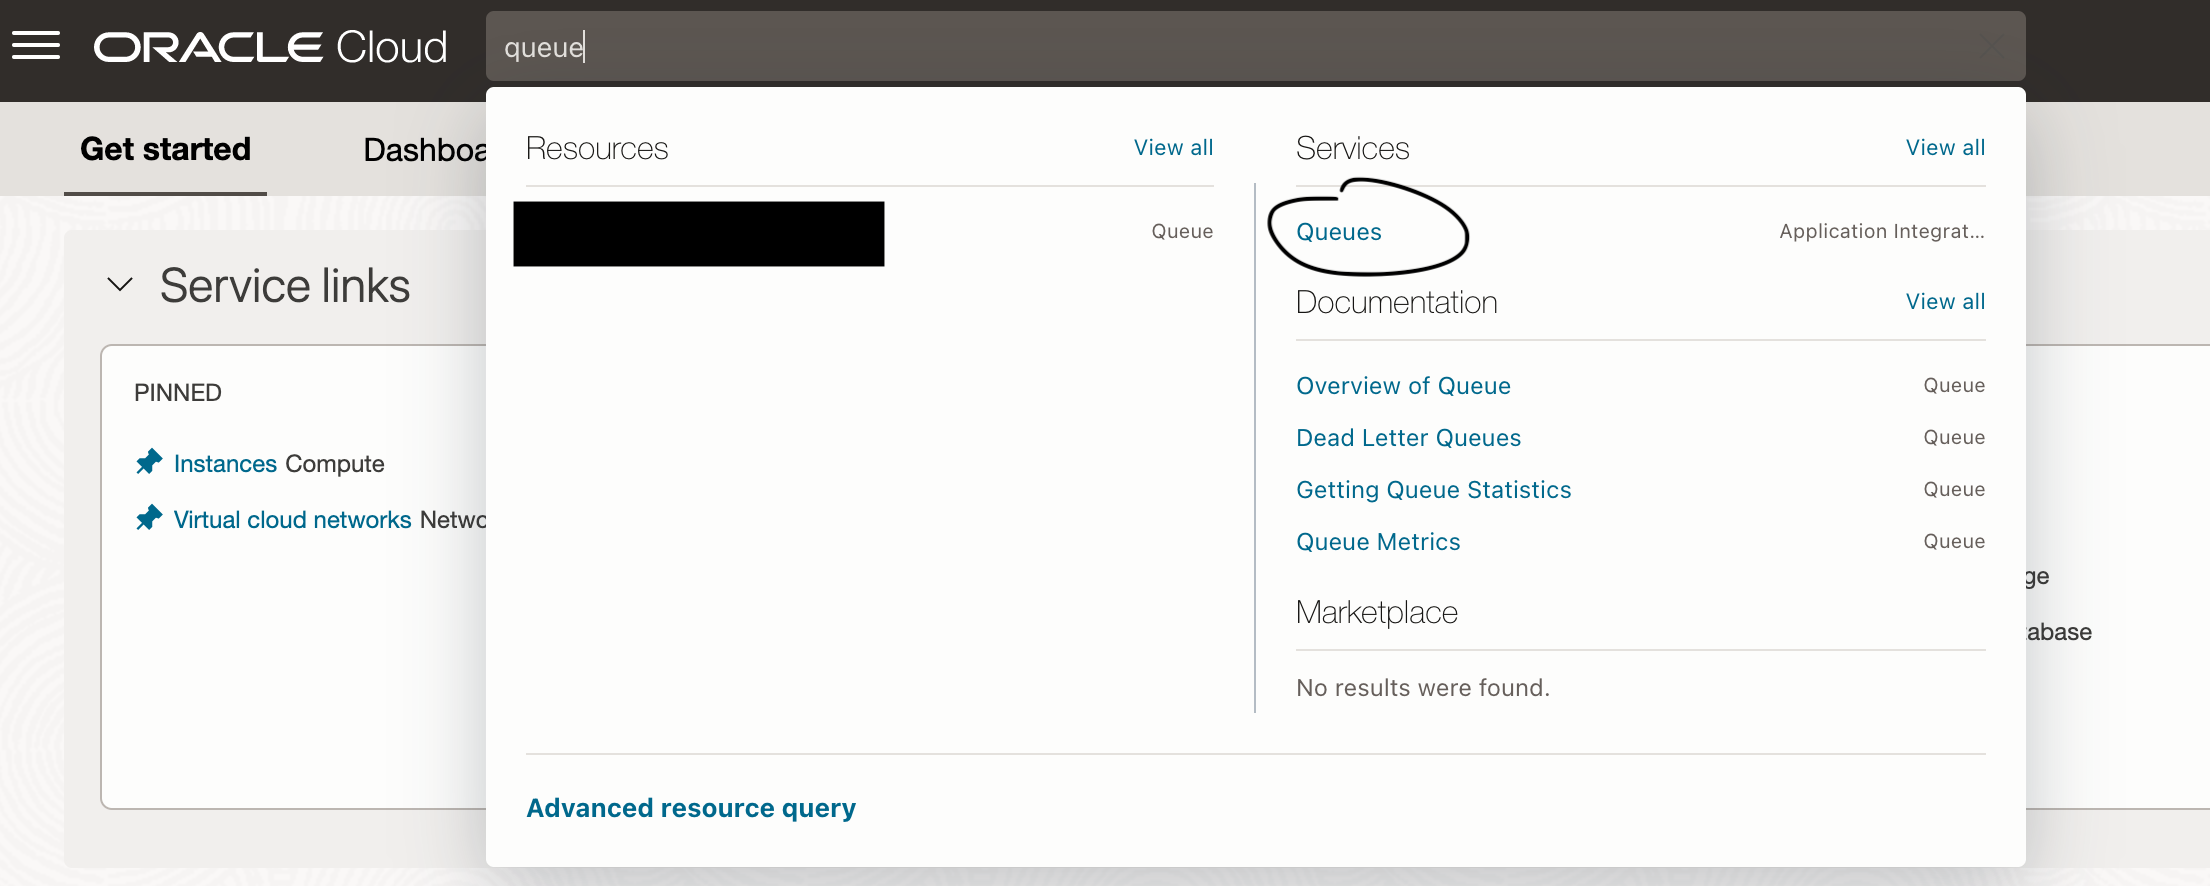
Access the Queue service in your OCI account. This can easily be done by searching for “Queue” in the search bar
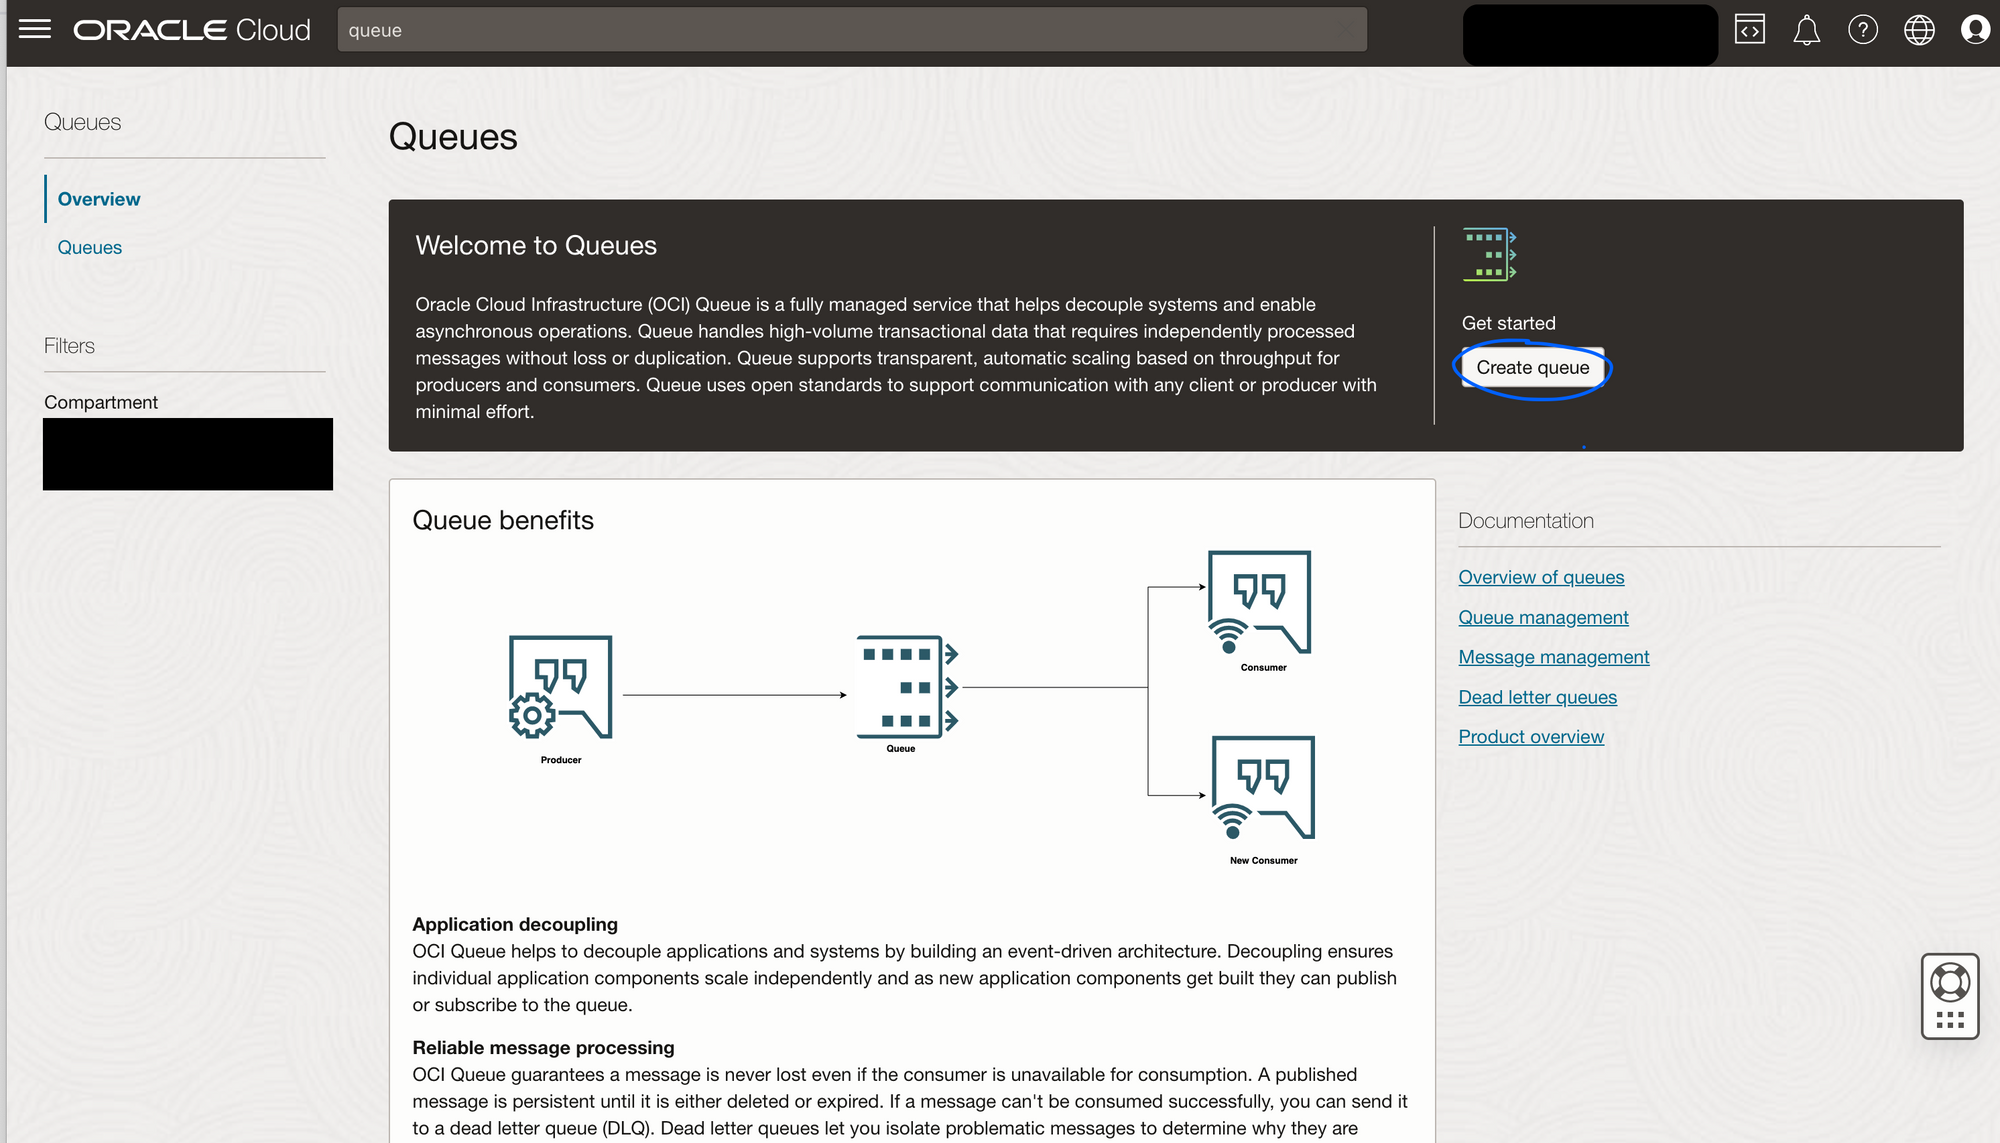
In the Queue overview page click on Create Queue.
Type the name of the queue and select the compartment where the queue should be created - We used hello_world and compartment RnD
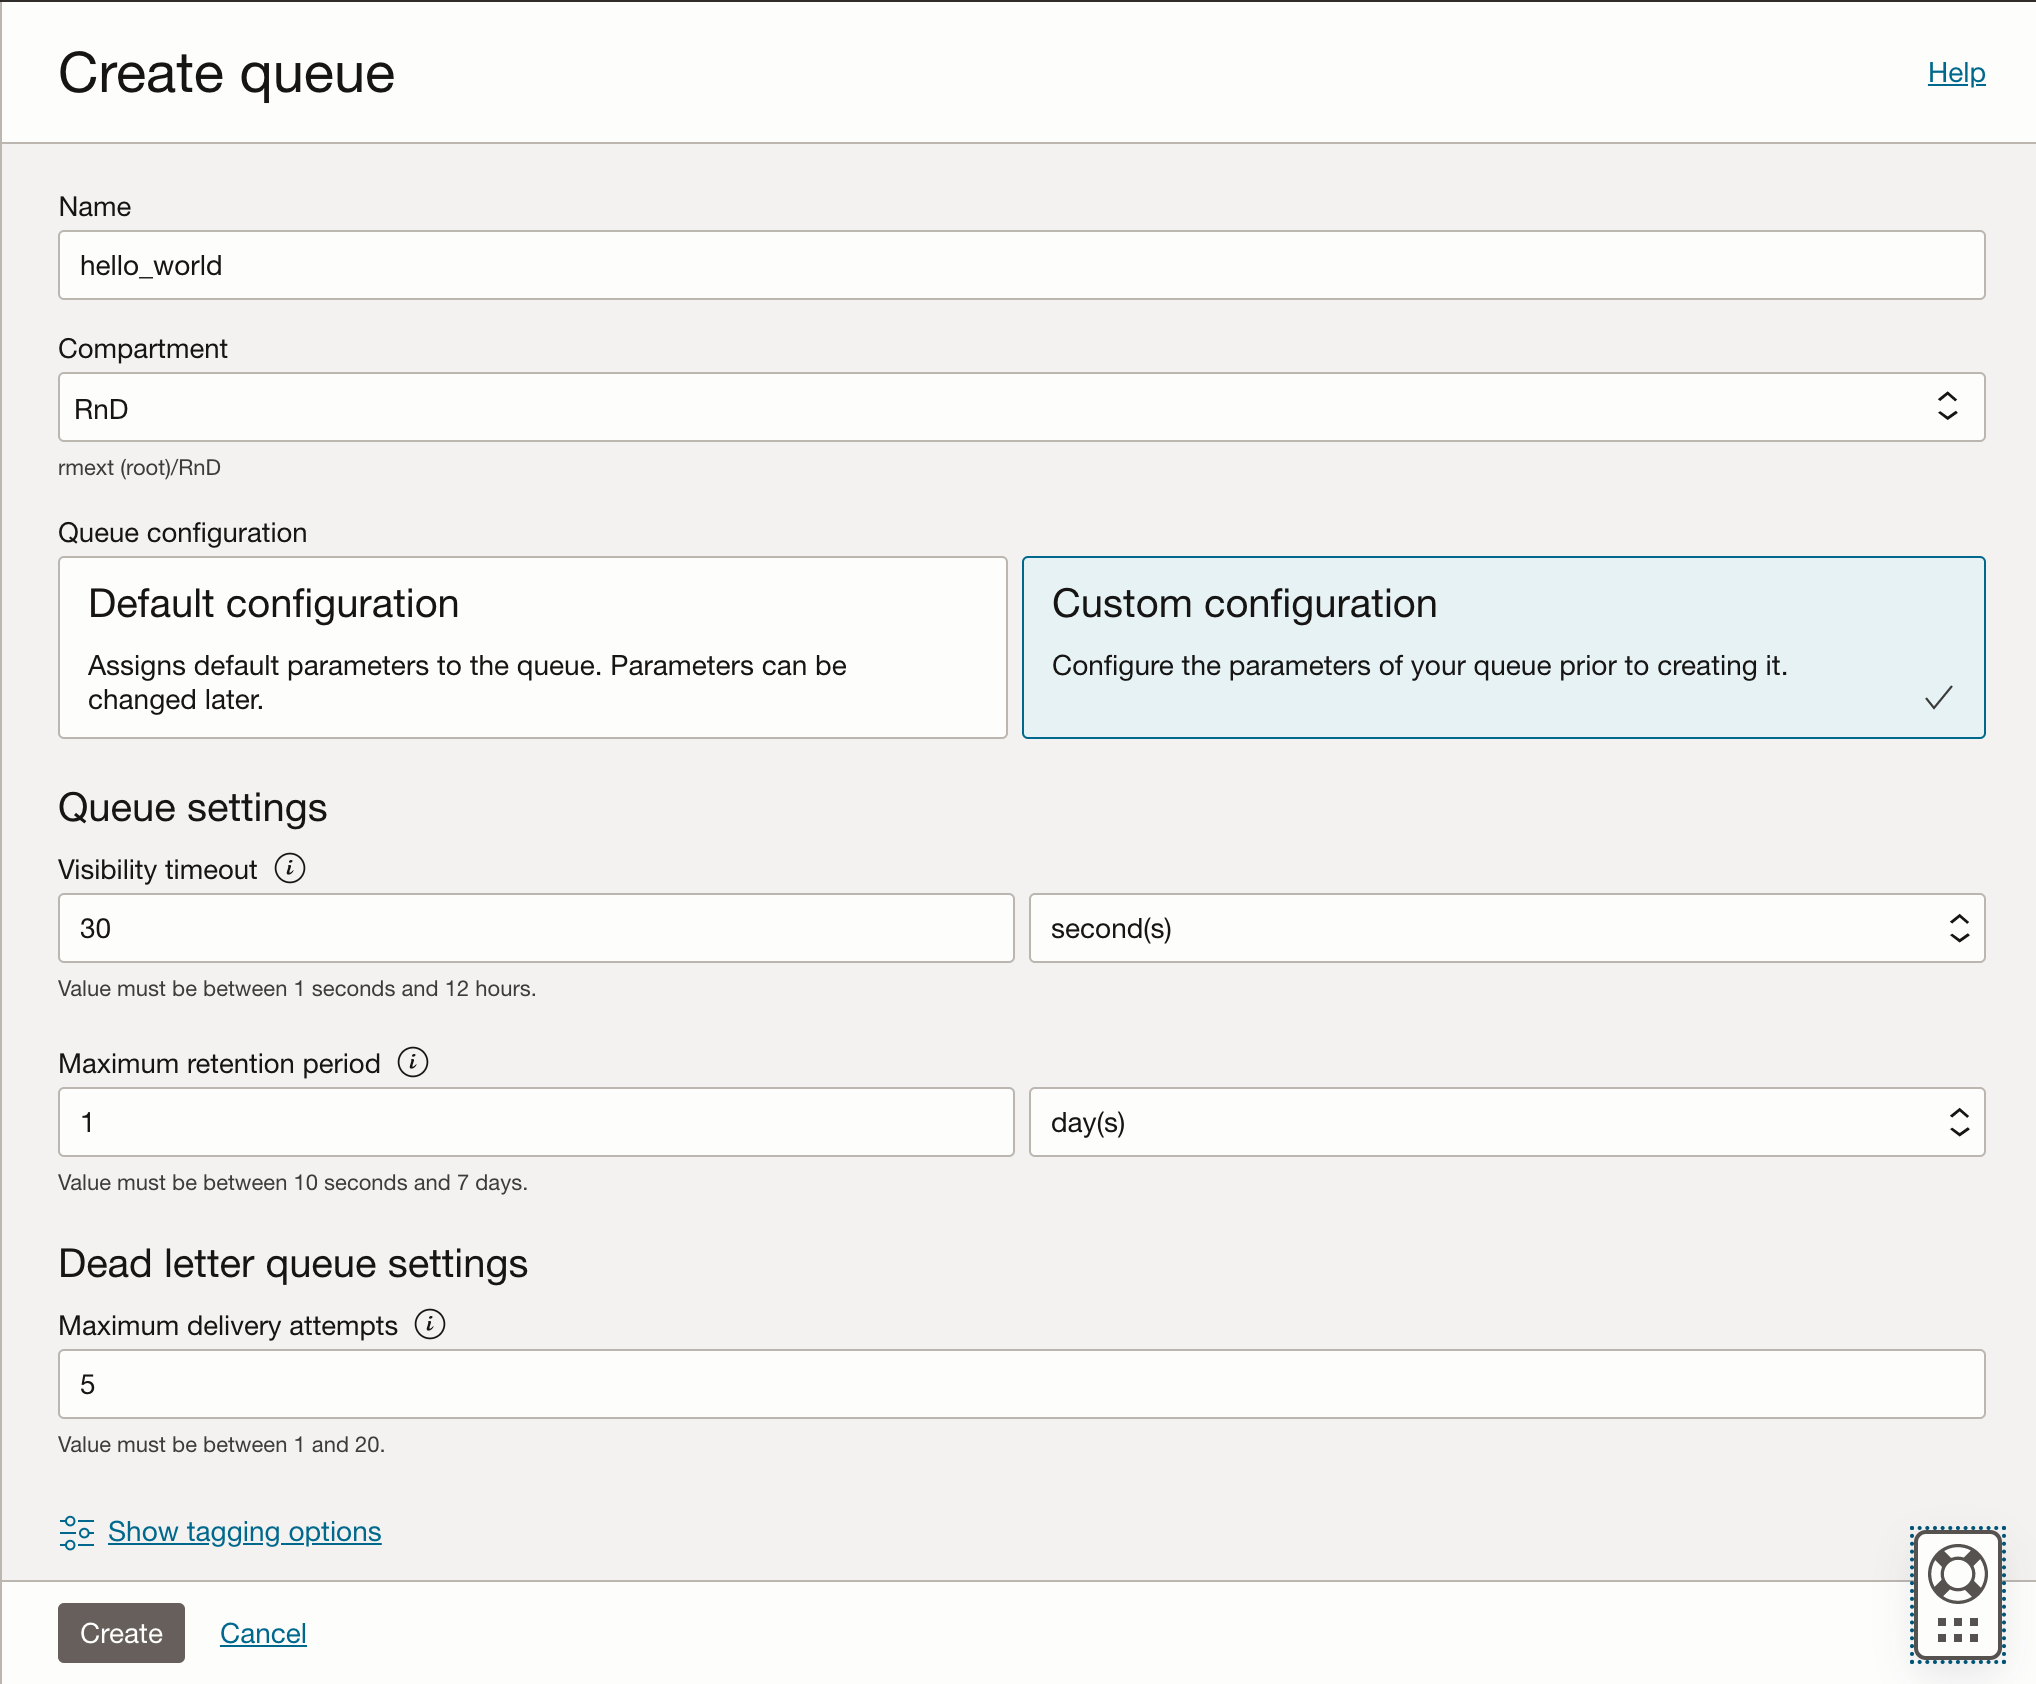
Select Custom Configuration and let's go through these configuration parameters
Visibility timeout: refers to the total time a message is hidden from message consumers after it has been collected by a consumer.
Maximum retention period: the amount of time a message can remain in the queue if no successful consumption happens. In other words the amount of time the queue can retain a message until it is deleted.
Dead letter queue settings
Messages that are not successfully processed within the maximum number of delivery attempts are moved to a Dead Letter Queue and will be kept there until either the retention time ends or a form of “manual” processing handles the message.
Maximum delivery attempts: The maximum number of retries for a message consumption before it is sent to a dead letter queue (DLQ).
Press Create and the queue overview page is shown. The status of hello_world is shown as Creating

and when it is ready to be used the state changes to Active

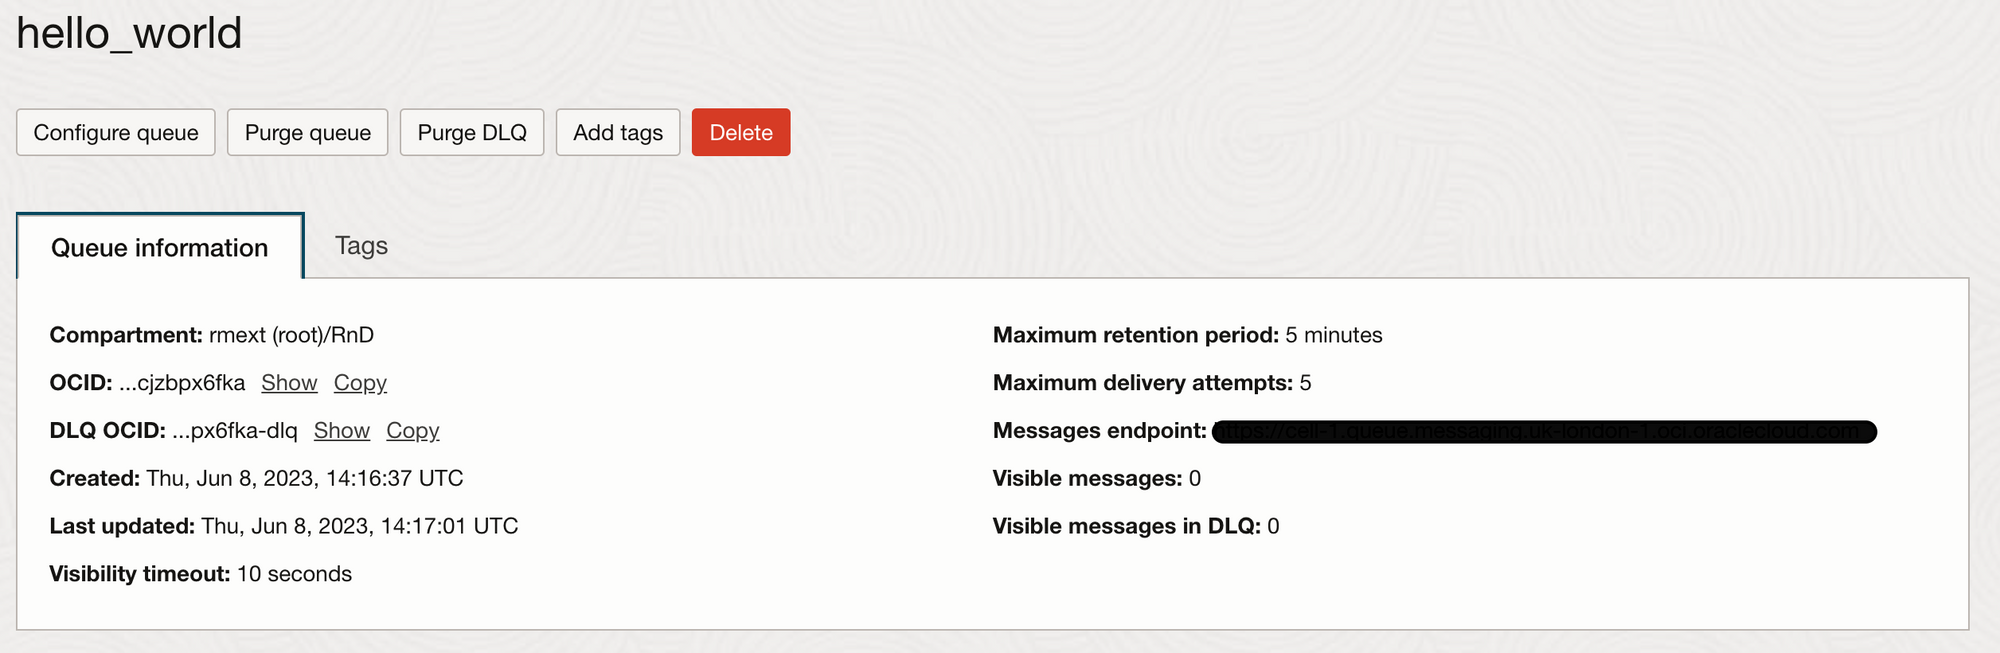
Now the queue is created let's gather some attributes that will later be needed in the Python application.
Click in the queue name - here hello_world, and in the queue information area gather the following attributes: OCID, DQL OCID, Messages Endpoint
Required Keys
When working with ODI SDKs, SSH keys must be created in other to access OCI resources.
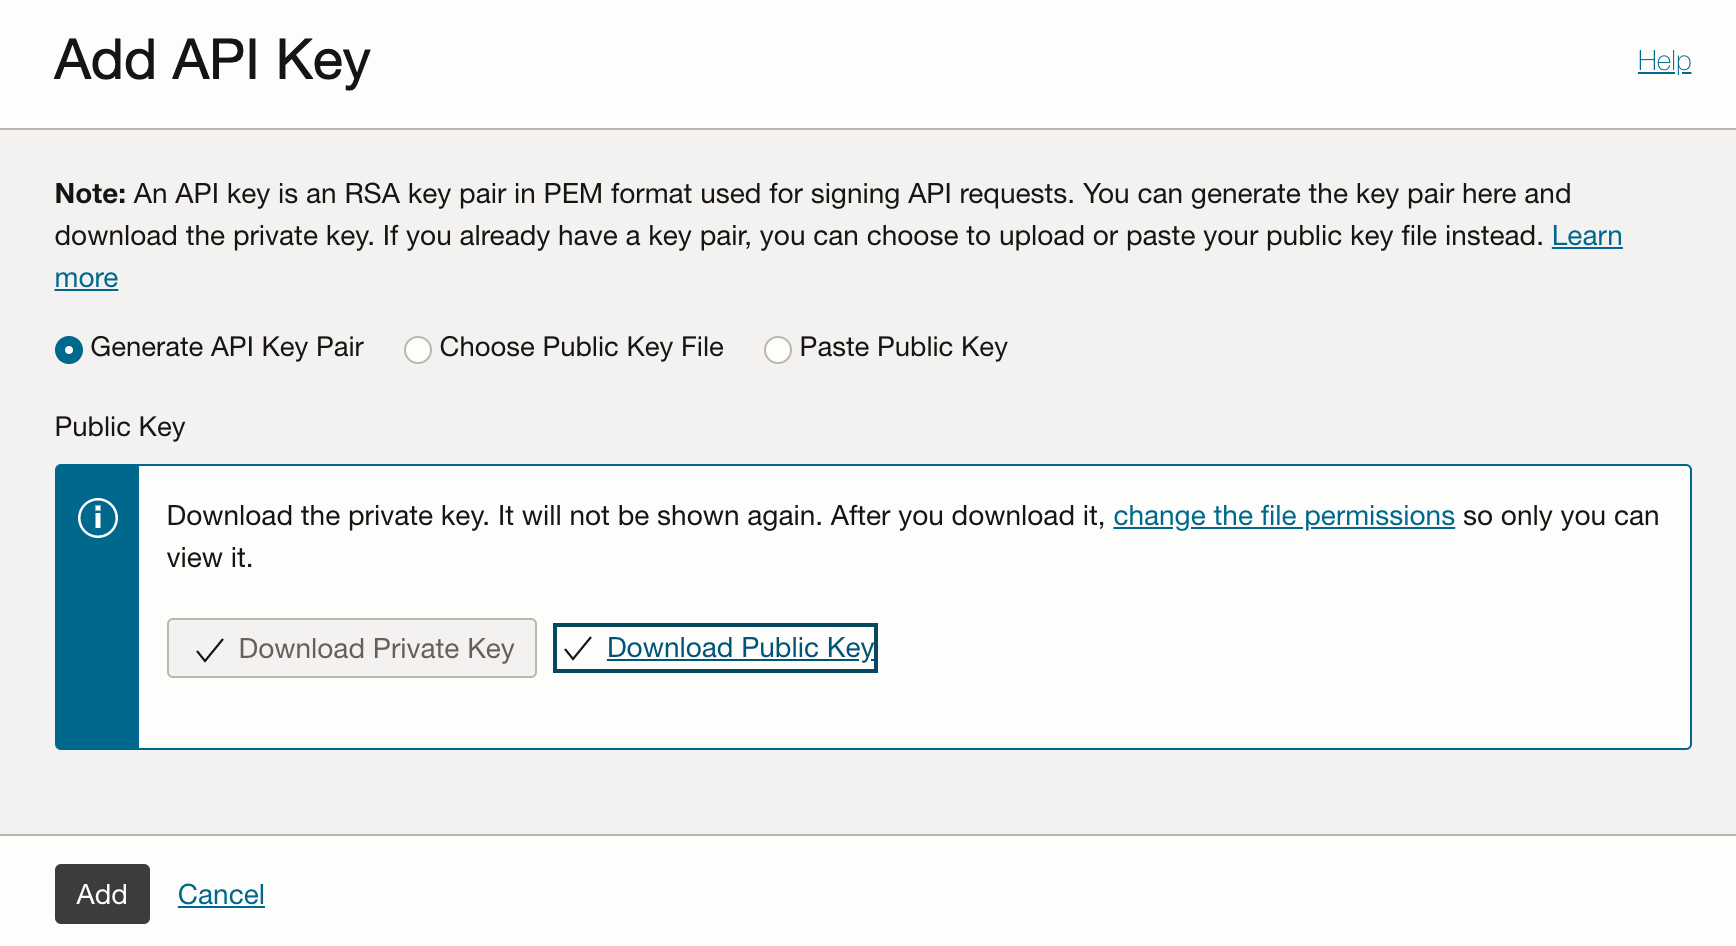
Access your OCI account and open the Profile menu, click on API Keys from the bottom left corner and click on Add API Key
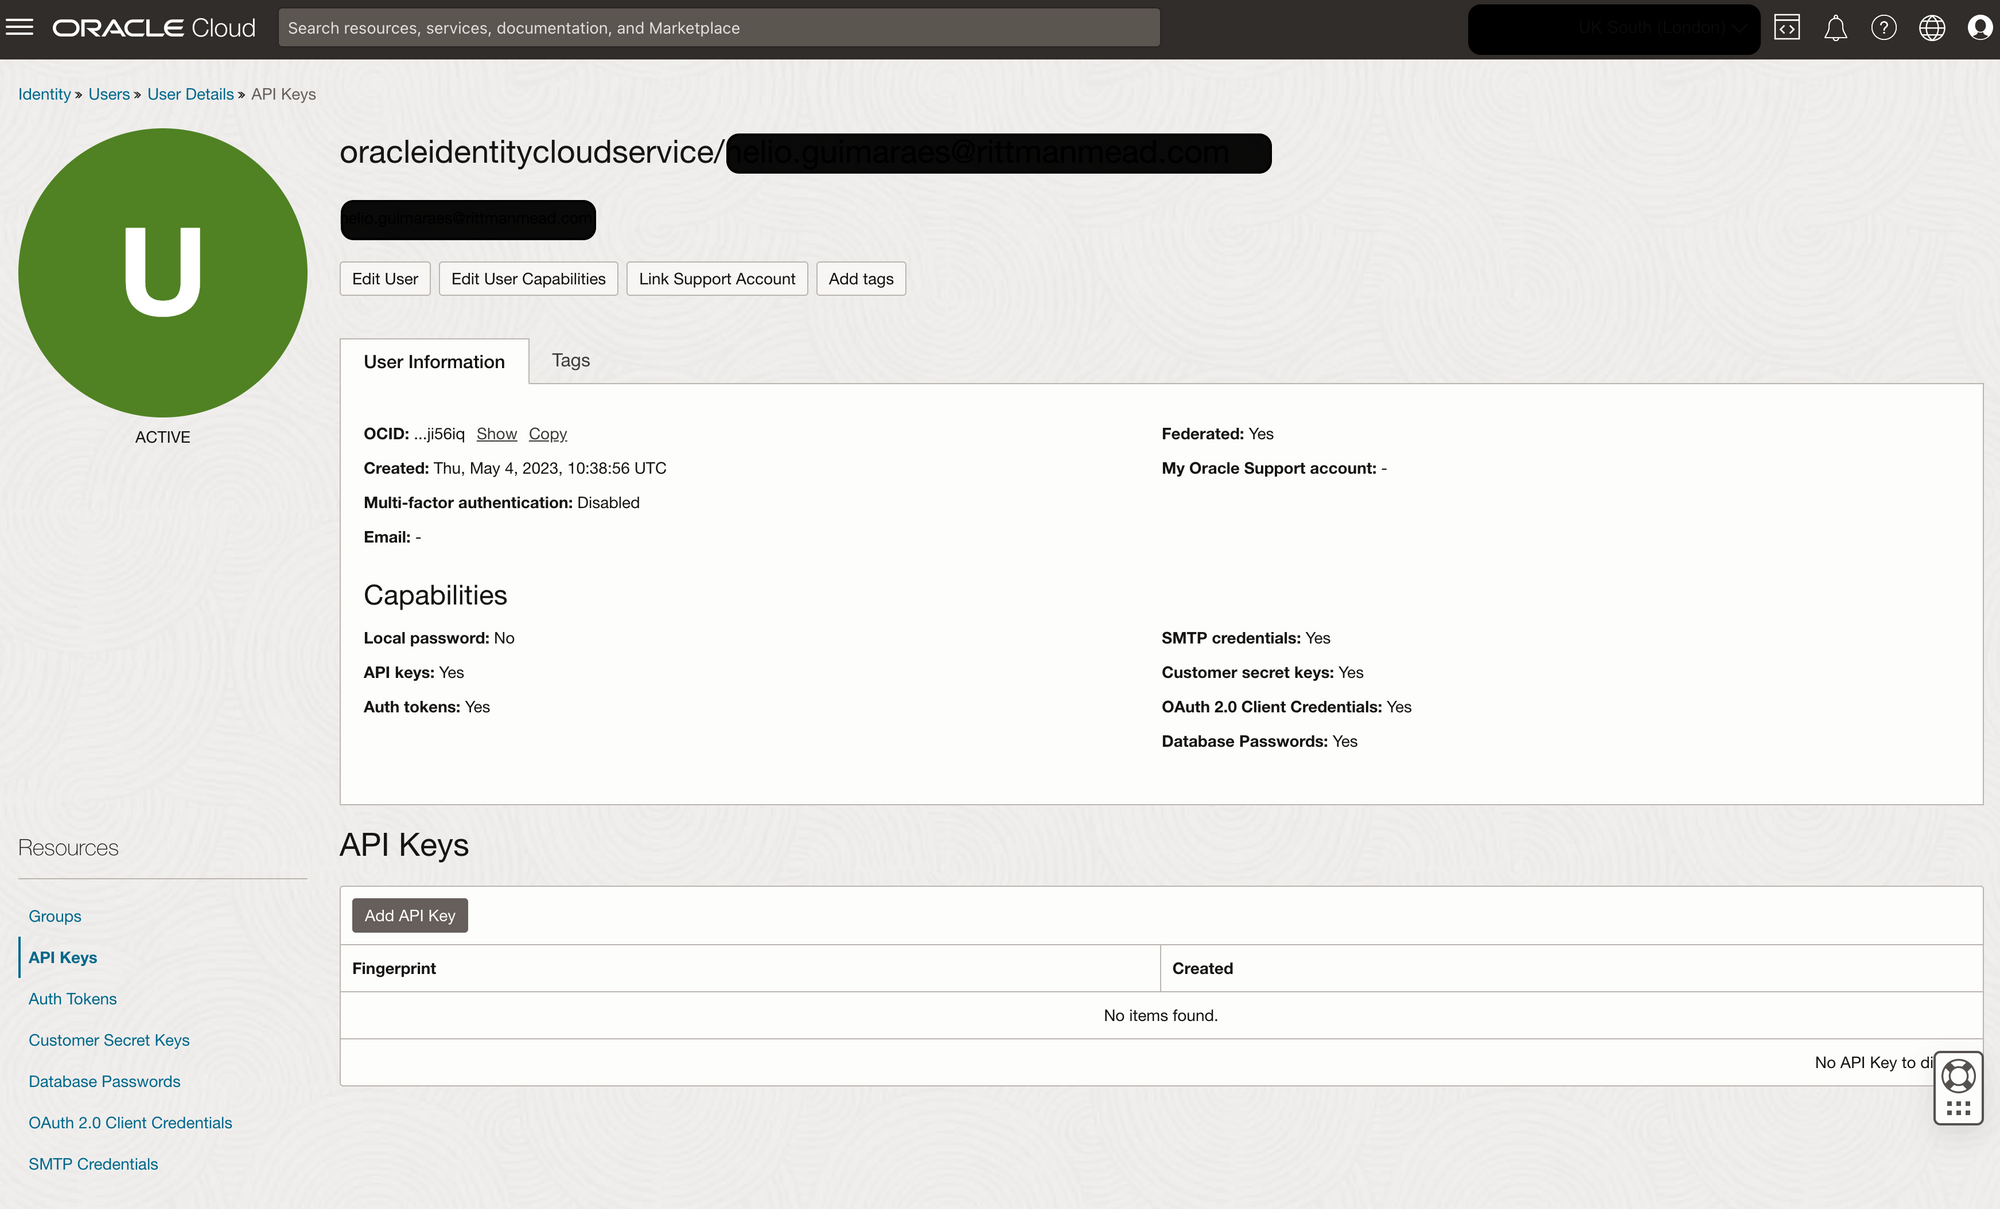
Download the Private Key and Public key as you will need it late and click Add
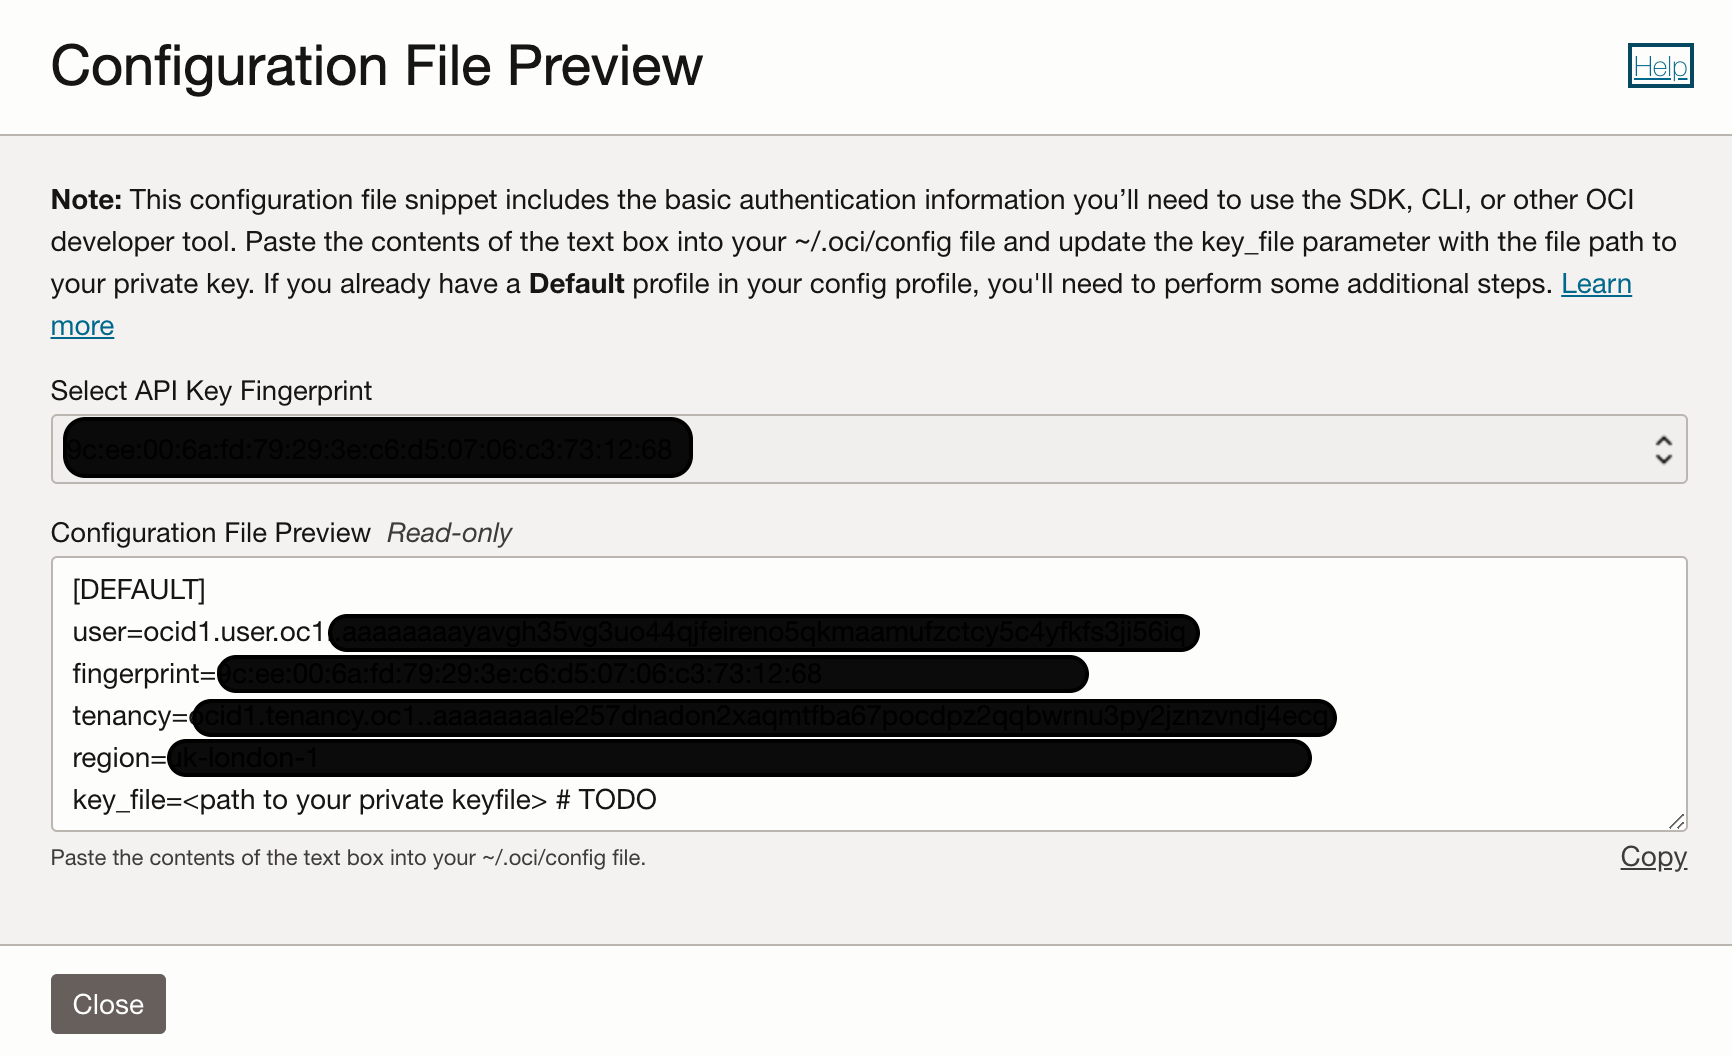
A new window will be shown with the sample of a configuration file needed later (save these values as they will be needed during the python configuration).
Python environment configuration
We use pipenv to wrap the application development under its own environment and as a package manager.
cd <base>/queue_demopipenv install
This will create a virtual environment where all the code and packages will be installed.
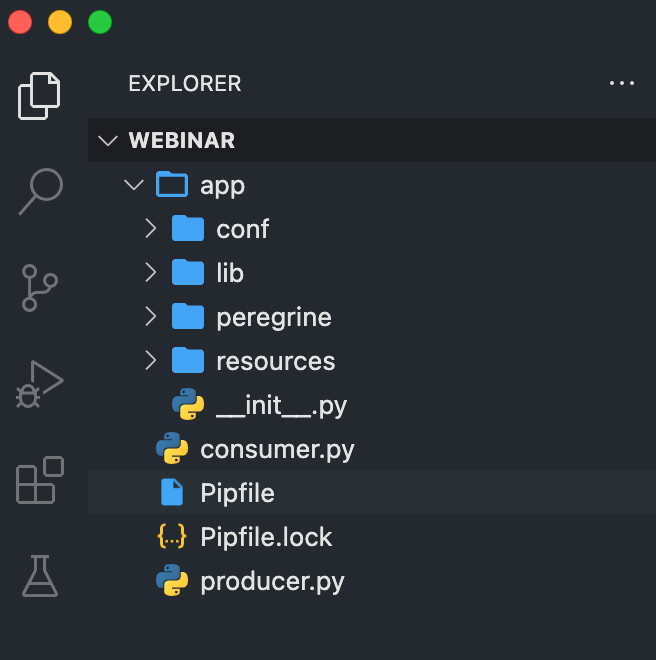
As part of our development principles, we create Python applications with a specific structure that makes code easier to read and organise. If you use Visual Studio Code, you could have a structure similar to this:
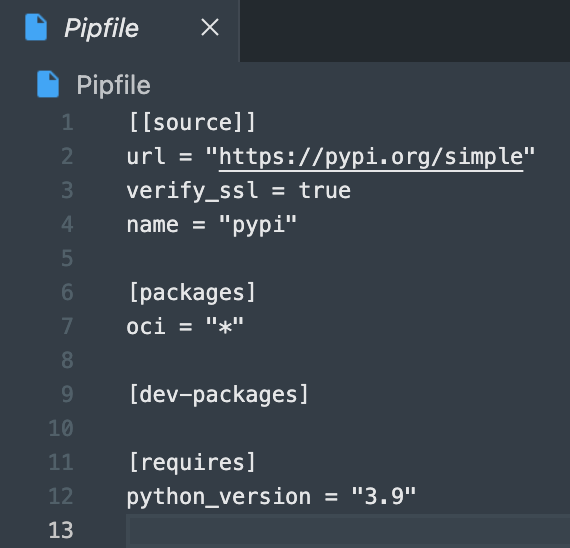
Open Pipfile file and add oci SDK to the package dependencies
In the terminal navigate to the development environment and run pipenv install - here /Users/nelioguimaraes/Documents/git/rittmanmead/webinar
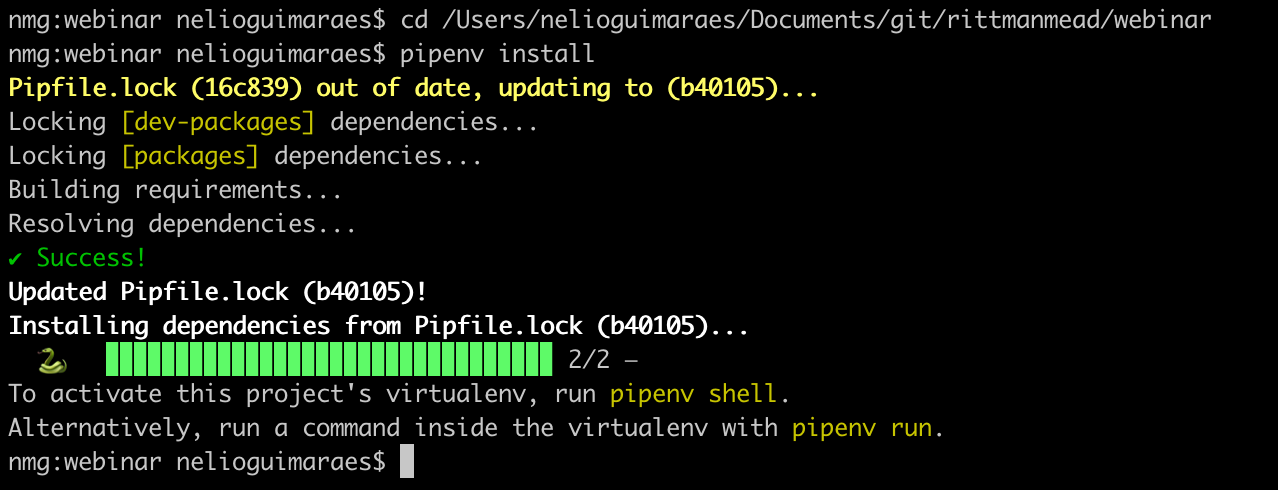
If your app structure follows the suggested structure below, under the conf directory create a conf.ini file and add the following information:
[oci_user]
user=<OCID USER>
fingerprint=<FINGERPRINT>
key_file=<path/to/privat_key.pem>
tenancy=<TENACY ID>
region=<REGION>Python producer
import oci

oci_configuration = oci.config.from_file("/path/to/config.ini","oci_user")
oci_service_endpoint = <MESSAGES_ENDPOINT>
oci_queue_id = <OCID for the>
oci_queue_client = oci.queue.QueueClient(config=oci_configuration, service_endpoint=oci_service_endpoint)

'''
  Function that publish a message to an OCI Queue
  Arguments:
      oci_queue_client: OCI queue client created using oci.queue.QueueClient
      oci_queue_id: OCI ID for the queue where the message is being sent
      message_content (String): The content of the message
'''
def publish_message(oci_queue_client, oci_queue_id, message_content):
        publish_message_response = oci_queue_client.put_messages(
        queue_id=oci_queue_id,
        put_messages_details=oci.queue.models.PutMessagesDetails(
            messages=[
                oci.queue.models.PutMessagesDetailsEntry(content=message_content)])
        )
        return publish_message_response

if __name__ == "__main__":
    response = publish_message(oci_queue_client,oci_queue_id,message_content="This is a message")

    # print the message response
print(response.data)Python consumer
import oci

oci_configuration = oci.config.from_file("/path/to/config.ini","oci_user")
oci_service_endpoint = <MESSAGES_ENDPOINT>
oci_queue_id = <OCID for the>
oci_queue_client = oci.queue.QueueClient(config=oci_configuration, service_endpoint=oci_service_endpoint)

'''
Function that publish a message to an OCI Queue
    Arguments:
        oci_queue_client: OCI queue client created using oci.queue.QueueClient
        oci_queue_id: OCI ID for the queue where the message is being sent

    Other parameters:
        visibility_in_seconds: The number of seconds where a message is not visible to other consumers
                                after being captured by a consumer. Default value is the one defined in the queue level
        timeout_in_seconds: Wait time for a message be available for consumption. Default is set to 0
        limit: The limit parameter controls how many messages is returned at-most.
                The default is 1, the minimum is 1 and the maximum is 32
'''
def consume_messages(oci_queue_client,oci_queue_id):
    message = oci_queue_client.get_messages(
        queue_id=oci_queue_id,
        visibility_in_seconds=5,
        timeout_in_seconds=7,
        limit=5
        )
    return message


if __name__ == "__main__":
    response = consume_messages(oci_queue_client,oci_queue_id)

    # print the message data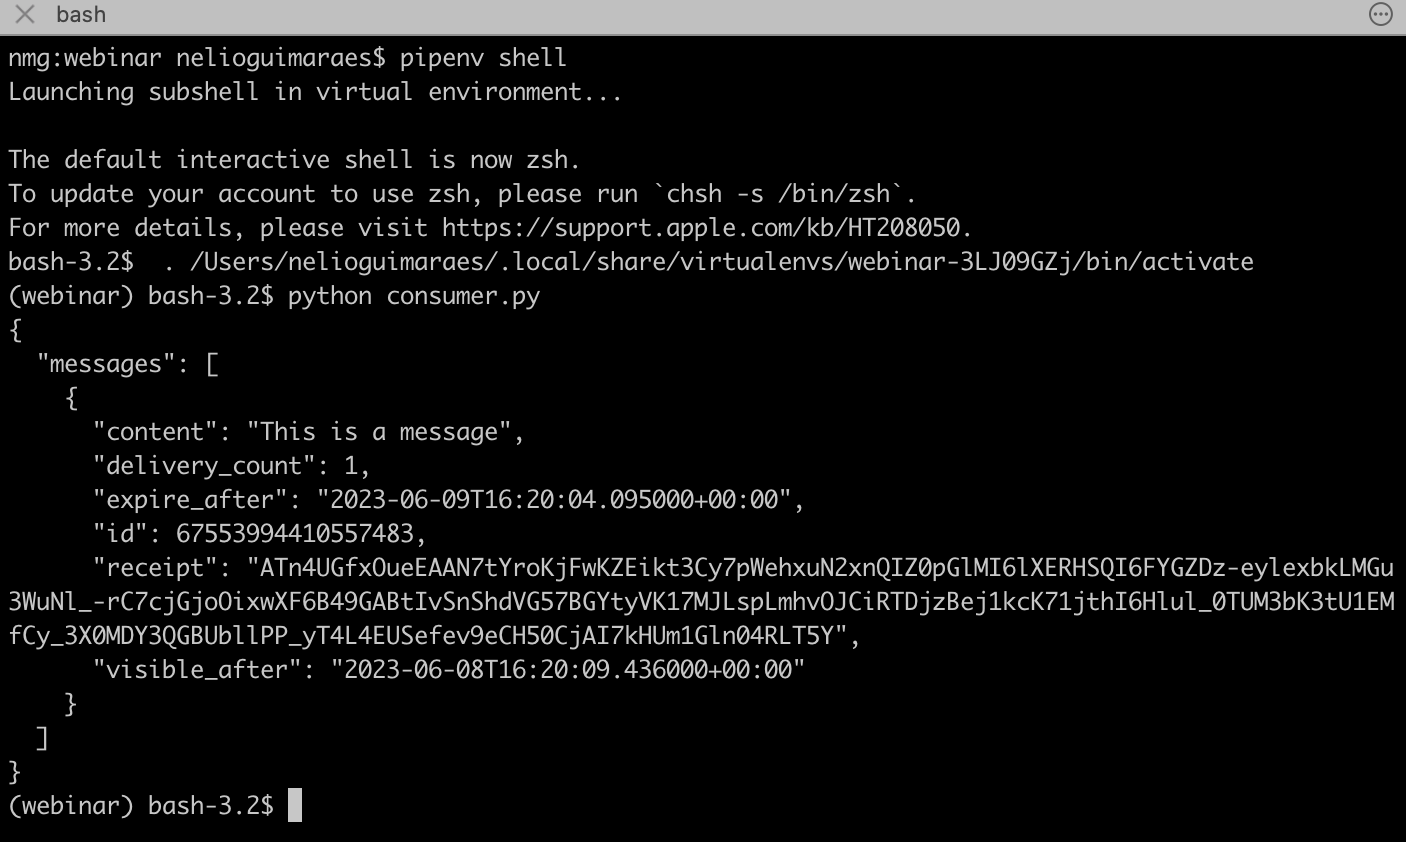
print(response.data)Execution
Running both files under the virtual environment, we will see messages being produced and consumed.
Producer
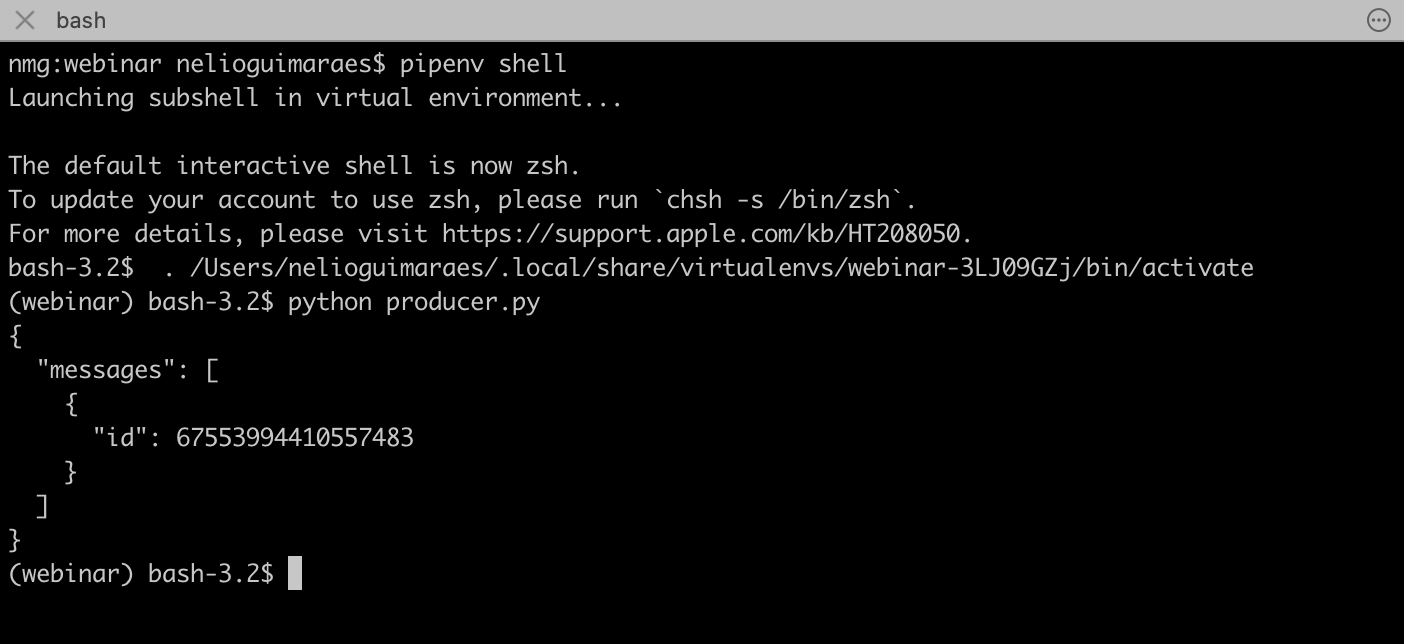
Consumer