Dataset Reload Schedules in Oracle Analytics Cloud


Let us show you how to easily configure scheduled refreshes in OAC. Streamline your workflow, optimise performance and take charge of your data!
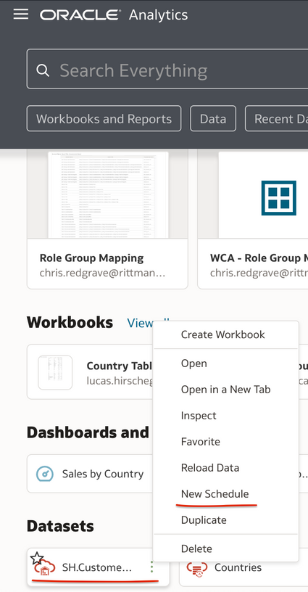
If you have been manually reloading datasets, the traditional way to do it is by simply doing a right-click on your selected dataset and choosing the 'Reload Data' option. This will refresh the data by queuing the respective dataset for reload in a background process.
By selecting 'New Schedule' after right-clicking on the respective dataset, you can easily automate and schedule your data refresh.
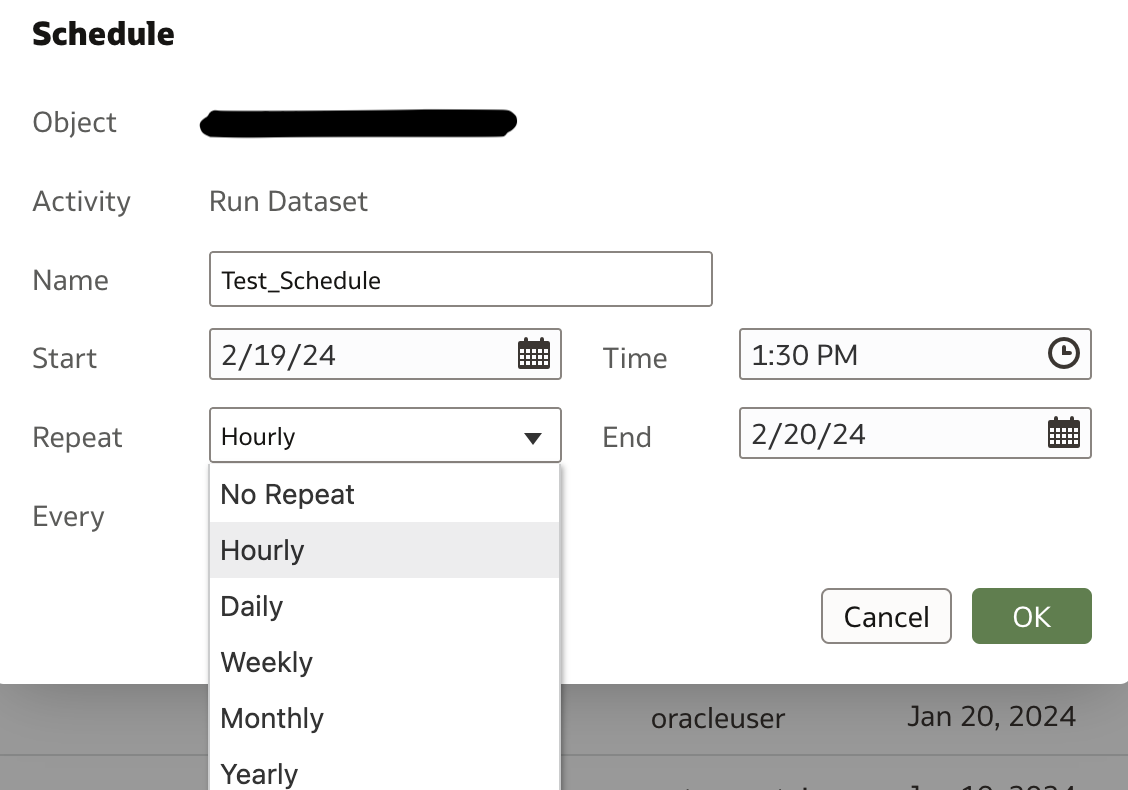
The resulting Schedule window gives you the below configuration options to choose from:
- Name: Give a name to your schedule.
- Start: Choose a start date for the schedule to begin running.
- Time: Set the exact time when the schedule should start running from the start date.
- End: Select the end date for your refresh schedule.
- Repeat: Choose the frequency of the schedule to run as - No Repeat, Hourly, Daily, Weekly, Monthly, or Yearly.
- Every: This field is active for Hourly, Daily, Weekly, and Monthly repeat frequencies. Choose the interval between the runs accordingly.
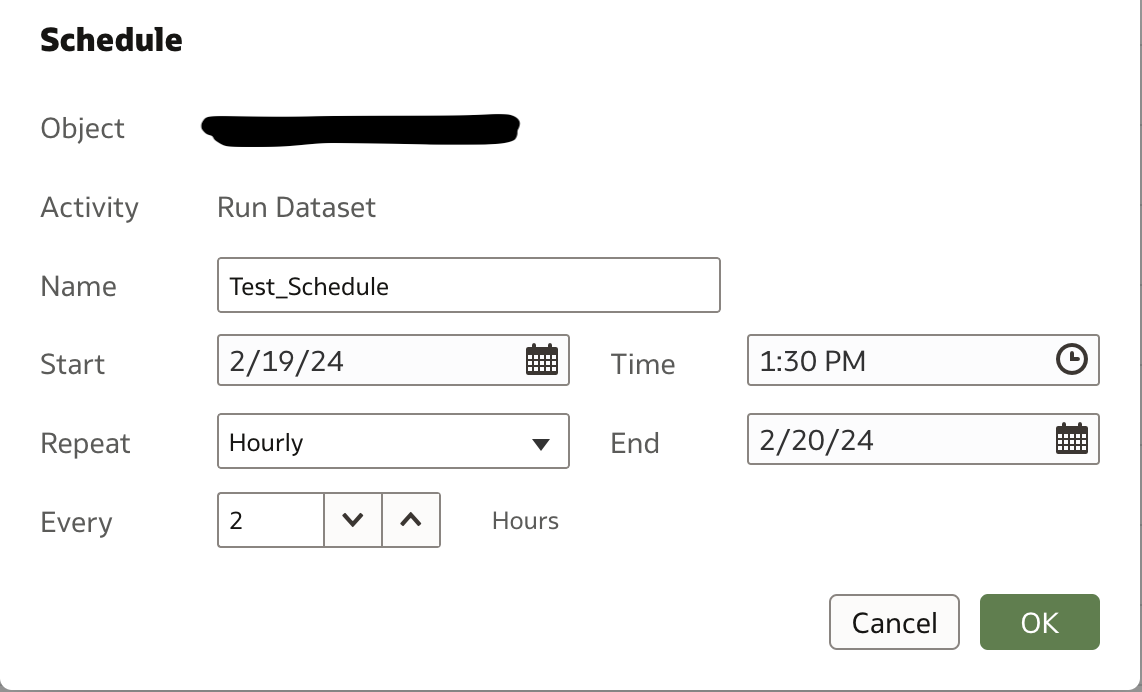
For example, if you wanted your dataset to be refreshed from 19 February, 2024 1:30PM until 20 February 2024 every 2 hours, the following are the scheduling options to go for.
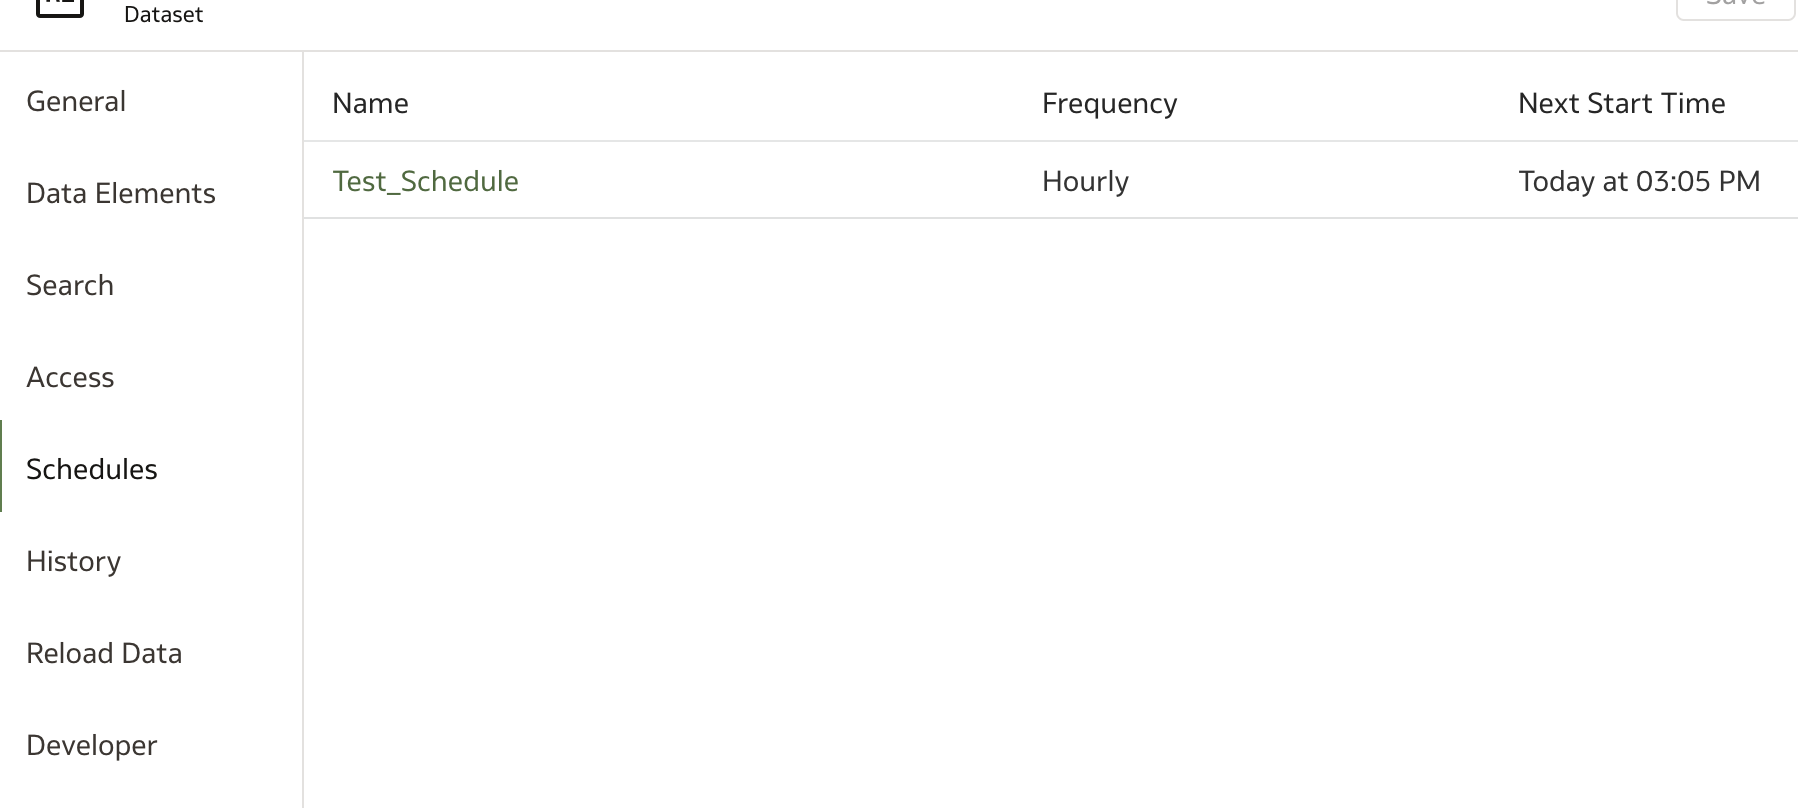
To verify the schedule configured for any given dataset, you can click the Schedules option in the Inspect dialog in the respective dataset.
To view the status of scheduled reloads, go to the History tab within the Inspect dialog. This tab will show you the status of both completed and pending reload runs.
In the screenshot below for a different dataset schedule sample, let us check how the History tab shows the details. This schedule was configured as below:

As you can see, we have one completed refresh status here with the start time and total duration clearly tracked.

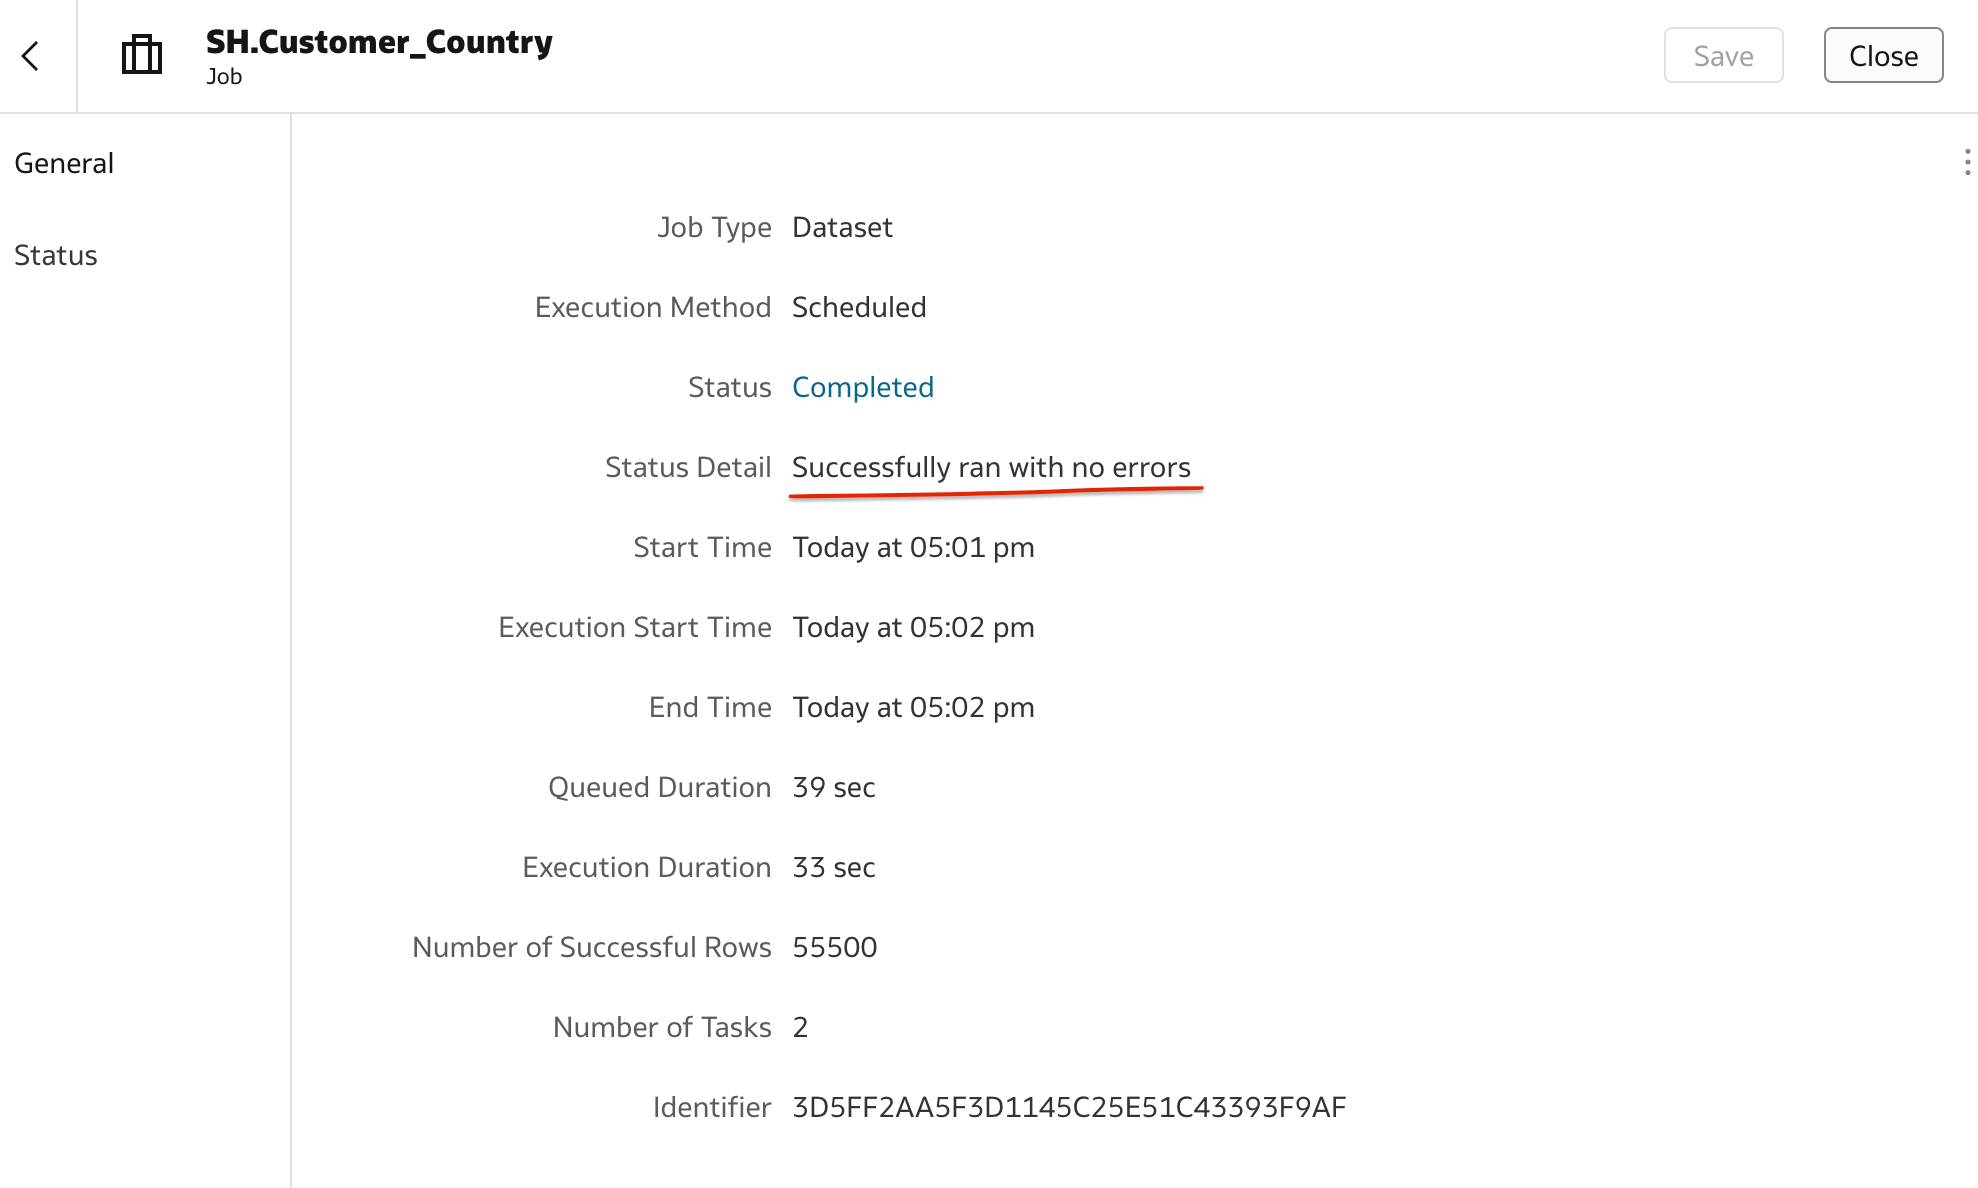
When you click on the status row, you will be directed to the job details window. The General tab in this window provides all the generic information about the Schedule dataset job. This information includes the Job Identifier, Queued & Execution Duration, Number of Successful Rows, and Number of tasks (corresponding to individual tables) involved.
The Status tab lists the tasks involved and the corresponding information.
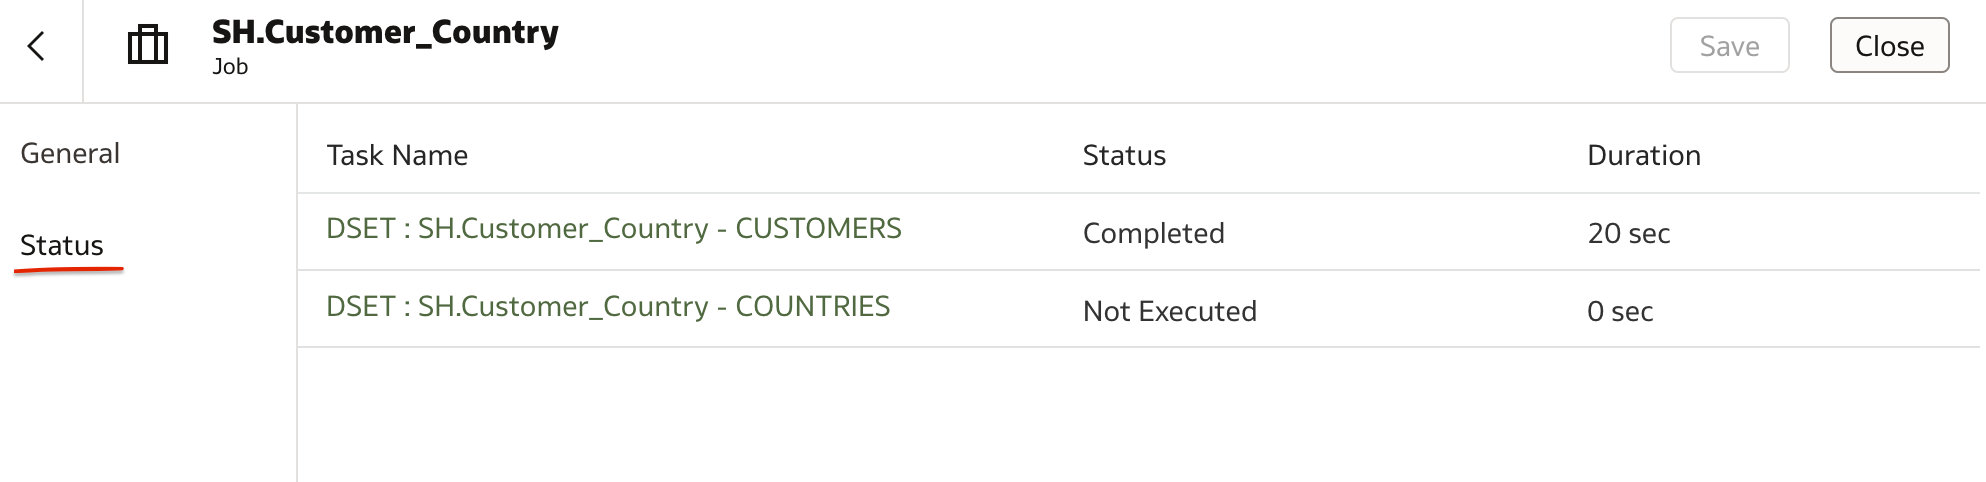
If you click on any of the tasks you can also verify the status of individual tables within the dataset.

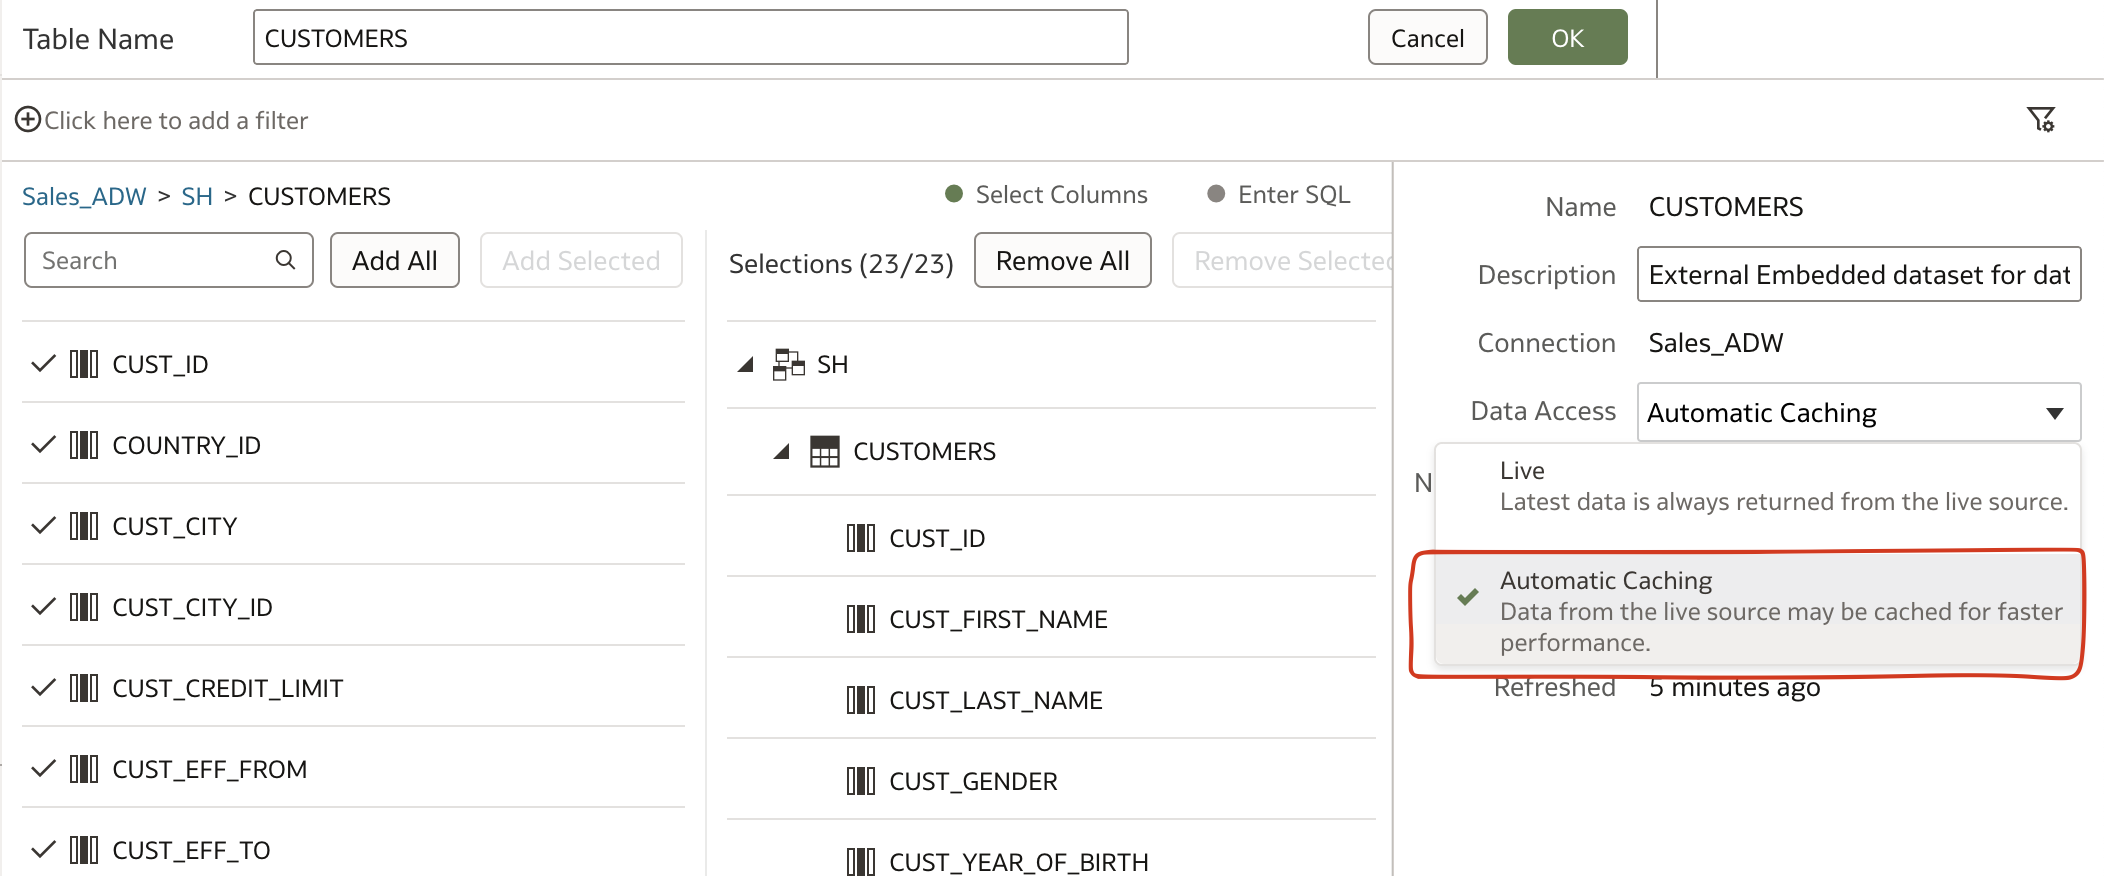
When scheduling a dataset that is not set for Automatic caching, you cannot configure the schedule and will receive an error message.

If you want to modify the settings to turn Automatic caching ON, access the Edit Definition option of the corresponding data table and set Data Access field as ‘Automatic Caching’ instead of the default value ‘Live’.
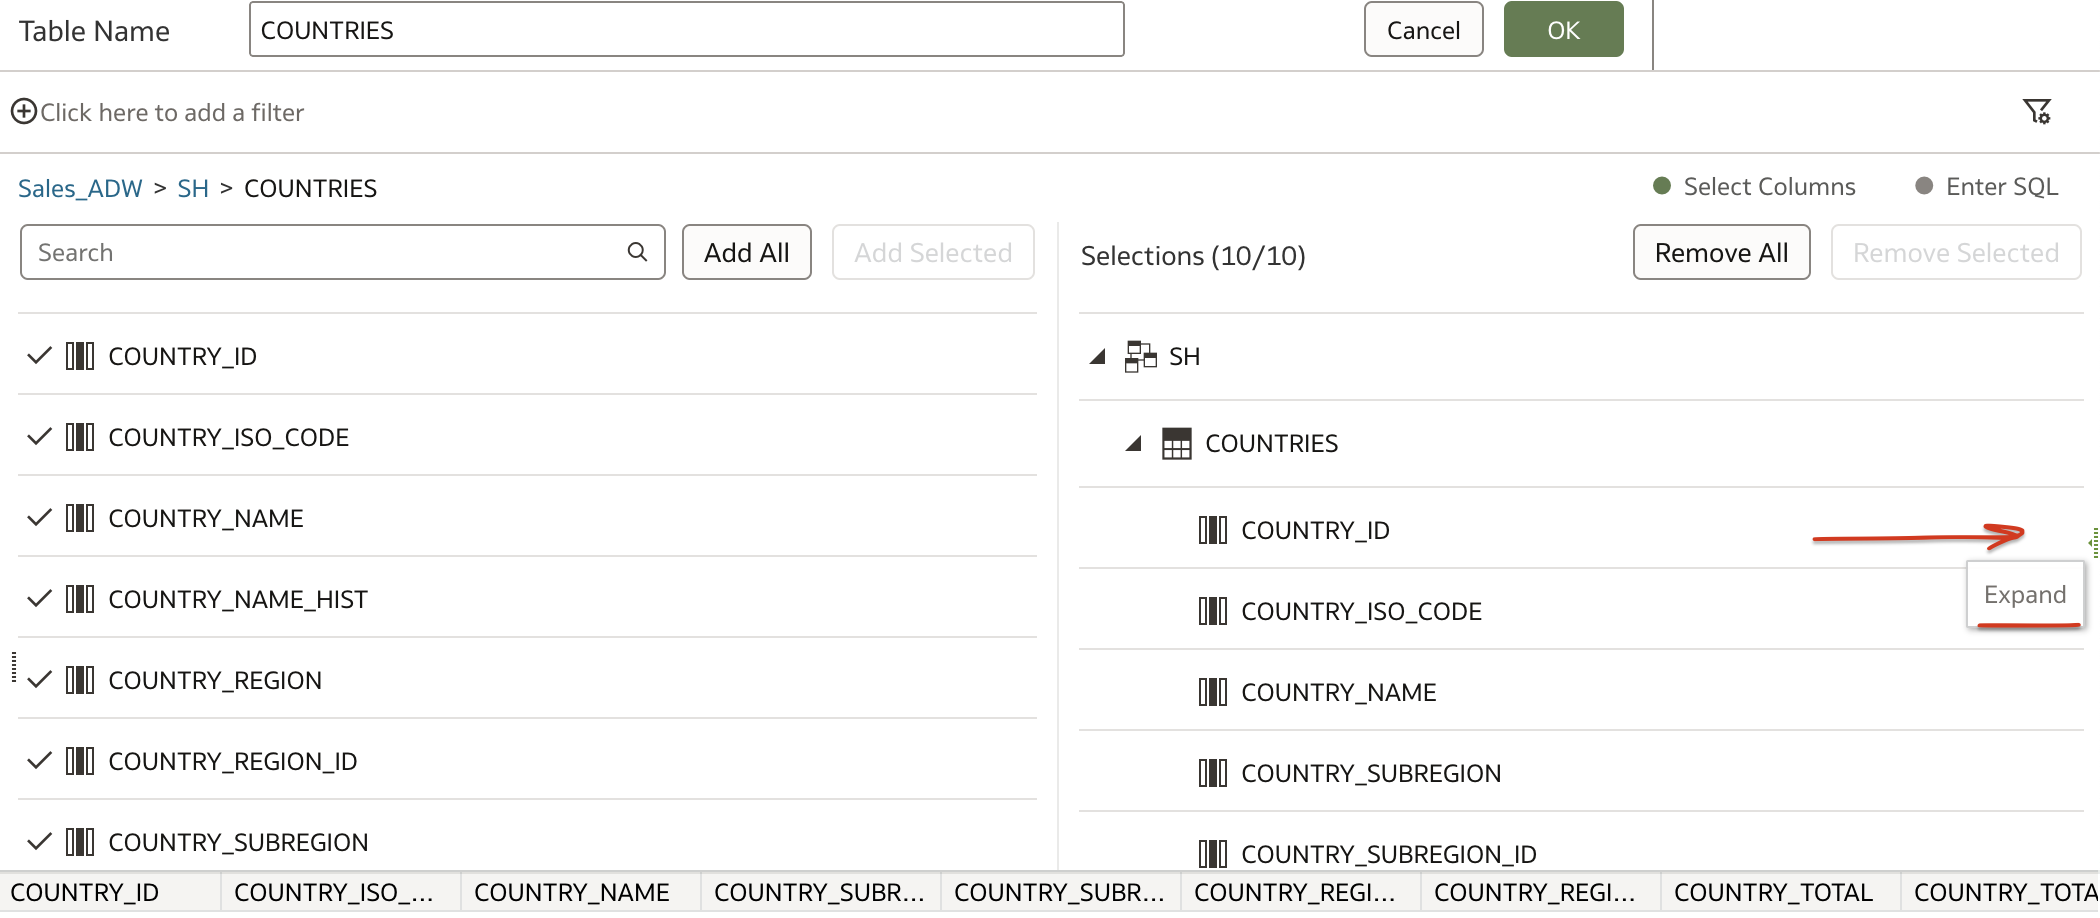
NOTE: If you are struggling to spot the Data Access option within the Edit Definition page, look out for the Expand prompt in the right centre as highlighted below.
If you haven't already, we highly recommend creating schedules to automatically reload data from your Oracle Analytics Cloud instance periodically. It's a convenient and efficient way to ensure your data is always up-to-date. Don't waste any more time manually refreshing your data - try out the 'New Schedule' option today!
Get in touch if you have any questions!