Building an Amazon Redshift Data Warehouse using ODI and Attunity Part 1 : Configuring Redshift, and CDC Using Attunity
One of our longstanding Oracle customers recently asked us to put together a proof-of-concept DW system using Amazon Redshift as the data warehouse database, rather than Oracle Database. The main driver for this was the economics of running Redshift in the cloud vs. Oracle on-premise, or using Amazon RDS, and they were also interested in the potential performance benefits of running their data warehouse on a column-store database. They were also interested in trying out Attunity Replicate with Cloudbeam as the CDC solution, a product conceptually similar to Oracle GoldenGate but hosted on the Amazon AWS platform, and licensed by data volume and month rather than per CPU, perpetual, as GoldenGate is.
Because the client is a big user of Oracle ETL technology though - currently OWB, moving to ODI in the near future - they still wanted to use ODI to do the main data integration work, so an interesting question for us was whether ODI was a suitable tool for use with Redshift, which isn’t an officially supported source or target platform for ODI. It’s important to understand what “not supported” or “not certified” means in this context - it doesn’t mean it won’t work, it just means you’re on your own if it doesn’t. What gave us hope though was that Redshift uses Postgres-compatible ODBC and JDBC drivers, and we got it working with OBIEE a few months ago, so the premise for the PoC seemed reasonable to us. The diagram below shows the architecture we went with at the start of the project.
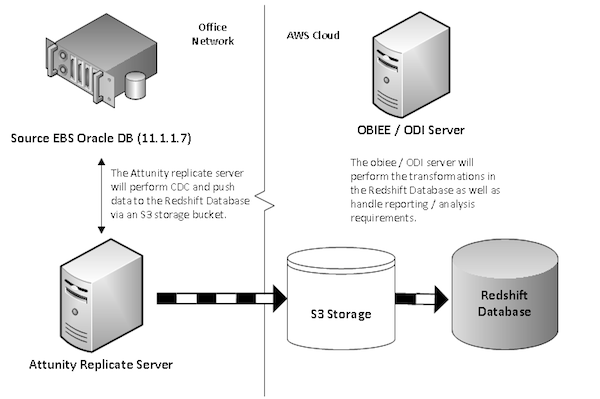
A little about the non-Oracle components:
- Amazon Redshift - Amazon's Fully Managed Data Warehouse in the cloud offering. Based on ParAccel technology (which itself has roots in PostGresQL), the service utilises MPP, columnar storage and compression principles to enhance query performance.
- Attunity Replicate & Cloudbeam - Attunity provide log based Change Data Capture and replication functionality, which includes Redshift as a target database. Attunity supports on going source to target replication as well as storing change data in audit / change tracking tables. In order to replicate data to Redshift, you need to set up an account with Attunity and then sign up for a CloudBeam subscription.
- Amazon S3 - Amazon's cloud storage service, which is used by Attunity to stage replication/change data prior to loading into the Redshift database.
Initial Configuration and Load
Source Database
The source RDBMS used for this proof of concept was an Oracle EBS database running on 11.1.0.7. In particular, we used the GL schema as this housed some sizeable data. The database requirements for Attunity Replicate are:
- Add supplemental logging (for this experiment full logging was added on the GL tables)
- Switch the database into archive log mode
- Optionally create a dedicated database account for Attunity - requires select privs on various V$ tables, the GL schema tables and execute on the LogMiner packages. It's at this point you may want to touch base with your resident DBA :)
S3 Storage
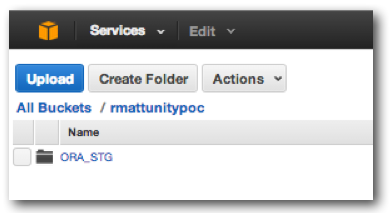
The Attunity CloudBeam service initially stages files in an S3 bucket before loading into the target database schema. In order to create this, browse to the S3 section of the AWS Console, and click Create Bucket. Once the bucket has been created, you then need to create a folder within this, in this instance the folder was named ORA_STG.
Redshift Cluster
You deploy a Redshift database from the AWS management console. From the Redshift page, select a Region, and then Launch Cluster. From here, fill out the cluster details, for example:
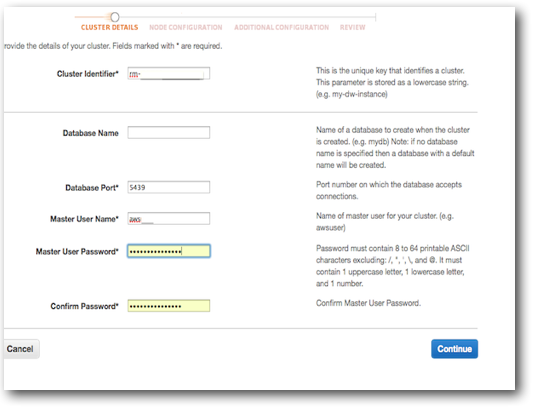
Leaving the database name blank will create a database named 'dev’.
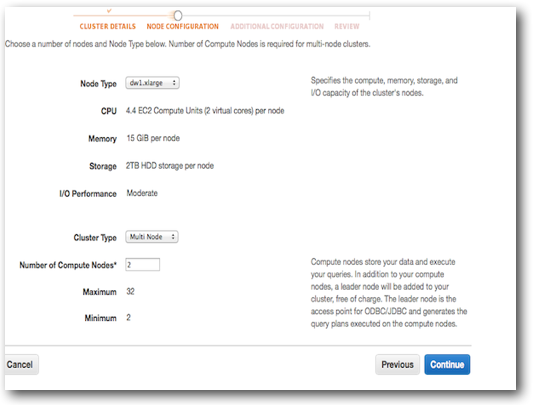
After clicking Continue, the next page allows you to size your cluster. For our test case, we opted for a two node cluster (which in fact has 3 nodes - 1 Leader node and 2 Compute nodes):
The next configuration screen allows you to set various security and network options:
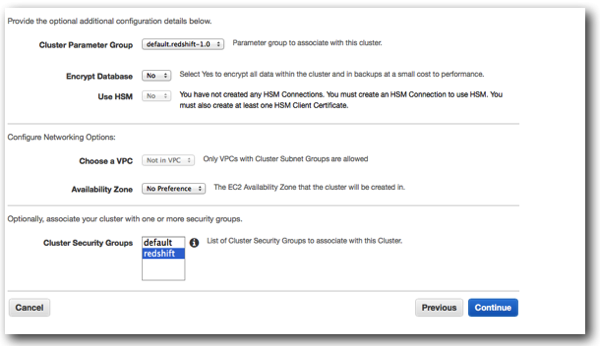
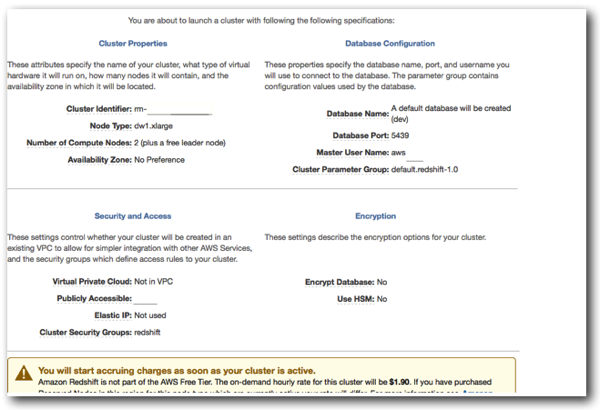
Finally you are presented with a summary screen confirming your configuration options. The important thing to note here is that as soon as the cluster is launched and running, you will be start being charged.
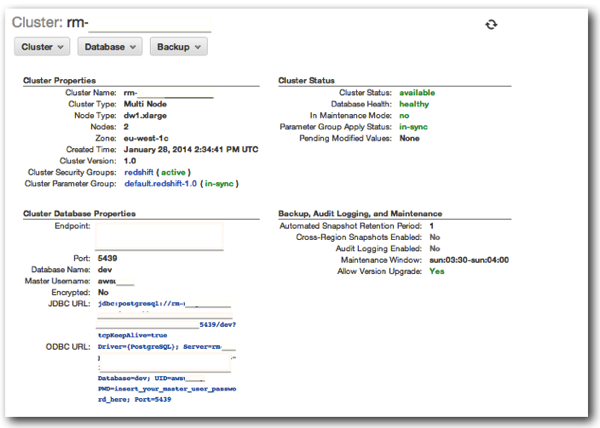
After you click Launch, the cluster build will begin, and after some time the Status will switch from creating to Available. Clicking the Cluster Name hyperlink will show you a summary screen, detailing security config, cluster status, information about backups and URLs for connecting to your cluster.
At the bottom of the screen area list of public and private IPs for the Leader and Compute Nodes of the cluster:
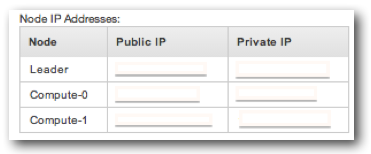
We used the public IP of the Leader node for our inbound client connections.
The final step in terms of cluster configuration was to configure a list of IPs that were authorised to access the cluster. This is handled from within the security screen on the Redshift Management Console.

Once you've authorised your machine, you can connect to the Redshift database via the JDBC/ODBC URLs shown on the cluster summary screen previously. Amazon recommend using SQL Workbench, and also link to JDBC and ODBC drivers which you should install. So, the next step was to enter the connection details, connect to the database and create some target users and schemas.
The connection details were defined using the downloaded jdbc driver, and the jdbc url from the AWS summary screen:
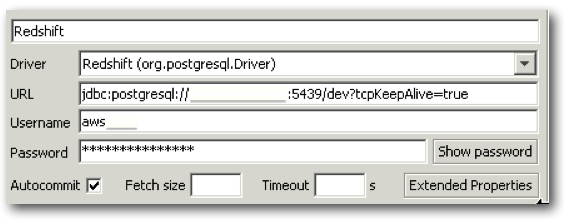
Once connected, users and schemas were created with the following statements:
create schema performance;
create schema staging;
create schema foundation;
create user usr_stg with password '<password>';

create user usr_fnd with password '<password>';

create user usr_dw with password '<password>';

create user odi_work with password '<password>';
NB: in Redshift, passwords must contain one uppercase character,a number, and be at least 8 chars long.
Once the users and schemas are created, we can then grant privileges to the odi_work account to be able to create objects across the schemas:
grant usage,create on schema staging to odi_work;
grant usage,create on schema performance to odi_work;
grant usage,create on schema foundation to odi_work;
Of course, how you would manage security and database privileges in your own environment is entirely up to you. You can configure object level privileges as your database security guidelines dictate.
Once your users are set up, you can create objects and grant privileges as required.
Attunity
Once the Attunity Replicate software is installed, it's a case of adding the source and target databases.
Source: Oracle EBS database
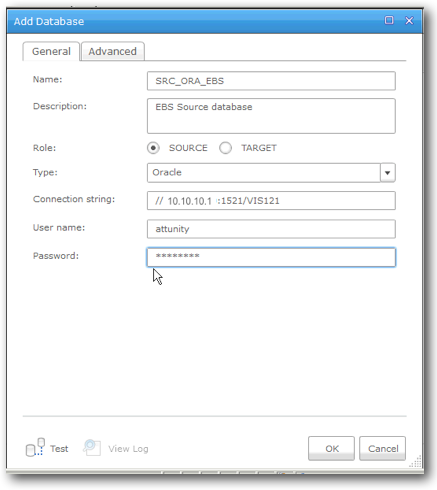
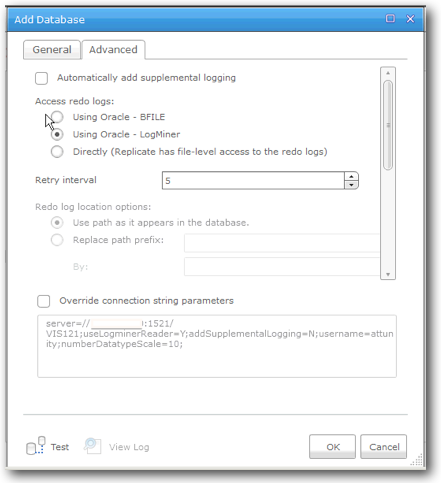
Clicking Manage Databases and then Add Database brings up the following dialogue, in which you fill in the details of the database. The Advanced tab contains details around how Attunity implements and executes CDC/log Mining.
Target: Redshift Cluster
You follow the same process as above, but select Amazon Redshift as the Type and specify it as a target. Within this screen, you enter details of the cluster endpoint address, the port (refer back to the AWS cluster summary screen), and a user name and password to access the database. If you have entered the details correctly and you can reach the cluster, you should be able to drop down the Database Name list and see the dev database. The next section on this dialog is to enter details about your Attunity CloudBeam subscription, and then your S3 bucket and folder. It should be noted here that in your environment you may not want to use your master user db account, but instead opt for a slightly less privileged user.
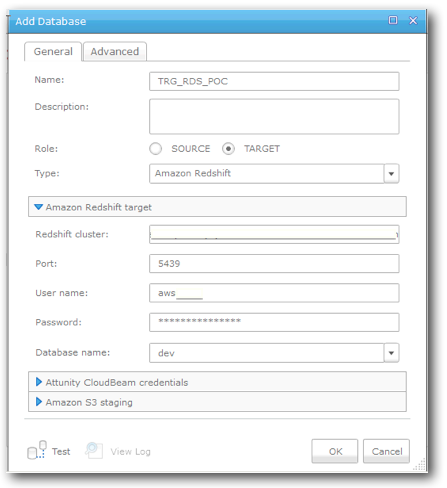
Once you have filled out each section, it is worth clicking the Test button on the bottom left of the dialog to ensure all details are correct.
So, now that we have our source and target databases configured, the next step is to create a Replication Task. The task can be a combination of the following options:
- Full Load - replicate a table from source to target
- Apply Changes - combined with the above, maintains the target copy with changes that occur on source
- Store Changes - CDC deltas stored in a separate table
Once you've decided on the type of replication task, you drag and drop the source and targets onto the palette, configure which tables you want to replicate from source, and specify any transformation rules e.g. to move to a different target schema. In our test case, we created an initial load task and a rule was created to map the GL schema in the source to the staging schema in the target.
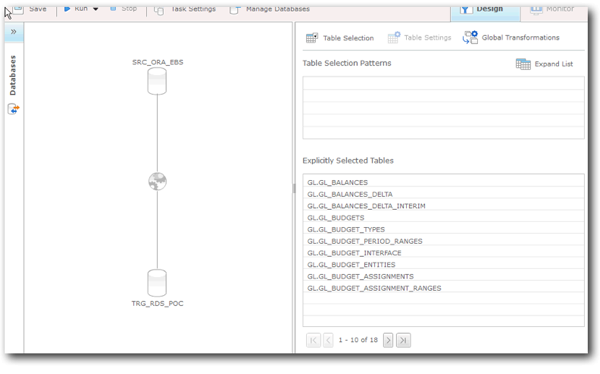
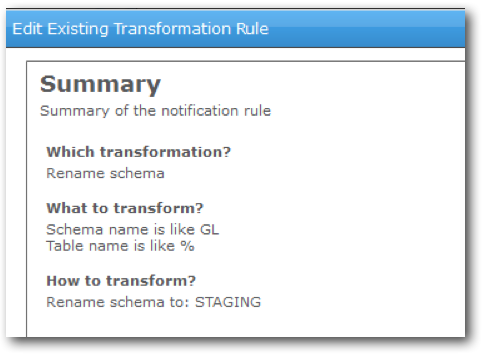
Within the task settings, you can choose to either create new target tables, or use pre-created ones. This is useful if you want to create the tables with certain options, e.g. specifying the sort and distribution keys.
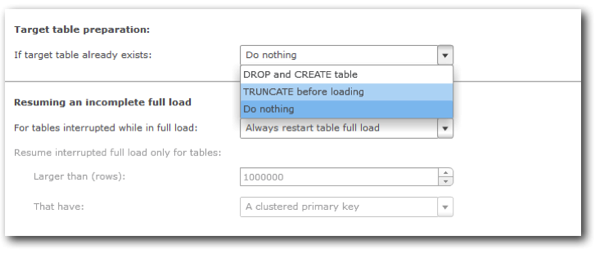
Once you finished reviewing and tweaking settings, you can run the task. Once kicked off, you can review progress from the Monitor screen:
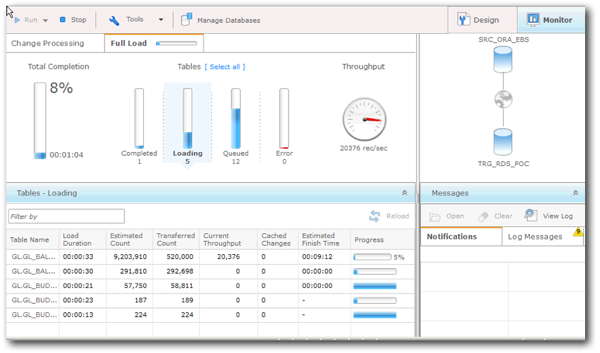
Any errors will be flagged up and can be reviewed in the Messages section. When the load completes, you can verify the existence of the tables in the Redshift database:
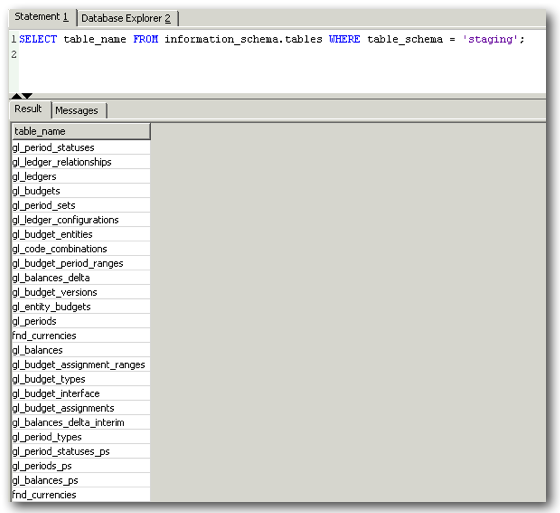
We can now need to grant select privileges on the above objects to odi_work (unless you configured Attunity to use the odi_work account) before it can access them, as despite residing in a schema odi_work can create objects in, they are owned by a different user and therefore permissions still need to be granted.
grant select on <schema>.<object> to odi_work;
So the first stage of getting our data from source to Redshift is complete. Tomorrow, we will look at transforming our initial load data into a target star schema using ODI.