Oracle Data Science - Accelerated Data Science SDK Configuration
How to configure Oracle Data Science's Accelerate Data Science SDK to access Oracle Cloud Infrastructure Object Storage

In my last post, I introduced Oracle Data Science, the new tool from Oracle aimed at Data Science collaboration including an Auto-ML Python SDK named Accelerated Data Science. The SDK allows the speed-up and automation of various tasks in the ML pipeline: from feature engineering, model and features selection and model explainability. A very handy tool for newbies and experienced people facing data science problems.
First version, First Hurdle
In the first version of Oracle Data Science, there is a preliminary step to follow before using the Accelerated Data Science SDK. This step is needed to be able to connect Oracle Cloud Infrastructure Object Storage, to save our models in the model catalog.

Please note that all the other steps within the SDK will still be available even without this setting. You will still be able to execute the calls to feature engineering, model and feature selection, model explainability functions but you'll not be able to save the model in the catalog.
If we want to accomplish this last step, we need to create a private/public key and setup a configuration file. Lucky enough we can run the whole process within the Oracle Data Science Notebook! Let's see all the steps
ADF SDK Configuration
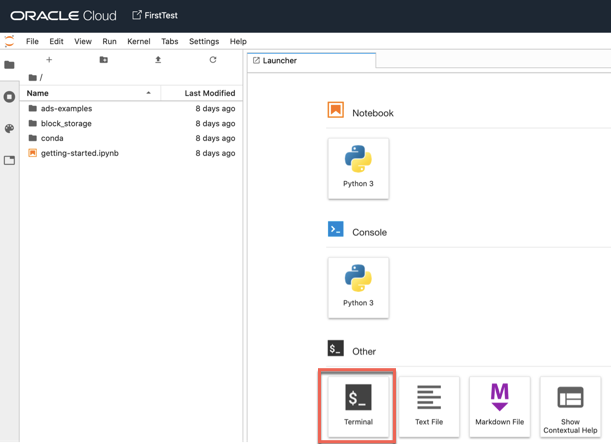
First of all, let's login in the notebook and open a terminal session
We can then create a folder named .oci under the /home/datascience
mkdir ~/.ociIn the next step, we need to generate an API signing Key
openssl genrsa -out ~/.oci/oci_api_key.pem -aes128 2048 the command will ask for a password which will secure the key

now it's time to generate the public key with
openssl rsa -pubout -in ~/.oci/oci_api_key.pem -out ~/.oci/oci_api_key_public.pemagain the command will ask for a password and then generate the oci_api_key_public.pem file
Another item we need to generate is the key's fingerprint, which can be done with
openssl rsa -pubout -outform DER -in ~/.oci/oci_api_key.pem | openssl md5 -cthe command will ask for the key's password and then output the fingerprint

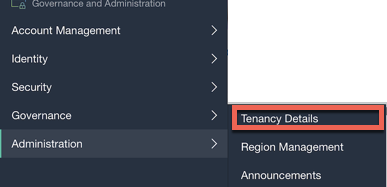
The next piece of information needed is the Tenancy OCID and the User OCID. The first one can be obtained by navigating to the Governance and Administration section and then selecting Administration and Tenancy Details
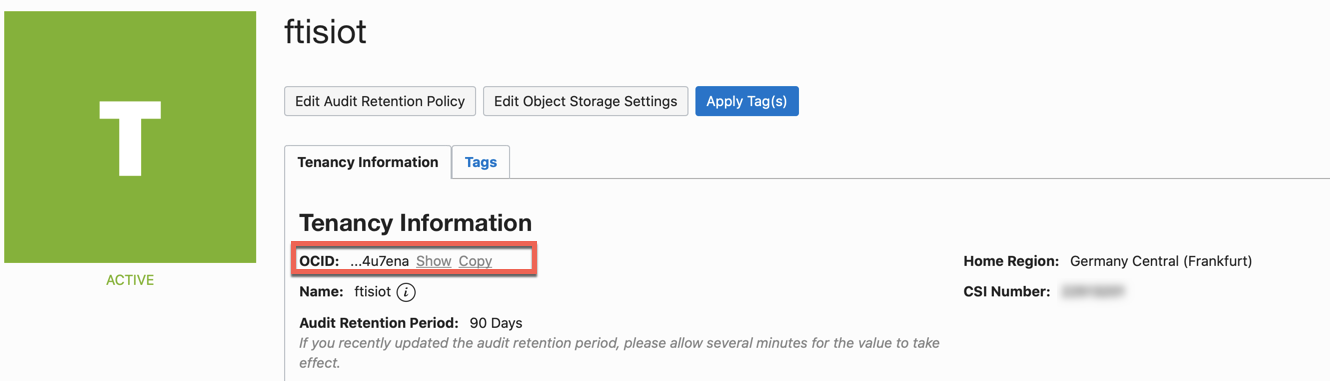
The OCID is shown in the main Tenancy Information section
The User OCID can be found by selecting the Identity -> Users
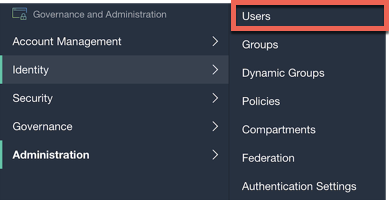
After selecting the User we want to connect with, the OCID is visible

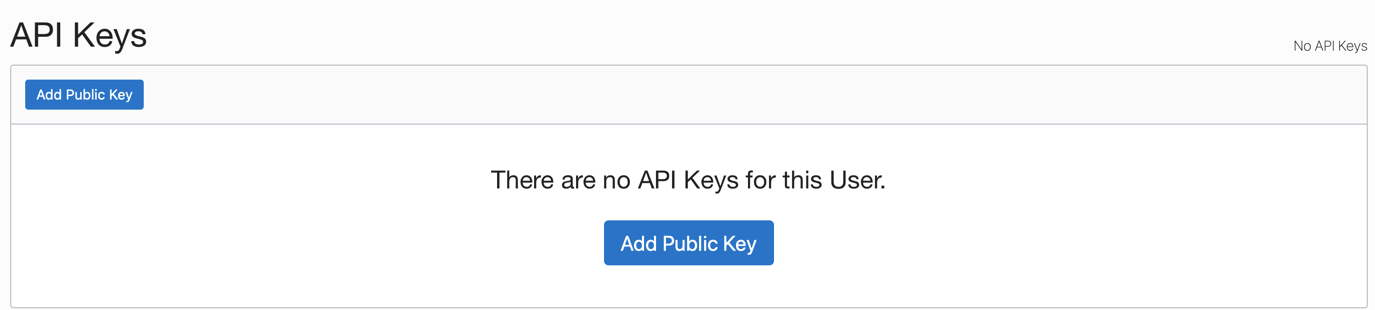
The next step is to upload the public key generated few steps before. Navigate again to the Identity -> Users -> Username screen in the console. Under the global User info, there is an API Keys section
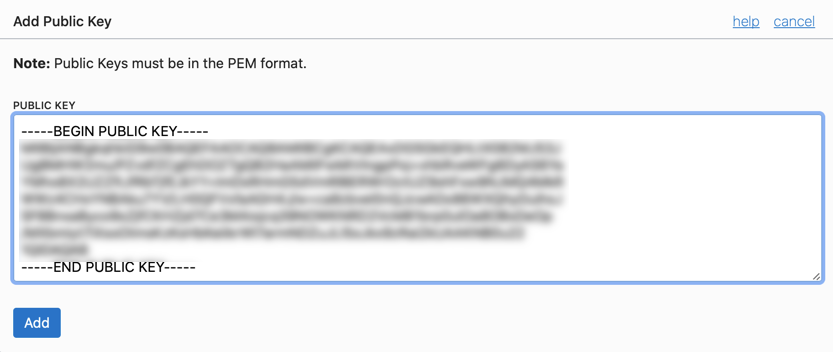
we can click on Add Public Key and paste the content of the oci_api_key_public.pem file generated before
Now it's time to use all the information collected so far to create a config file. The file needs to reside under ~/.oci/ folder and must be named config with the following entries
[DEFAULT]
user=<OCID of the user>
fingerprint=<Fingerprint of the Key>
key_file=<Path to the private Key>
pass_phrase=<Passphrase used to Encrypt>
tenancy=<OCID of the Tenancy>
region=<Region where the Tenancy is hosted>
an example is
[DEFAULT]
user=ocid1.user.oc1........
fingerprint=c8:24:75:00:00....
key_file=~/.oci/oci_api_key.pem
pass_phrase=oracle123
tenancy=ocid1.tenancy.oc1.......
region=eu-frankfurt-1
If the settings are not correct, when trying to save the model you'll get an error like the following
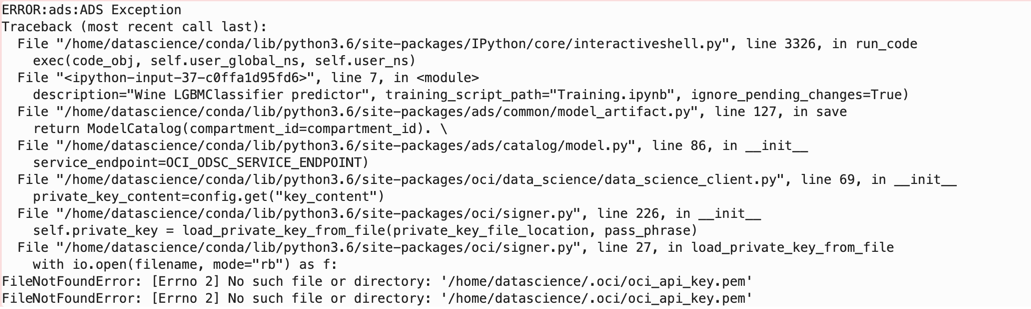
If, settings are correct, the save model step (defined in my previous blog post) will execute correctly. Enjoy your trials with Oracle Data Science!