Oracle Digital Assistant – Deep Dive into Skill Development: Part 1

With the developed understanding of the fundamentals of Oracle Digital Assistants in the very first blog of ODA series (can be found here, if you missed it), it’s now time to take a deep dive into Skill development.
My attempt would be to take you through the basic steps on end-to-end development of a simple skill, to be able to understand the process in depth.
Let’s get started!
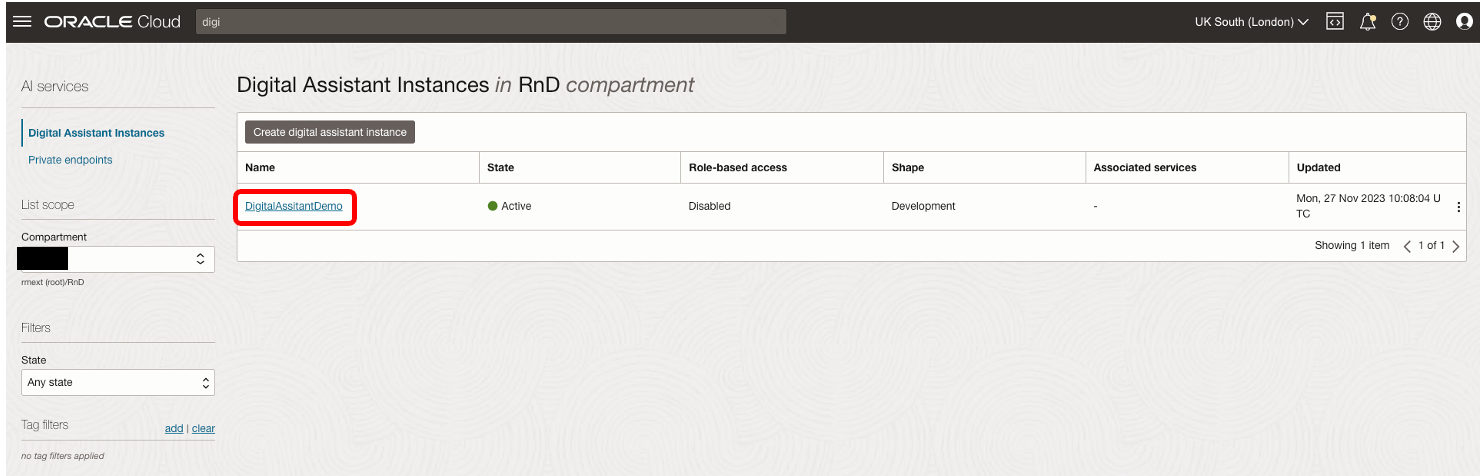
Once you login to your OCI account, search for Digital Assistant in the Resource/ Services search bar and click on the highlighted link.

You will be able to access your active Digital Assistant instance within the respective compartment as shown below:
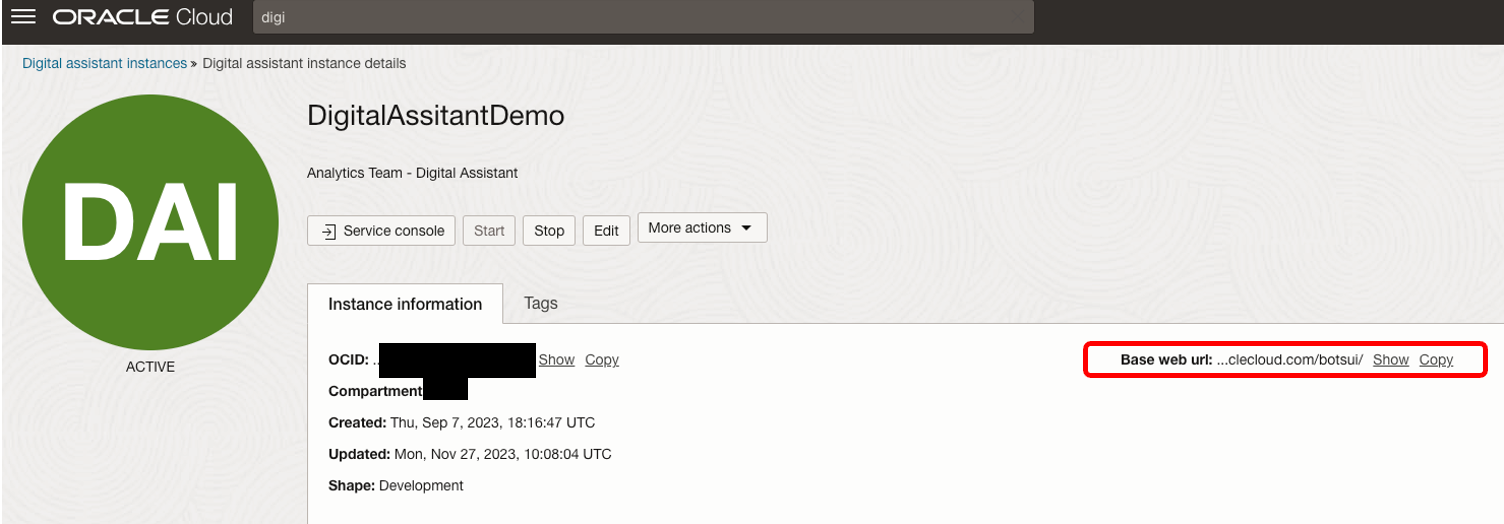
You can access the base web URL of your digital assistant instance by clicking on the highlighted instance hyperlink and copying the URL from the details page.
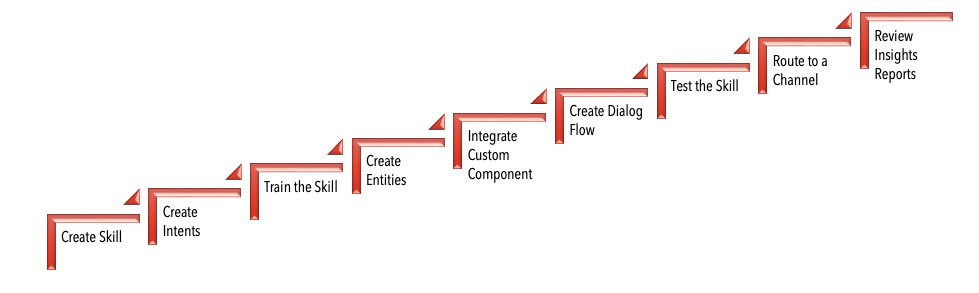
Skill Development Lifecycle:
The high-level view of skill development life cycle was covered in the first ODA series blog and can be summarised using the below diagram.
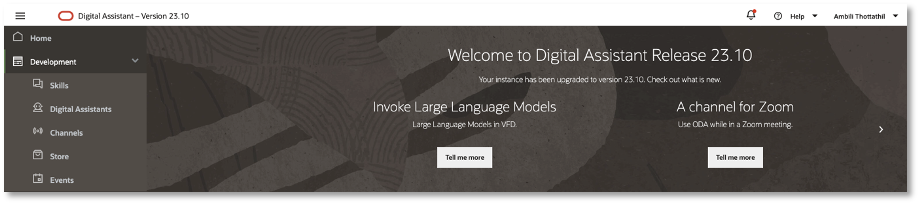
From the home page of the Oracle Digital Assistant platform, navigate to Development>Skills in the side menu to manage the end-to-end development of your skills.
Let us first investigate the Create Skill step in detail.
You can create skills in three ways, as depicted in the below diagram:

i> Create New Skills from Scratch
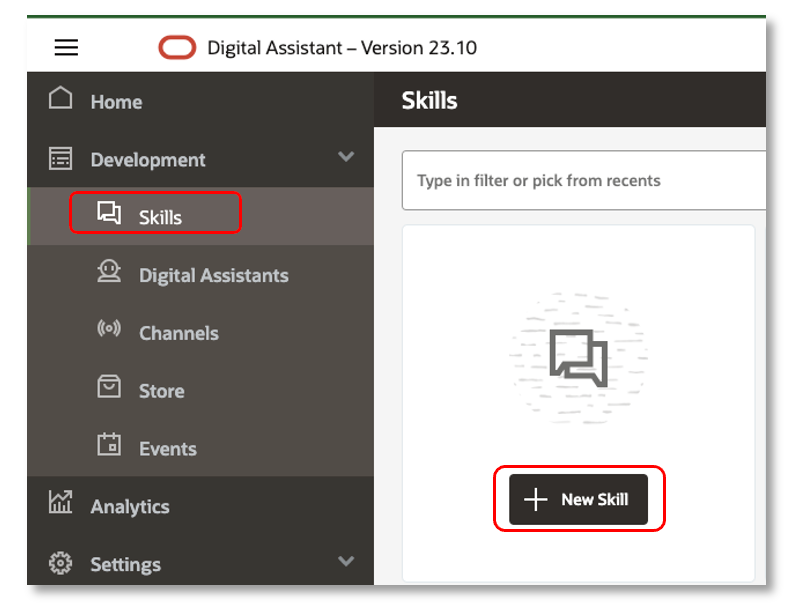
To build a brand-new skill from scratch, click the hamburger icon to open the side menu, navigate to Development>Skills and click on + New Skill.
ii> Clone Existing Skills & Customise
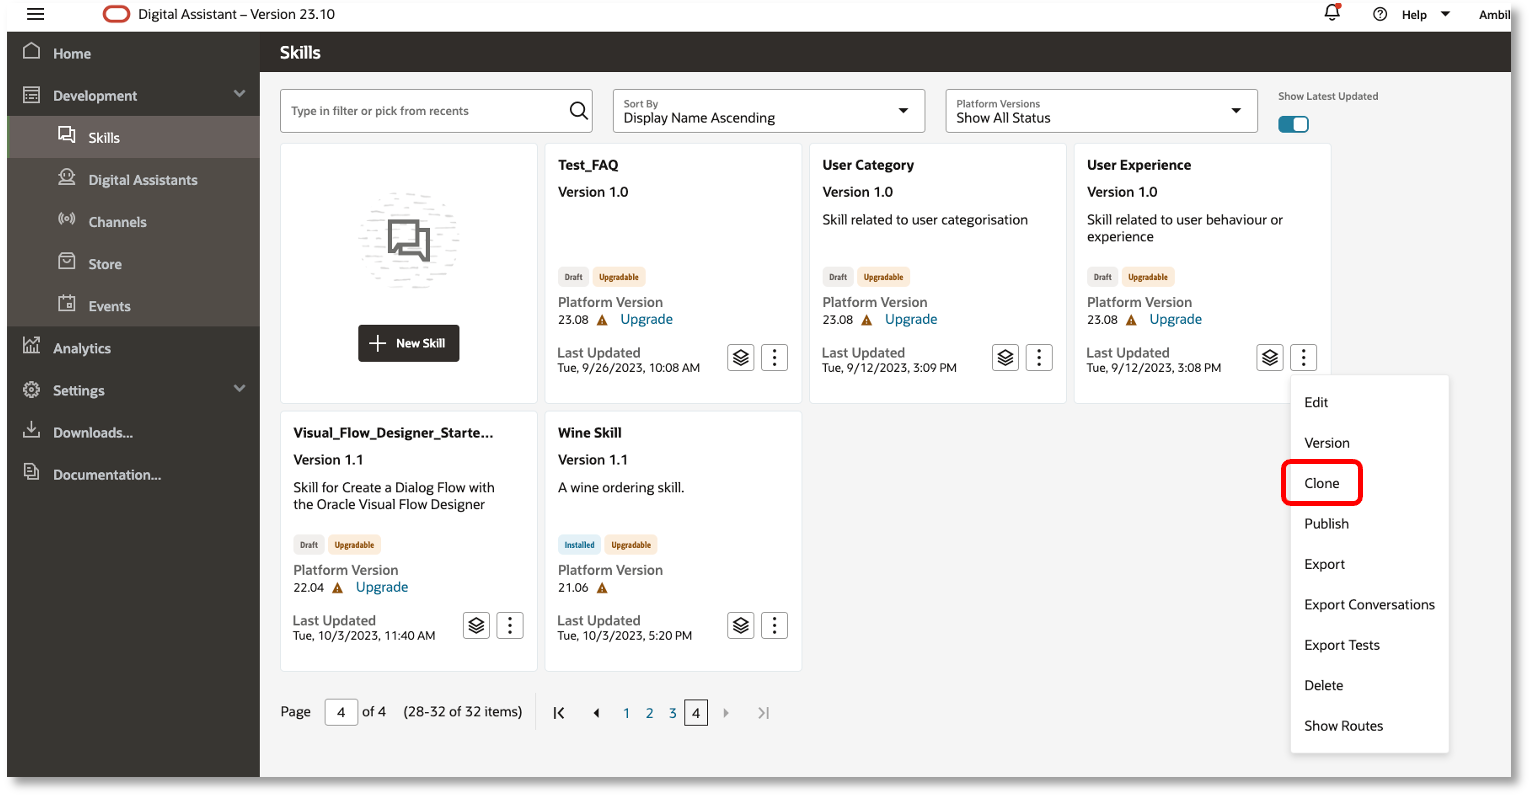
If you want to clone an existing skill and customise based on your requirement, access the Skill Catalog and locate the skill to clone from. From the Options icon, select Clone.
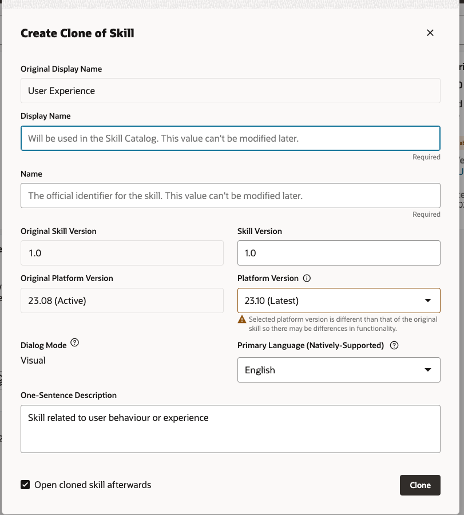
In the Create Clone of Skill window that opens, you can modify the Display Name, Skill Name, Platform Version and Primary Language as needed and click on Clone. You can further customise this cloned skill, as per requirement.
iii> Import Skills
To create a new skill by importing an exported version from another instance, navigate to Import Skill option from the Skill Catalog.

Upload the Zip file of the exported skill and click on Open.
Sample Skill Development
Let us now create a simple skill from scratch and understand the skill lifecycle thoroughly.
I am creating a skill called ‘Greetings_Test_Skill’.
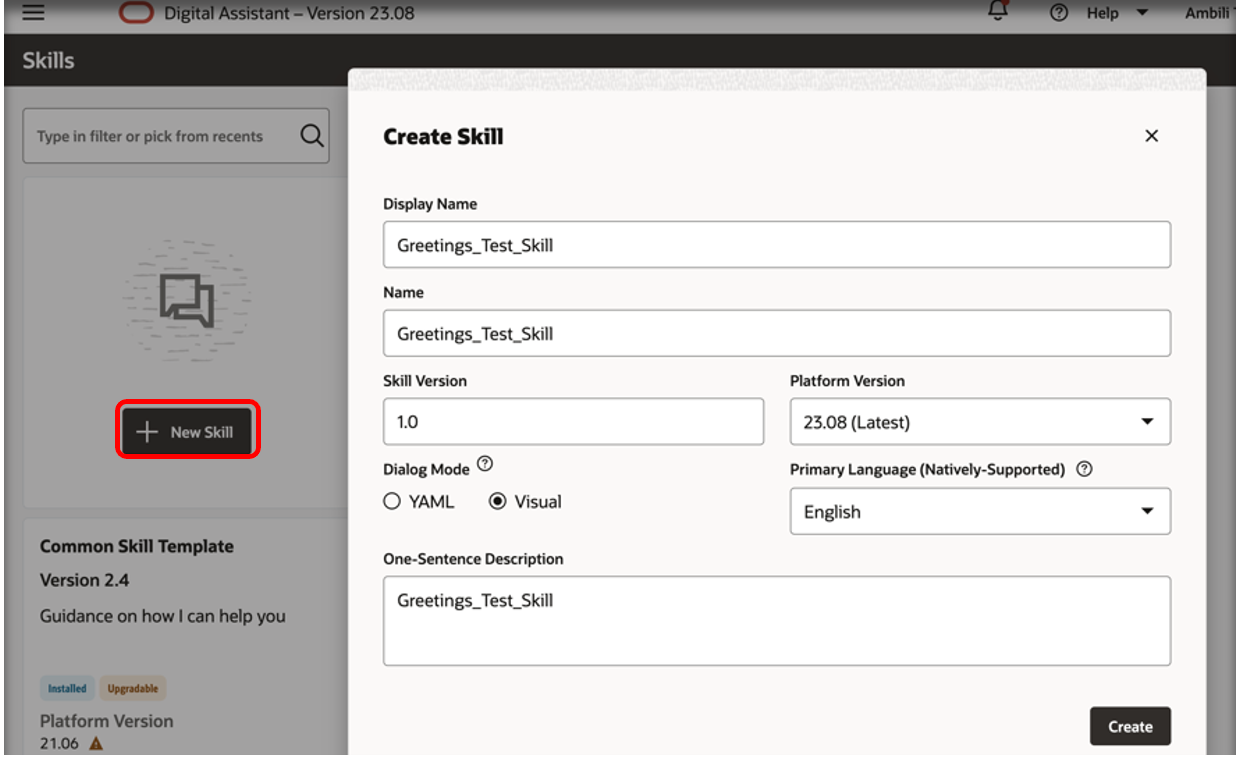
For this skill, the Platform Version was by default selected as 23.08 which was the latest available version at the start of November. Currently, the latest ODA version available is 23.10.
The Primary Language field is selected as English. If your requirement demands multi-language support, you can choose either Native Language support or Translation Service.
ODA supports below 8 languages natively. You can refer to the level of support for each language, in the below table from Oracle docs:
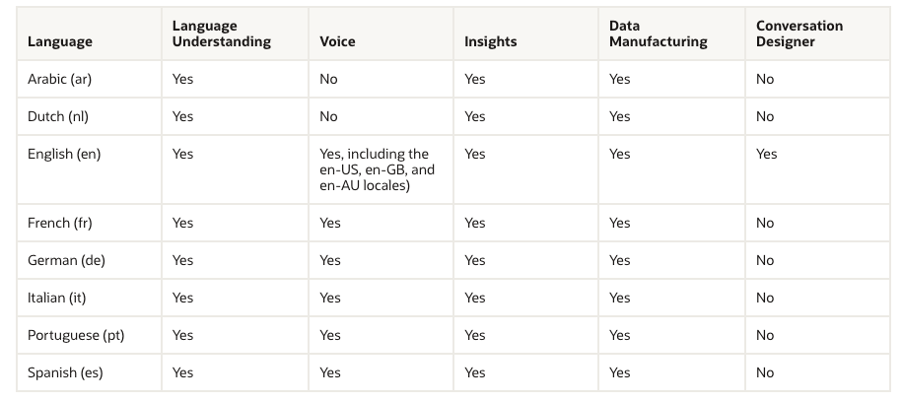
Under Translation Service, you can choose from a wide range of 194 language options, out of which English is the preferred one. It would be interesting to explore the Translation Service dedicatedly in another blog (a note to self 😊).
The Dialog Mode can be either YAML or Visual.
- In YAML, you can use a simple markup language to define the user-skill interaction framework and describe the dialog in terms of actions and dialogs in a single file.
- In Visual (default), you can utilise the Visual Flow Designer to define the framework visually. You can design the dialog flows for each state and connections between the states in a more intuitive way than YAML. You can also set variables, parameters and properties for each component defined in respective editors. The advantage of Visual editor is in the ease and modularity aspect.
Creating Intents:
As discussed in a previous blog, Intents describe the actions of your skill and are also important to enable skills to recognise user input.
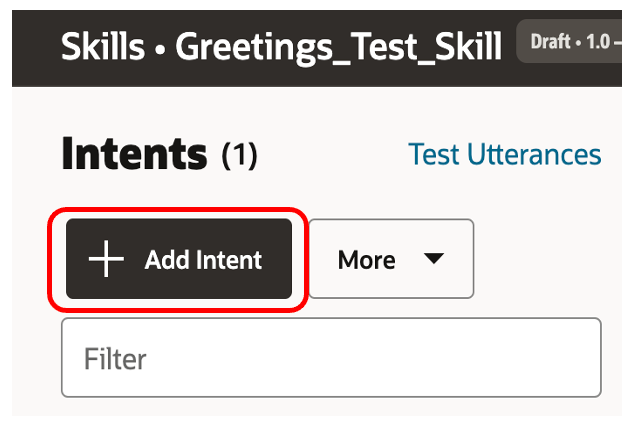
- To create an Intent, click on Intents in the left navbar and then click on + Intent button.

- Click + Add Intent button to create your first intent for the skill. Remember that your skill needs a minimum of 2 intents.
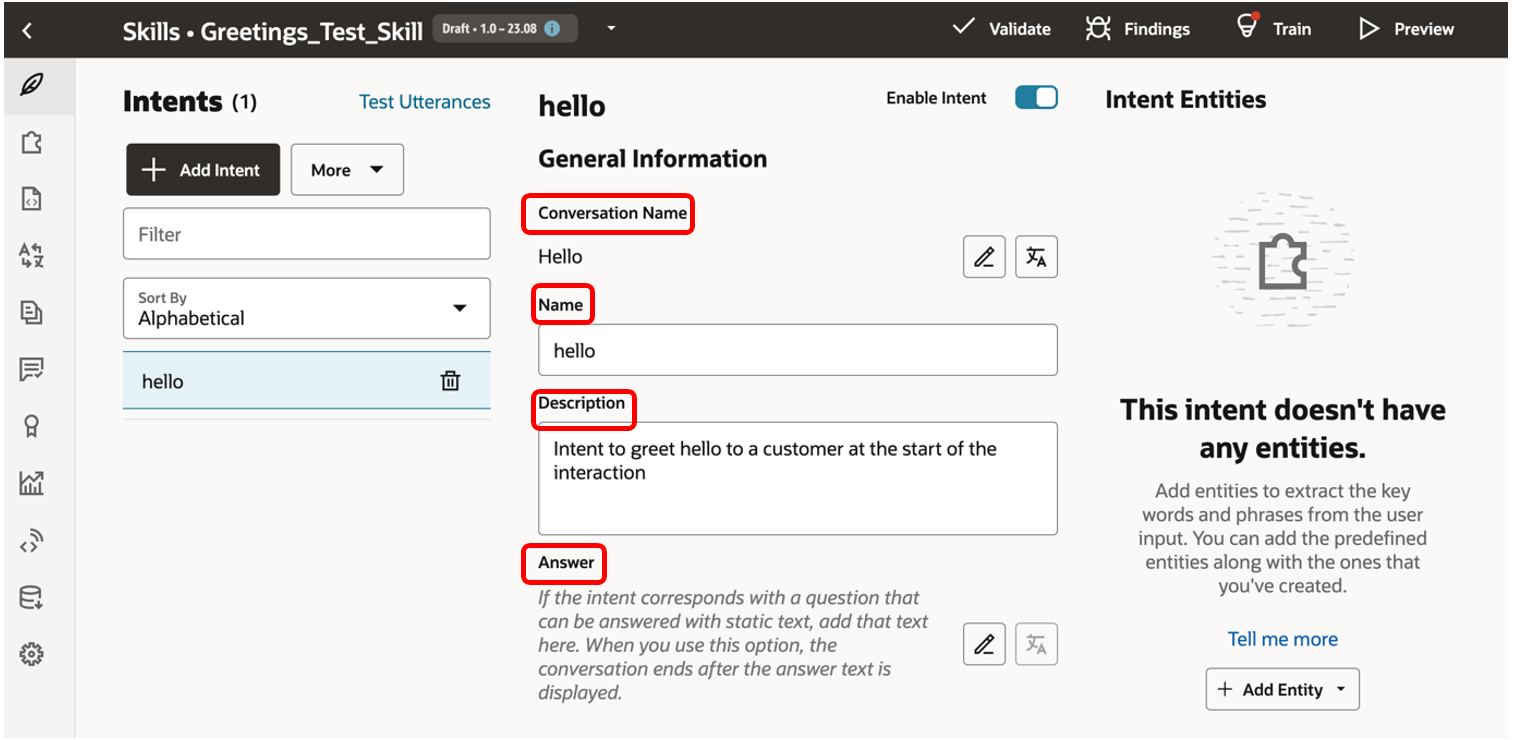
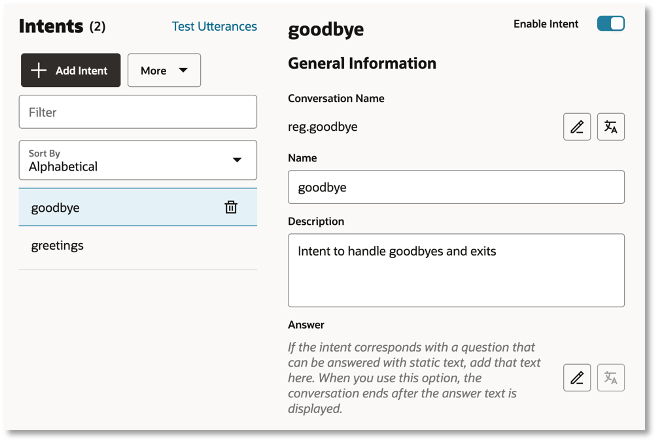
- It is recommended to give a descriptive name in the Conversation Name field and a brief intent name in the Name field. If the Conversation Name is not defined, the Name field value is used instead.
In the sample intent, I have used the same name as Hello in both fields.
- Add a Description that should describe the intent and the details around what makes it unique, the actions performed etc.
- If you are creating an Answer Intent, you can click on the edit icon and add a short answer to the Answer field.
- Continuing with the fields, next, we have Annotations wherein optionally you can add one or more tags for the intent. The idea is to categorise it in a useful way, by choosing any apt word.
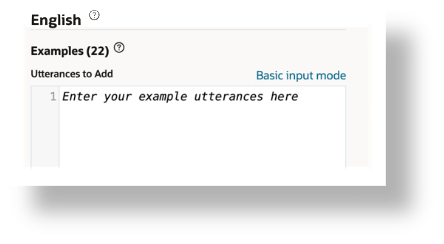
- The most important field here would be Utterances to Add – wherein we add sample utterances to start building the training corpus.
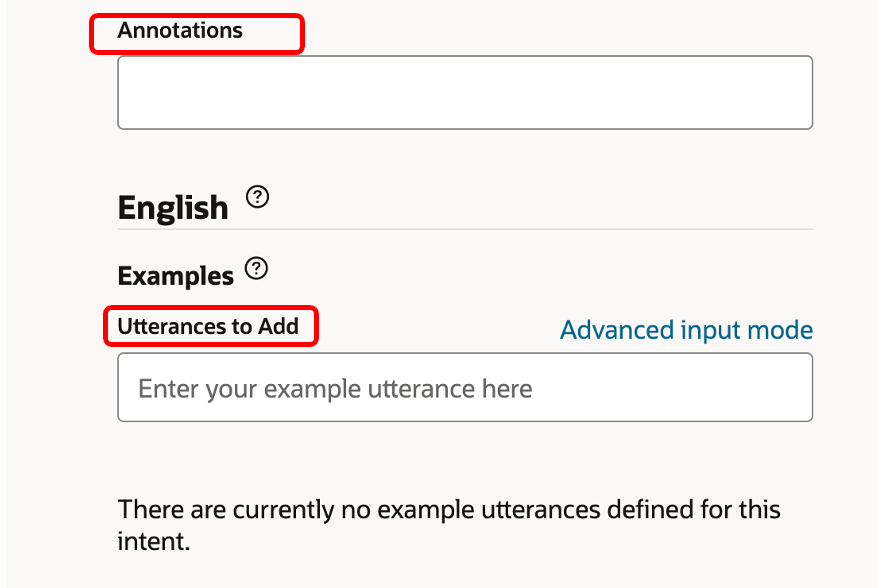
For our hello intent, let us add example utterances as highlighted below.
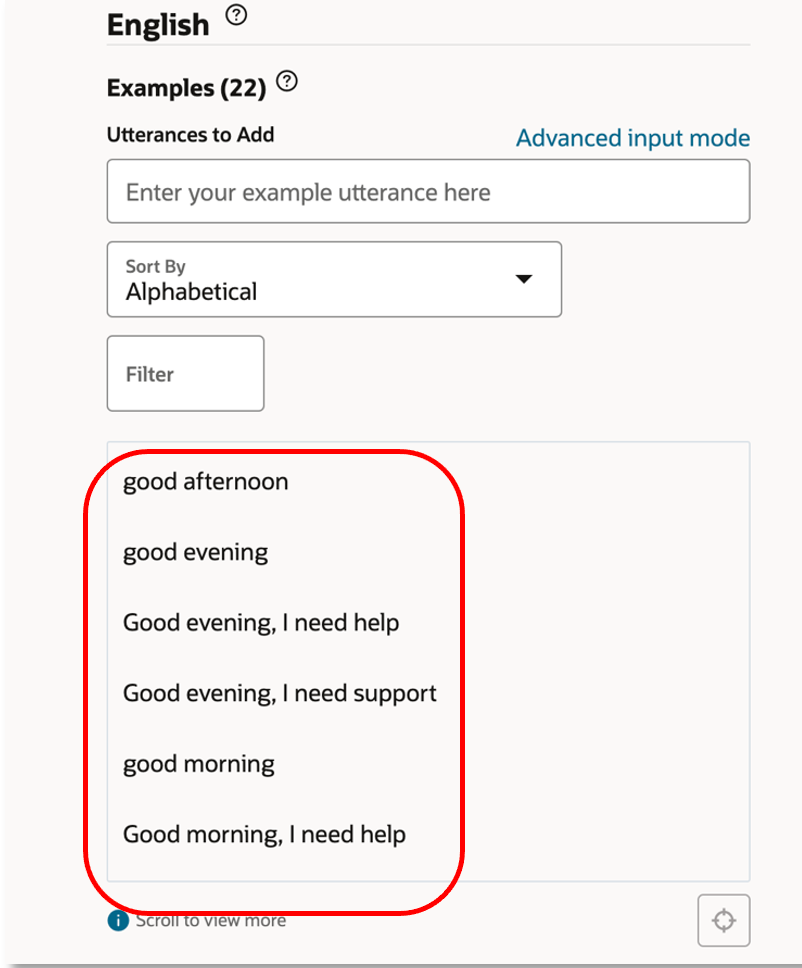
I have added 22 utterances here for the hello intent as a sample.
- In the Auto-Complete Suggestions field, optionally we can enter suggested phrases to help the user input an appropriately worded request.
- If the respective intent requires to identify any specific user input, we should add an entity which we can explore shortly.
Model Training
At this point, we are good to teach our skill how to comprehend user inputs using the set of utterances provided so far.
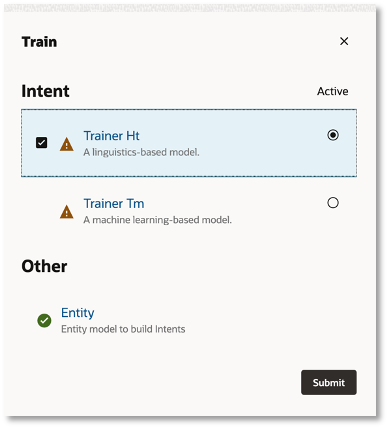
- Click on Train, choose a model and click Submit.
- For intents, the available model options are – Trainer Ht and Trainer Tm. Trainer Ht uses pattern matching and is a linguistics-based model whereas Trainer Tm is a machine learning algorithm that uses word vectors.
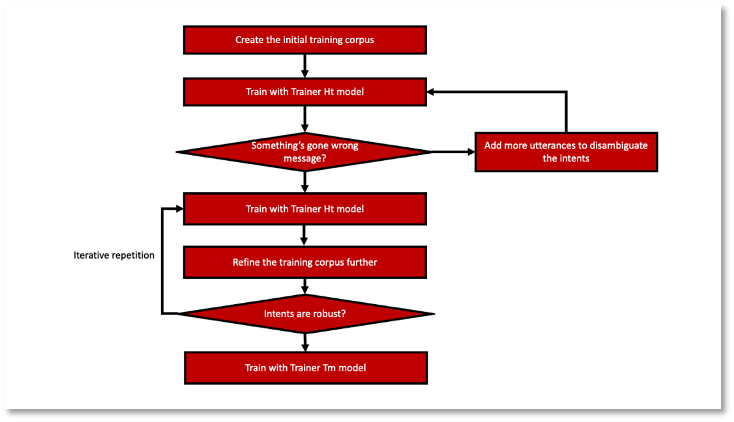
The ideal sequence of Model Training Process is depicted in the below flow diagram.
Let us explore the entity mapping and utterance testing with the help of a new skill cloned from our initial sample skill - with 2 separate intents defined for greetings and goodbye. For the greetings intent, the utterances are mapped the same way as the hello intent we covered above.
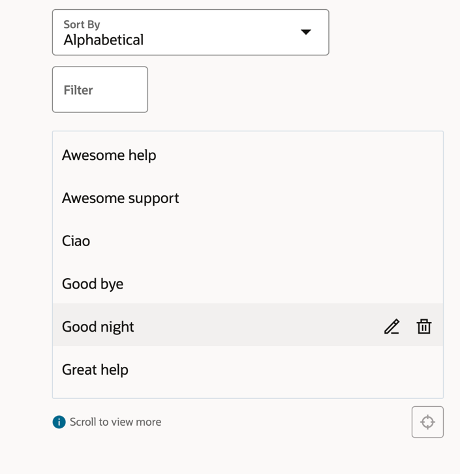
You can take a look at the goodbye intent mappings in the screenshots below, to brush up on what we discussed so far.
Creating & Mapping Entities:
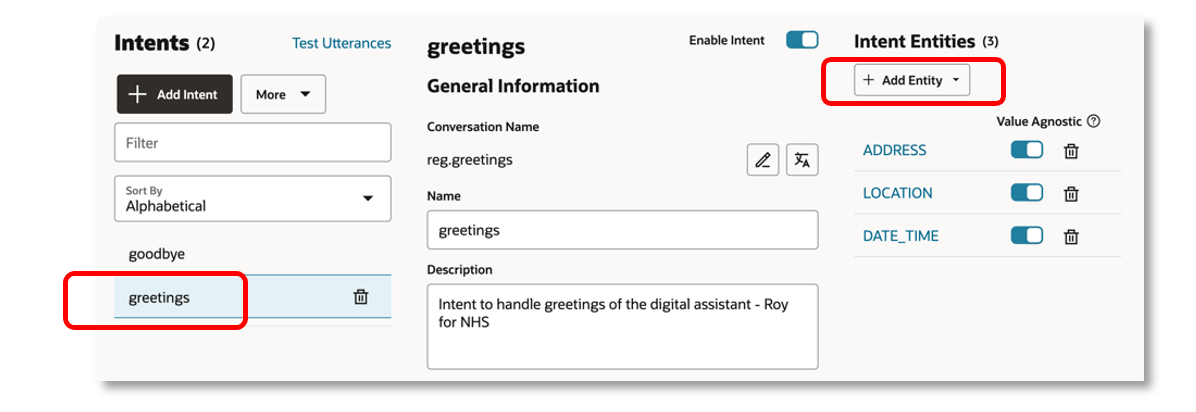
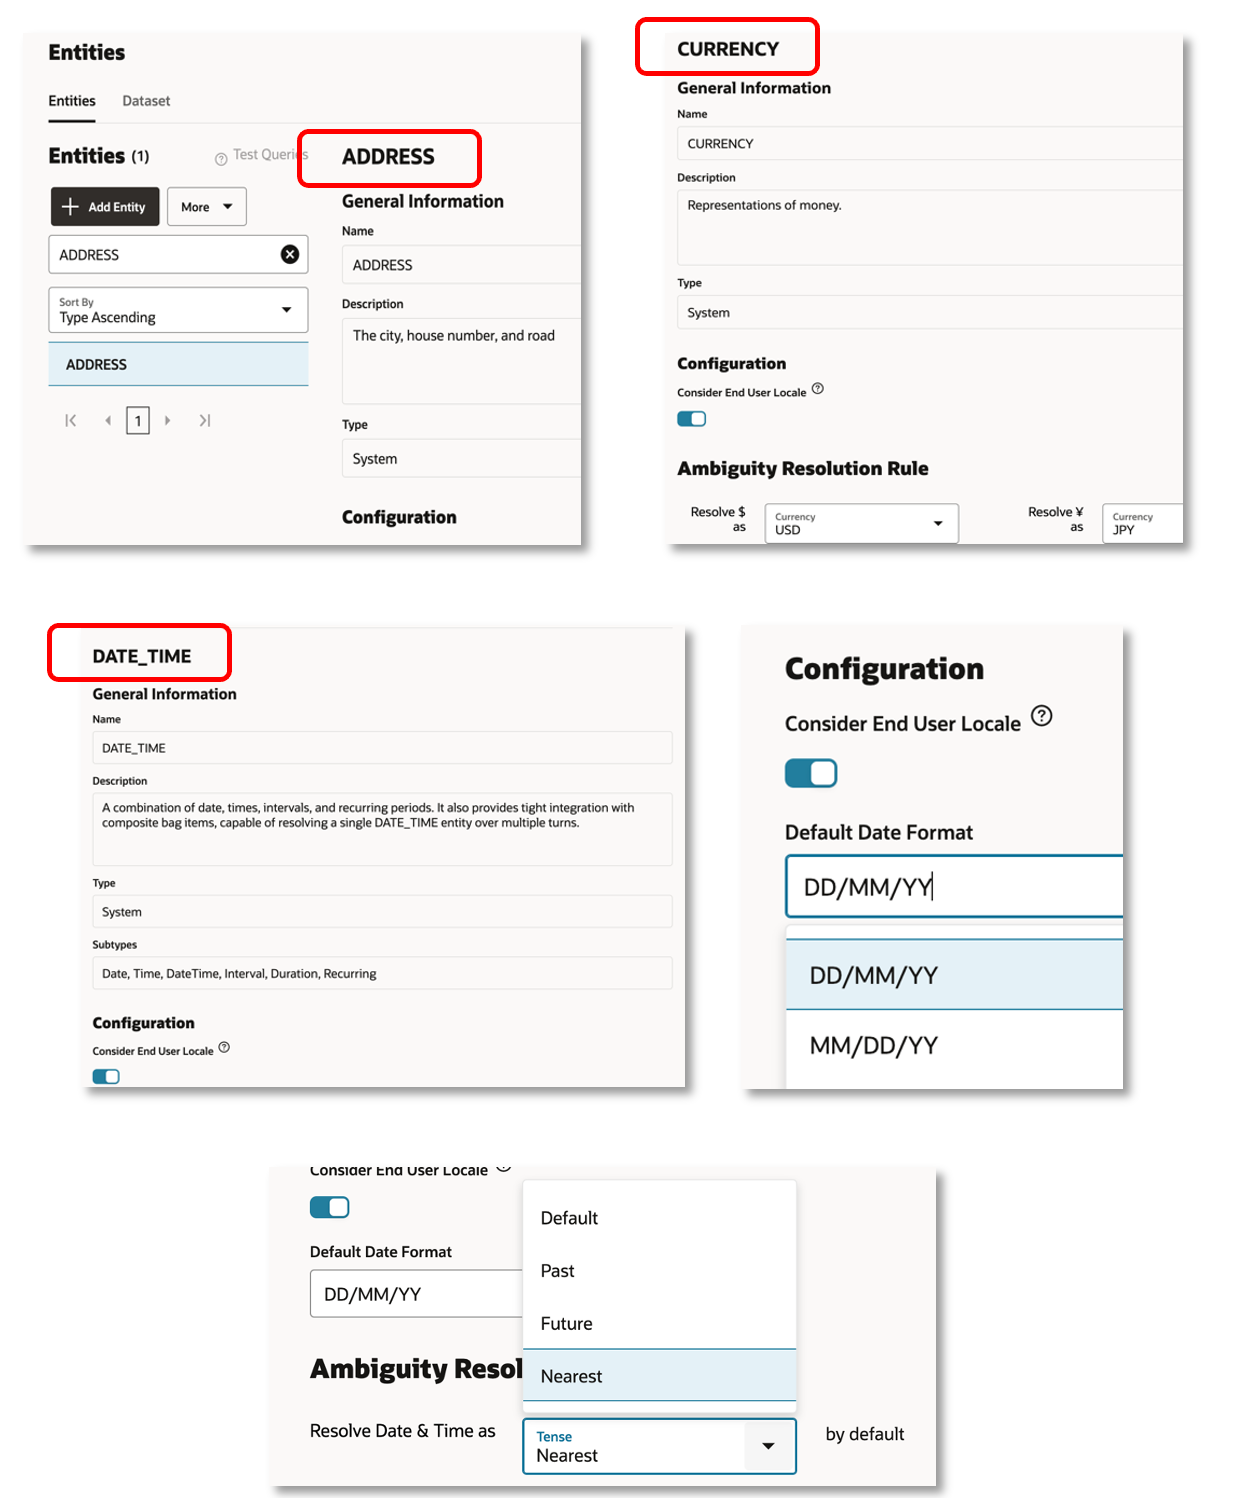
For the greetings intent, let us understand how the entity mappings can be applied. Entities can be built-in or custom and are added to complete an action within the dialog flow or make a REST call to a backend API. In the below screenshot, you can see that the greetings intent has been mapped with 3 built-in entities – ADDRESS, LOCATION and DATE_TIME.
To add a new entity, select the intent and click on +Add Entity as highlighted below.
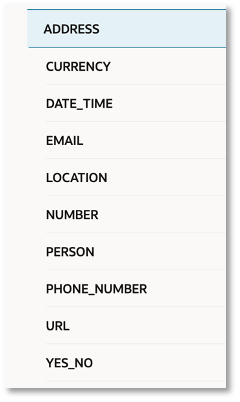
We have the following 10 built-in entity options to choose from:
Let’s take a look at the field mapping of the three entities we have configured for the greetings intent.
More on each of the Entity types, use cases, development and best practices will soon follow in a dedicated blog, with a detailed discussion on each.
Utterance Tester:
Once we have created the intents and completed the model trainings, we are good to do the utterance testing which does manual and batch testing to validate how well the model is able to resolve intents from user messages.
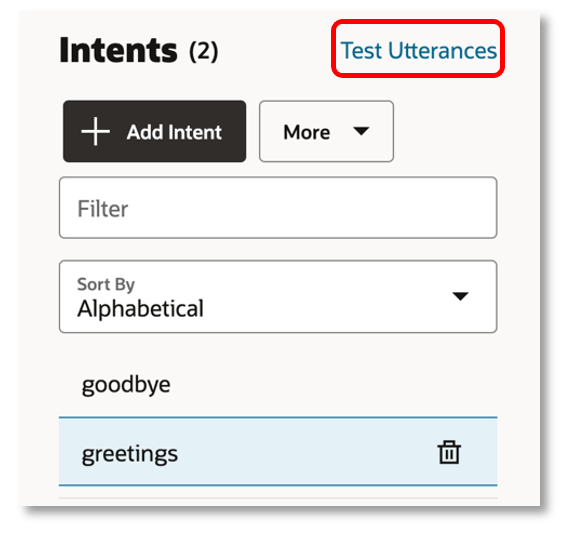
Click on the highlighted Test Utterances link to access the Utterance Tester.
Let’s enter test phrases to evaluate our skill’s cognition.
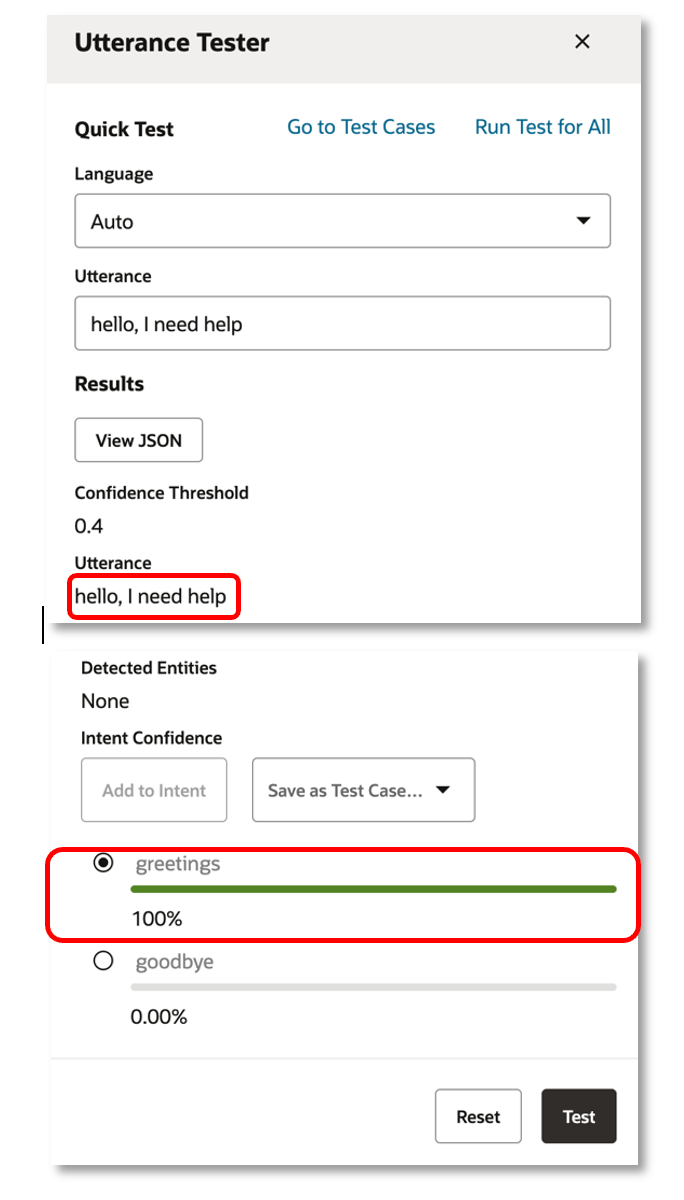
In the below example, I have keyed in – “hello, I need help” as the test utterance. This being a straightforward test, the skill has no ambiguity whatsoever and has shown 100% confidence in the greetings intent as the invoked one.
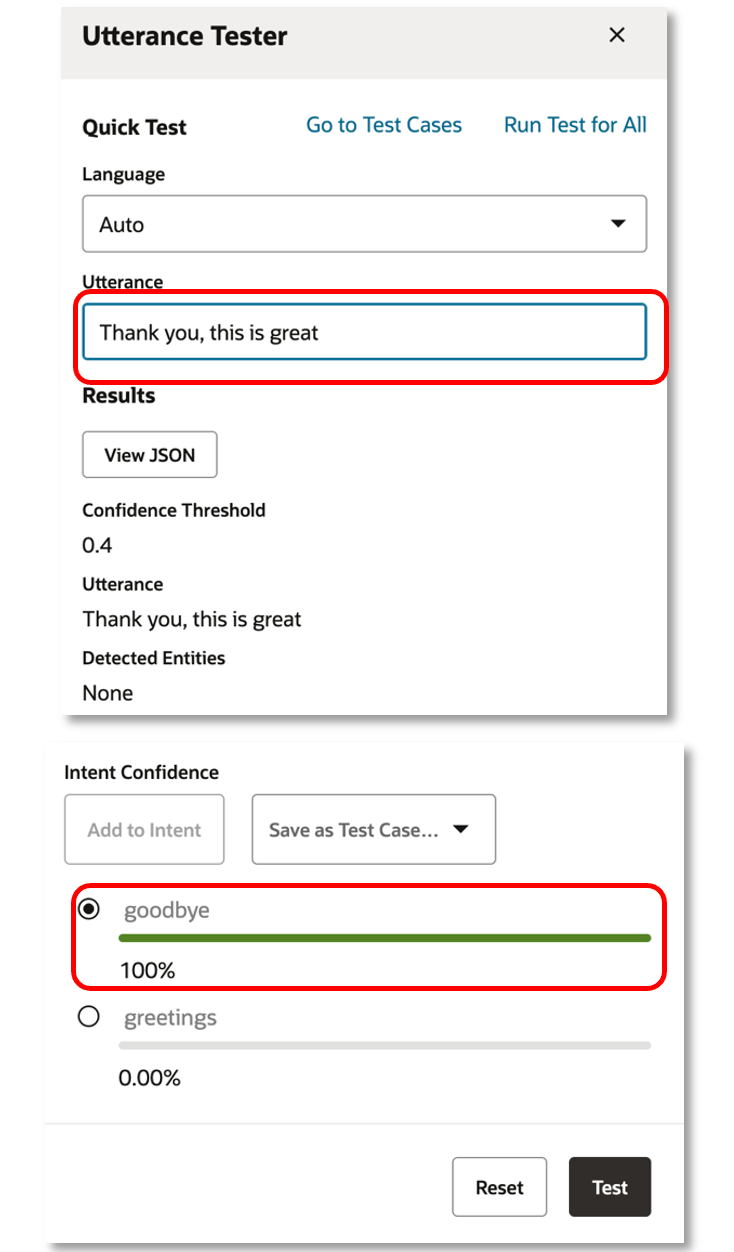
As a second test, let us give a thank you message and check which intent is getting invoked by it. Test utterance of “Thank you, this is great” has given 100% intent confidence on the goodbye intent.
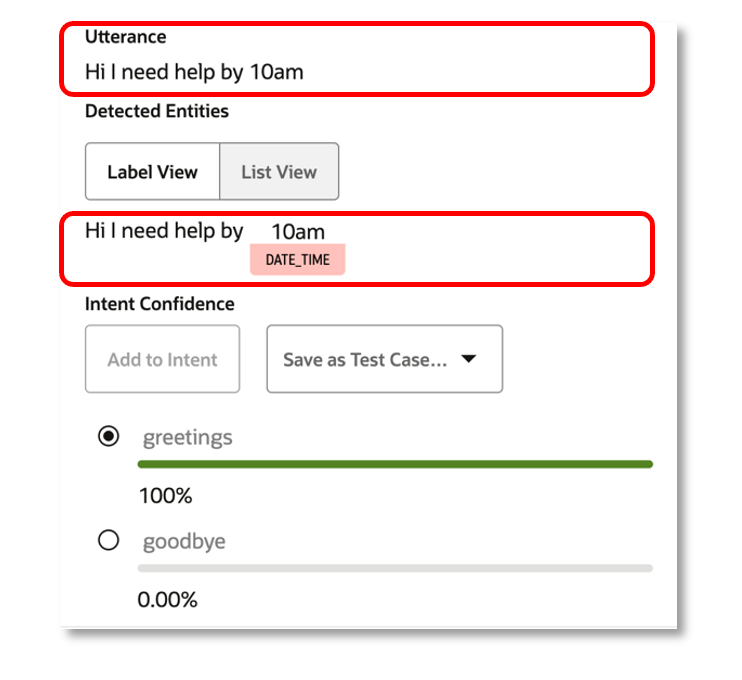
If you recollect the entities we had mapped to the greetings intent, it is time to check if they are being identified correctly. Let’s key in the test utterance as “Hi I need help by 10am”.
You can see below that 10am is accurately being mapped as a DATE_TIME entity under the greetings intent.
What we just performed are tests on our intents in isolation and once we complete the end-to-end development after designing the conversation, defining the dialog flows on top of added custom components etc; we will be able to retest it all in the context of the digital assistant. This final piece shall be dealt with in a separate blog to draw full focus into its details.
Summary
Now that you have a feel of ODA skill development in depth, am sure you will be able to appreciate the simplicity and intuitiveness of Oracle Digital Assistant platform. We have seen how a simple skill can be developed, with intents, utterances & built-in entities defined and mapped to it. Also, we discussed the steps and best practices around model training and did a fair bit of utterance testing to see the bot in action.
Stay tuned for upcoming ODA blogs which will cover more on the remaining processes under Skill development, Conversation Designing, SQL Dialogs, FAQ Bots and a lot more.