GoldenGate and Oracle Data Integrator - A Perfect Match in 12c... Part 2: Journalizing Knowledge Module

This is the second post in a blog series on the integration between Oracle Data Integrator (ODI) 12c and GoldenGate 12c. The first post focused on the latest, yet-to-be-released, Oracle Information Management Reference Architecture and some high-level features new to the 12c versions of each product. We also began working through the details of the GoldenGate installation and configuration, specifically the JAgent setup, which is necessary for communication between ODI and GoldenGate during the setup of "online" journalizing. In this post, we'll look at the new features of the Journalizing Knowledge Module "JKM Oracle to Oracle Consistent (OGG Online)" and get started on the modifications to the JKM that must occur for us to load the Raw Data Reservoir (RDR - acronym coined by Nick Hurt in the comments of my first post...I like it!) and Foundation Layer simultaneously.
ODI Journalizing
Before I get into editing the JKM, let me briefly go through an introduction of ODI Journalizing, aka Change Data Capture (CDC). In case you missed it earlier, ODI CDC is implemented using a Journalized Knowledge Module. The JKM generates the infrastructure for the CDC, creating journal tables that store the change rows and views that provide access to the change rows for use in ODI Mappings. ODI CDC can be implemented using various capture processes, such as triggers on source tables, timestamps on rows, or mining of the database logs via Oracle Streams or, in our case, Oracle GoldenGate. A great explanation of ODI JKMs and how they work, written by Christophe Dupupet of the Oracle Data Integration A-Team, can be found here.
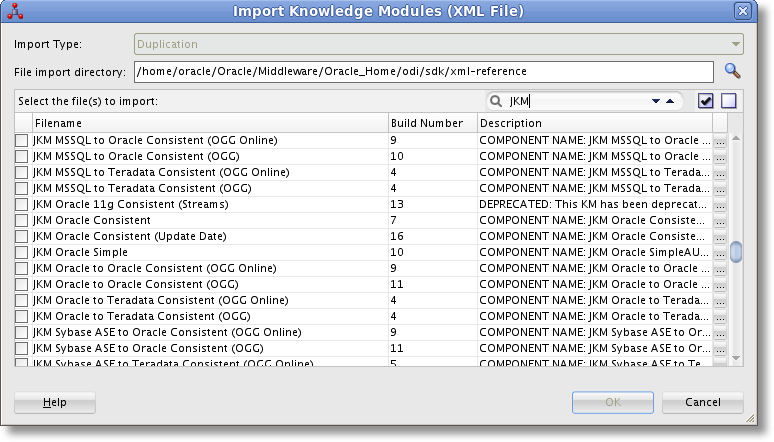
The integration between GoldenGate and ODI begins with a Journalized Knowledge Module, in our example we'll be using the “JKM Oracle to Oracle Consistent (OGG Online)”. The JKM, delivered with ODI, will create the GoldenGate parameter files, configure GoldenGate process groups (and start them up), and generate the ODI CDC tables and views. The JKM, added to the source Model in 12c, uses the ODI metadata to generate the GoldenGate parameter file mappings. This alone saves quite a bit of manual work and reduces possible typos caused by human error.
JKM Oracle to Oracle Consistent (OGG Online)
In the previous post, I mentioned the new capability of the JKM that allows for an "online" integration between ODI and GoldenGate. But, there are many other new features that need to be described, so we'll walk through those here.
ODI Tool: OdiOggCommand
The JKM uses an undocumented ODI Tool called OdiOggCommand in the target command of some tasks that are executed only when in "online" mode. This tool has different values for a parameter called OPERATION.
EXECUTECMD: executes various commands, such as Add Extract, within GGSCI
EXECUTEOBEY: runs the OBEY command against an obey file in GGSCI
DEFGEN: generates the source definitions file by executing the DEFGEN command
SAVEFILE: uploads the parameter and obey files to the GoldenGate installation directory

I imagine the code behind this ODI Tool is simply executing command line calls to GGSCI, DEFGEN, etc. It would be great to see some Oracle documentation on this one!
GoldenGate Topology
The "online" aspect of the JKM requires that a Data Server, Physical Schema and Logical Schema all be setup under the GoldenGate technology in ODI. The Data Server contains the location and connection information for communicating with the JAgent on either the source or target GoldenGate server. Under that, a Physical Schema must be setup for each extract (the pump is included) and replicat process group that will be implemented on that server.
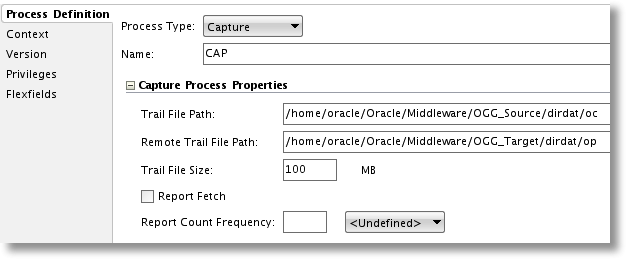
In this screenshot, we have a Physical Schema with the process type set to Capture, also called the extract. Here we set up the directory path on the source to the location where captured transactions from the source database logs will be stored in GoldenGate's own log files, called trail files. The remote trail file directory, setup on the target server and accessed by the pump process in order to move transactions from the source trail to the target trail, must also be added. Additional options such as trail file size (how large a trail file can get before rolling over to the next file) are also available to be set. Just below the Capture Process Properties are the Additional Options, parameters that can be added to the extract or replicat parameter files based on specific needs of the solution.
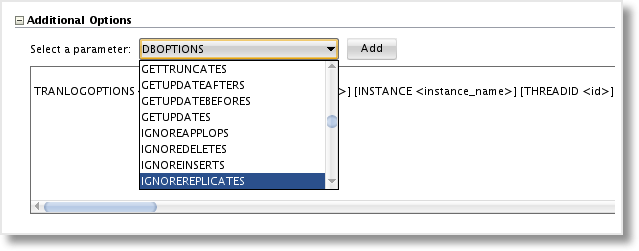
Here we can add options to handle different aspects of the extract or replicat, such as TRANLOGOPTIONS on the extract. Once I add this option, I get a template of the additional parameters I can configure. For example, I may want to access my transaction logs stored in ASM via the database rather than directly from ASM. The DBLOGREADER option lets me utilize the ASM API in the database, simplifying my access to the logs.
TRANLOGOPTIONS DBLOGREADER, DBLOGREADERBUFSIZE 2597152
When I add the additional option to the capture physical schema, it will be generated as a part of the extract parameter file. This helps to drastically reduce the amount of manual editing that had to occur after the parameter files were generated in the 11g version, and is a great addition to the JKM.
JKM Setup and Options
The JKM is actually applied to the source ODI Model, which is a grouping of logical table structures called Datastores. On the Journalizing tab in the Model, we first set the type (Consistent Set) and choose the appropriate JKM.
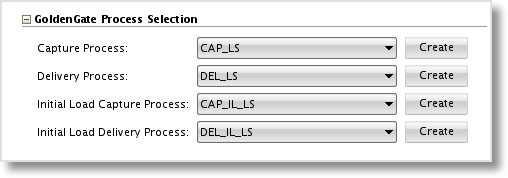
In the GoldenGate Process Selection section, we choose the Capture and Delivery Logical Schemas that were setup in the ODI Topology. If none have been created, but the Data Server for the source and target GoldenGate installations exist, we can choose to create the Physical and Logical Schemas directly from the Model by clicking the Create button. This is a nifty way to separate the system administration role (setting up the Data Server) from the metadata management or developer role.
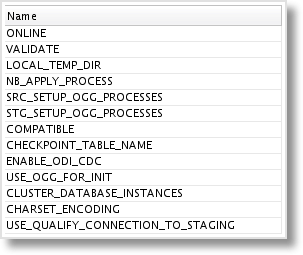
The JKM also has a set of Options with configurable values, some being required and others optional. The number of Options has been reduced by quite a bit in the 12c JKM. This makes sense, as we've seen that additional metadata such as the trail file location and trail file size are set elsewhere. We'll go through these in more detail later on when setting the values in our example.
That covers the updated features in the JKM, now let's talk Knowledge Module customization.
JKM Customization
In the first post, I described how we want to extract the source data once and replicate it into both the Foundation Layer and Raw Data Reservoir in parallel. The JKM is set up to load the ODI CDC Framework (the fully replicated table and J$ table) out of the box, but not the Foundation table. In case you're unfamiliar with the purpose of the Foundation layer, the idea is to store all transactional history from the source tables by converting every transaction into an insert, and tracking the type of change (insert / update / delete), commit date, and commit SCN. With this information stored from the beginning of the data warehouse, it can be used for historical drill-throughs from the dimensional model, or to completely reload a star schema - including all history. With the stage set, let's look at what we're going to change in the JKM.
1. Add New Option "APPLY_FOUNDATION" This option, when true, will allow the Start Journal process to generate the source-to-foundation mapping statement in the Replicat (apply) process.
2. Add New Option "FND_LSCHEMA" The Logical Schema name for the Foundation layer schema.
3. Add New Task "Create apply prm (4) RM" This task will create the source-to-foundation mapping code and add it to the replicat parameter file.
4. Set Option on "Create apply prm (4) RM" Task Set the execution Options to have APPLY_FOUNDATION as the only checked option. This will determine whether or not that task will execute when Start Journal is run.
5. Edit Task "Execute apply commands online RM" We'll comment out the "start replicat ..." command, as we'll first need to complete an initial load of the source data to the target.
Now, I did say I would get into the editing of the JKM in this post, but after describing the new features of the Knowledge Module, I'll save the actual details for the part 3 of the series! Up next, editing the JKM and building the necessary ODI objects so we can start journalizing.