Oracle APEX - Debugging a Social Login


Integrating social login within Oracle APEX offers remarkable convenience. I've had the privilege of configuring various Identity Providers (IdP), such as Azure AD, Google, Oracle IDCS, PING, and more. Generally, the setup process is quite smooth, and authentication functions seamlessly. However, the real challenge arises when things don't go as expected.
For those seeking assistance with the initial setup, we recommend referring to our previous blog post, which covers the fundamental configuration steps. You can find it here.
In this blog post, we'll explore how to fix issues with social login in Oracle APEX. We'll uncover the hidden challenges that can make this seemingly easy process a bit tricky.
Debugging Authentication in APEX
Debugging in APEX is typically a straightforward process for developers. When you're running a page in an application and logged in as a developer, you can easily activate the debug mode through the developer toolbar, and you're all set to start debugging.
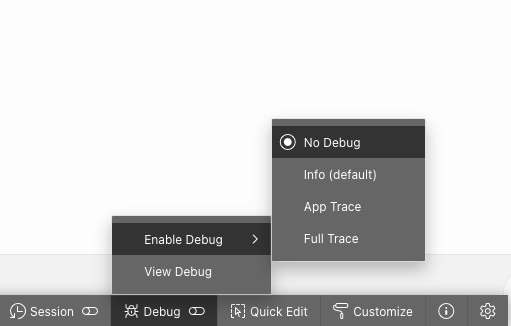
Once the desired debug level has been activated, you can inspect the debug trace by refreshing the page and selecting the "View debug" option within the same menu.
The problem with our scenario is that to switch on the debug mode from the developer toolbar we already need to be sat on a page in the application and by that point the process of authentication has already happened.
Assuming that your initial redirect to the IdP proceeds without any issues, we'll need to take a slightly different approach to debug the second part of the authentication process.
To begin, initiate the process by running the APEX application, but refrain from signing in through just yet. As an example, the screenshot below illustrates a typical Google authentication screen that appears after being redirected by the APEX application using Google as an IdP.

Here's the crucial point to understand: An APEX session has already been generated in the system for an anonymous user before being redirected to the Identity provider. What makes sense at this point is to enable the debug mode behind the scenes, ensuring that the next interaction with APEX will be subject to debugging.
To enable that, we are gonna use the Monitor Activity that is available in Application Builder. You can found it under the administration button in the top right hand corner of Application Builder.
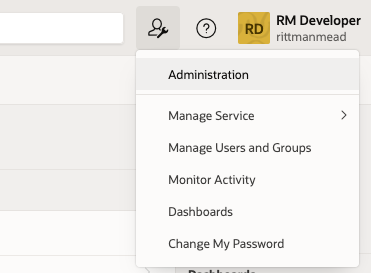
Once there, navigate to the Active Session page:

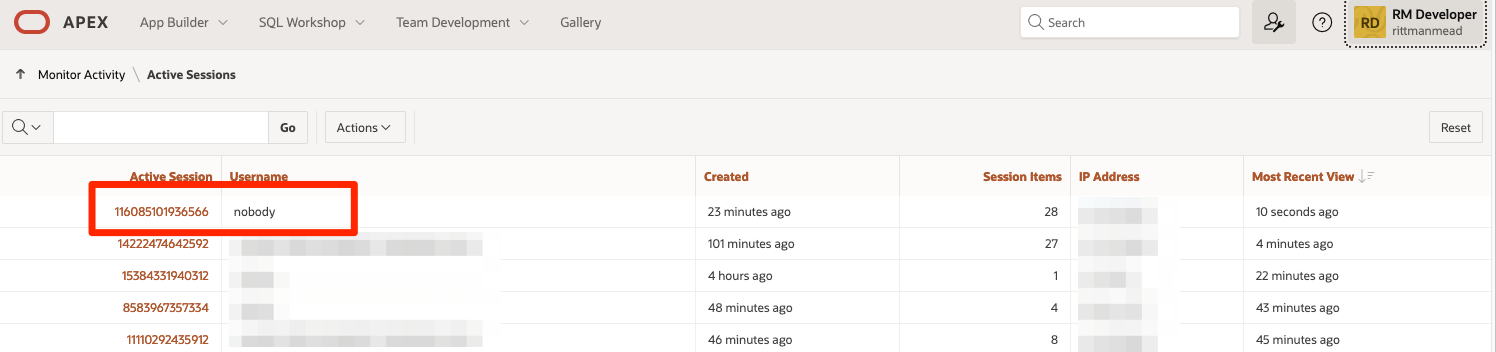
Here you need to find the latest active session with the username "nobody". This will be be the session that APEX has created and is presently using in the redirect to Google.
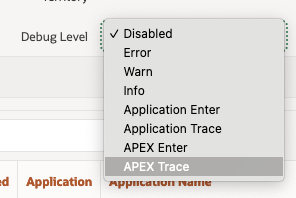
Click on that session and in the following window make sure that debug level session is set to "APEX Trace" and hit apply.
Now, return to your Google (or whichever Identity Provider you are using) confirmation window and proceed with the login. The authentication process might then grant you access to the APEX application.
Finally, go back to the APEX developer environment, refresh the session window, and you should observe something similar to the following.
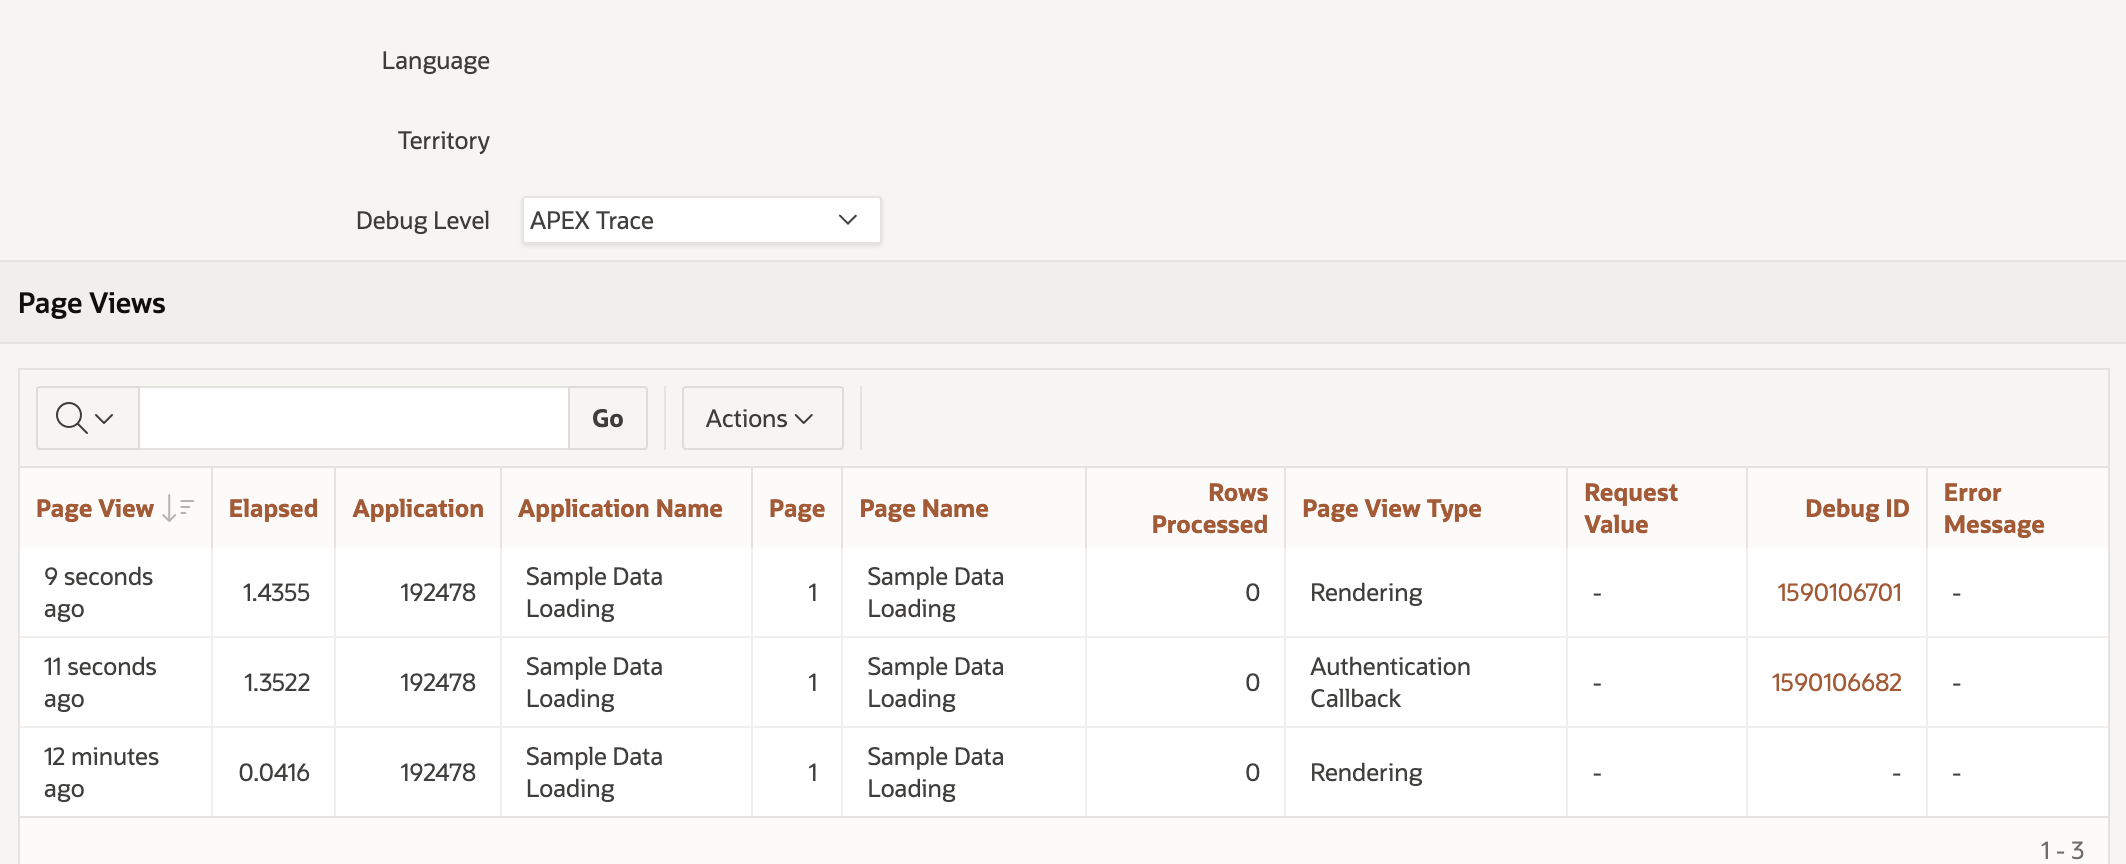
All the information you need for debugging the authentication process will be located under the debug ID labelled as the authentication callback "Page view type."
This enables you to examine every step of the process with the highest level of debugging, providing an extensive wealth of information about the inner workings of the OAuth2 process, including the detailed exchange of data and tokens.
Checking User Info
In addition to user identification, an Identity Provider can furnish valuable insights about the user accessing a system. This information can be leveraged to influence the behaviour of our application. For example, a common scenario involves requesting the user's group affiliations and utilising them for authorisation within Oracle APEX.
To find out if the needed information is returned by the User Info call, Look for a record mention the payload response following this line:

The interesting part is the final JSON payload delivered to APEX by the Identity Provider, which should resemble this:
{
  "birthdate": "",
  "email": "[email protected]",
  "email_verified": true,
  "family_name": "Collins",
  "gender": "",
  "given_name": "Simon",
  "groups": [
    {
      "id": "c449293933044ec7acb5c0f38a583",
      "name": "apx-admin",
      "$ref": "http://in-admin:9246/admin/v1/Groups/c449293933044ec7acb5c0f38a583"
    },
    {
      "id": "a153bf1433054fd2bebfeaba90c71",
      "name": "apx-modify",
      "$ref": "http://in-admin:9246/admin/v1/Groups/a153bf1433054fd2bebfeaba90c71"
    }
  ],
  "name": "Simon Collins",
  "preferred_username": "simonc",
  "sub": "simonc",
  "updated_at": 1697469379,
  "website": ""
}
We can see that IDCS has provided, along with my name, email and username, an array of groups that I am part of (in this case the names are apx-admin and apx-modify).
If any property is missing in the response, it could be due to the scope requested from the IdP not being as expected or in a wrong format.
Conclusion
Debugging a Social Login authentication method in APEX is technically straightforward, but it can become challenging due to the varying attributes and information returned by different Identity Providers.
Happy debugging!
Find out more about our APEX services